Spring MVC Architecture
Spring MVC (Model-View-Controller) is a popular framework within the Spring ecosystem used to build web applications. It follows the Model-View-Controller design pattern, which helps in separating the business logic, presentation logic, and navigation logic, thus making the code more manageable and scalable.
1. Introduction to Spring MVC Architecture#
The Spring MVC architecture is designed to streamline the development of web applications by providing a clear separation of concerns. It follows the MVC design pattern, where:
- Model represents the application data and business logic.
- View is responsible for rendering the user interface.
- Controller handles user requests and coordinates between the Model and the View.
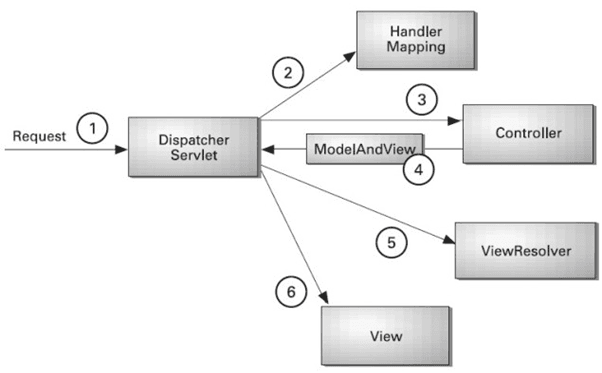
In Spring MVC, the architecture revolves around a central component called the DispatcherServlet, which acts as the front controller. It delegates requests to appropriate controllers, based on the configured HandlerMapping, and returns a ModelAndView object to be rendered by a ViewResolver.
2. Understanding the DispatcherServlet#
The DispatcherServlet is the core of Spring MVC architecture. It acts as the front controller, managing all incoming HTTP requests and routing them to appropriate handlers or controllers.
Initialization: When the Spring MVC application starts, DispatcherServlet is initialized, and it loads the application context containing all the configurations related to the web application.
Request Handling: Upon receiving a request, DispatcherServlet performs the following steps:
- Receives the Request:
DispatcherServletintercepts the incoming request. - Finds the Handler: It uses
HandlerMappingto determine the appropriate handler (controller) for the request. - Executes the Handler: Once the handler is determined,
DispatcherServletcalls the corresponding controller method. - Returns the Model and View: The controller returns a
ModelAndViewobject, which contains the model data and the view name. - Renders the View:
DispatcherServletusesViewResolverto render the view based on theModelAndViewobject.
In this example, when a request is made to /home, DispatcherServlet forwards the request to HomeController, which returns a ModelAndView object with a view name home and a model containing a message.
3. HandlerMapping: Mapping Requests to Handlers#
HandlerMapping is an interface used by DispatcherServlet to map a request to the appropriate controller. It is responsible for identifying which method of which controller should handle the incoming request.
- Types of HandlerMapping: Spring MVC provides several implementations of
HandlerMapping, such as:RequestMappingHandlerMapping: Maps requests based on the@RequestMappingannotation.BeanNameUrlHandlerMapping: Maps requests to beans with a name that matches the URL.SimpleUrlHandlerMapping: Allows mapping of URL patterns to specific controller beans.
Example:#
Consider the following HandlerMapping configuration using RequestMappingHandlerMapping:
Here, the HandlerMapping maps the /user/profile URL to the userProfile method in UserController.
4. ModelAndView: Combining Model and View#
ModelAndView is a key class in Spring MVC that holds both the model and the view. It is used by controllers to pass data to the view and to specify which view should be rendered.
- Model: The model is a map that holds the data to be displayed in the view.
- View: The view is the name of the JSP, Thymeleaf, or any other template that should be rendered.
Example:#
Let's revisit the earlier example:
In this example, the home method returns a ModelAndView object. The model contains a message, and the view is set to home. This means that when the request is processed, the home.jsp view will be rendered with the model data.
5. ViewResolver: Resolving Views#
The ViewResolver is an interface used by DispatcherServlet to map view names to actual views. It resolves the view name returned by the controller to a specific view file.
- InternalResourceViewResolver: One of the most commonly used
ViewResolverimplementations isInternalResourceViewResolver, which resolves view names to JSP files located in a specific directory.
Example:#
Here is how you can configure InternalResourceViewResolver in a Spring configuration file:
With this configuration, if a controller returns a view name home, InternalResourceViewResolver will resolve it to /WEB-INF/views/home.jsp.
Lets us build project from scratch to understand Spring MVC#
We will start by setting up a simple Spring MVC project using Maven, a popular build automation tool.
1.1 Creating the Maven Project#
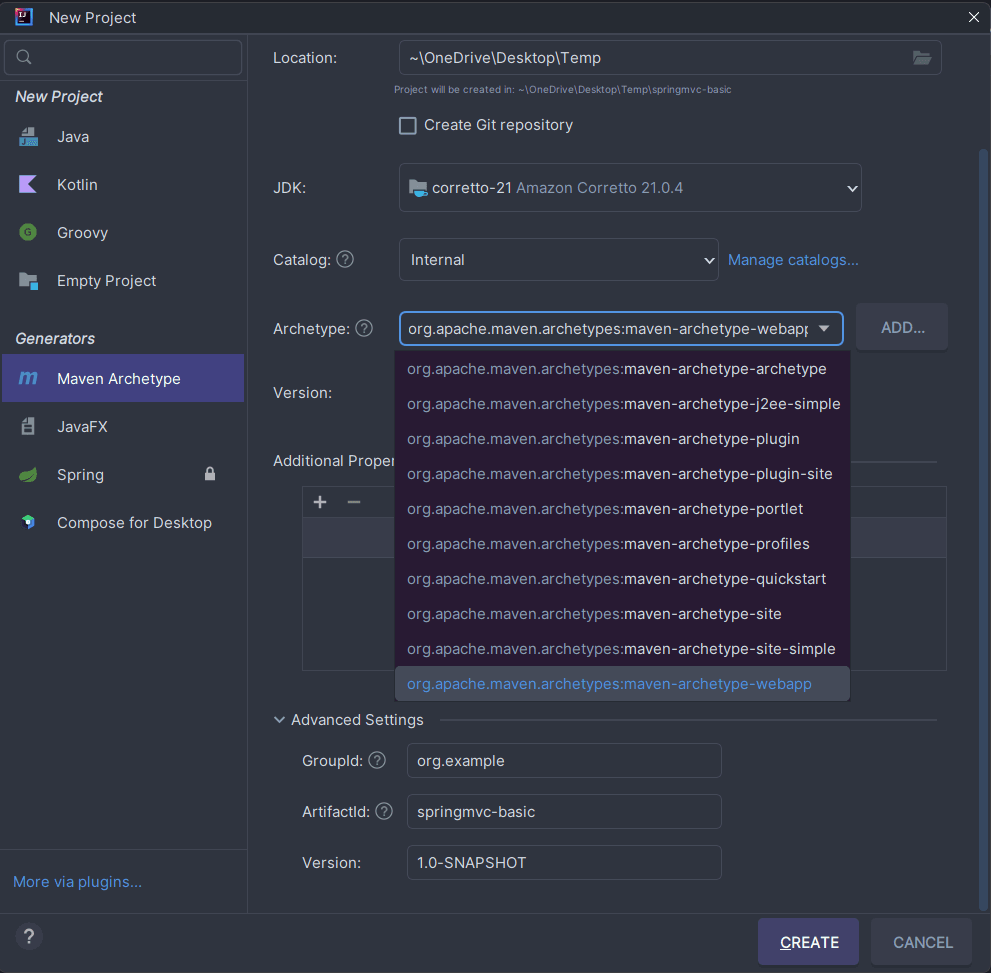
Create a New Maven Project: Open your IDE (such as IntelliJ IDEA, Eclipse, or STS) and create a new Maven project. If you are using IntelliJ IDEA:
- Go to File > New > Project.
- Select Maven Archetype and archetype as webapp
- Select Maven and click Next.
- Enter the GroupId (e.g., com.example) and ArtifactId (e.g., springmvc-basic).
- Click Finish.
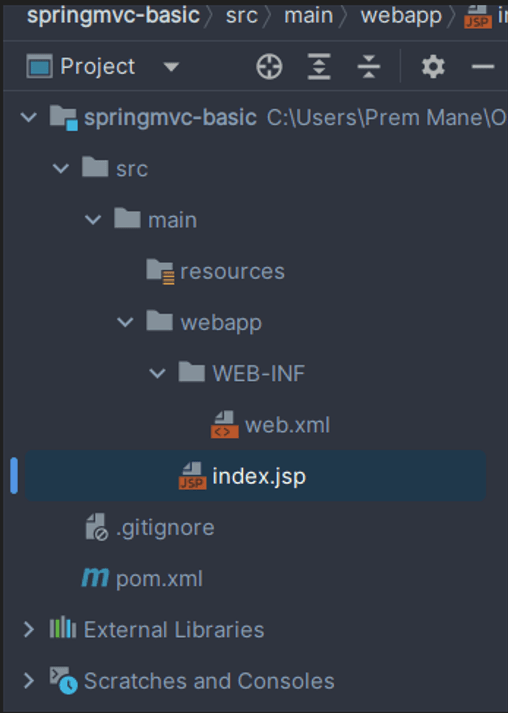
Directory Structure: Once the project is created, your directory structure will look like this:
- Make sure you have installed Tomcat server
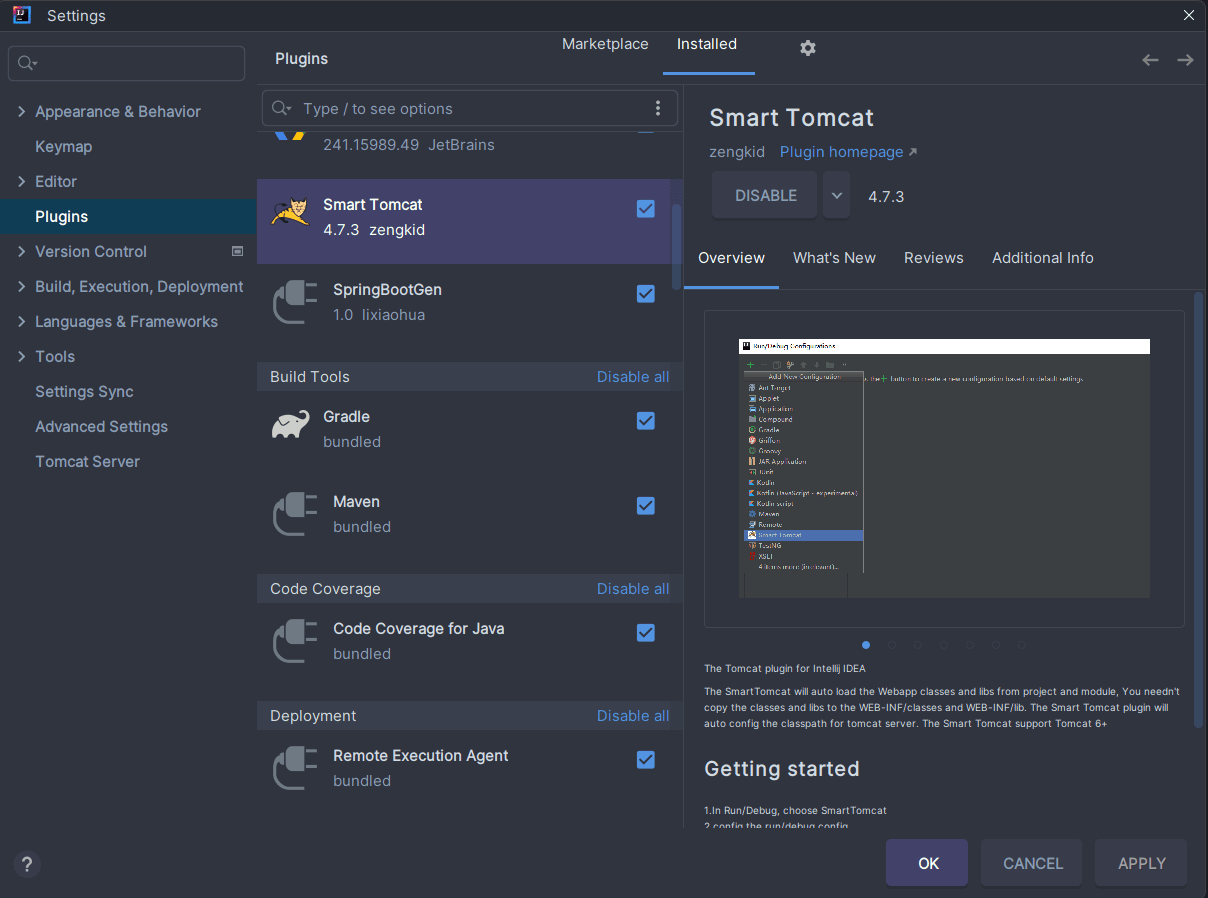
- on system and plugin in Intellij , required to run application.
1.2 Adding Dependencies#
In your pom.xml, add the following dependencies to include Spring MVC and Servlet API:
This configuration will download the required Spring MVC libraries and the Servlet API needed to run the application.
2. Configuring the Project#
Next, we need to configure the essential files that Spring MVC requires to function correctly.
2.1 Configuring web.xml#
The web.xml file, also known as the deployment descriptor, is located in the WEB-INF directory and is crucial for configuring the DispatcherServlet.
Here’s what this configuration does:
- DispatcherServlet: The DispatcherServlet is configured with the name dispatcher. It will look for a configuration file named dispatcher-servlet.xml under
WEB-INF. - Servlet Mapping: The
url-patternof/ensures that all requests go through theDispatcherServlet.
2.2 Creating dispatcher-servlet.xml#
Next, we need to create the dispatcher-servlet.xml file, where we will define the configuration for Spring MVC.
Create the dispatcher-servlet.xml file in the WEB-INF directory and add the following content:
Explanation:
- Annotation-Driven Controllers: The
<mvc:annotation-driven/>tag enables the use of annotations like@Controllerand@RequestMappingin your project. - Component Scanning: The
<context:component-scan>tag tells Spring where to look for annotated components, in this case, in thecom.example.controllerpackage. - View Resolver: The
InternalResourceViewResolverbean resolves logical view names to actual JSP files located under/WEB-INF/views/with a.jspsuffix.
3. Writing Your First Controller#
With the configuration in place, it’s time to write your first Spring MVC controller.
3.1 Creating a Controller#
Create a new package controller under java source file under main folder and add a class HomeController:
Explanation:
- @Controller: This annotation marks the class as a controller component.
- @RequestMapping: Maps the
/homeURL to thehome()method. - ModelAndView: This method returns a
ModelAndViewobject, which contains the view name (home.jsp) and the model data (a welcome message).
4. Creating the View#
Now, we’ll create the JSP view that the controller references.
4.1 Creating home.jsp#
In the WEB-INF/views/ directory, create a new file called home.jsp and add the following content:
Explanation:
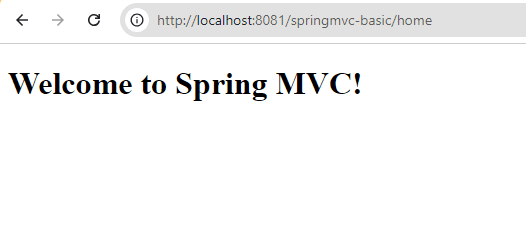
- The ${message} expression will display the message model attribute passed from the controller.
Output :
In this article, we covered the core concepts of Spring MVC architecture, including the role of the DispatcherServlet, HandlerMapping, ModelAndView, and ViewResolver. We also walked through setting up a basic Spring MVC project from scratch, configuring necessary files like web.xml and dispatcher-servlet.xml, and writing a simple controller to handle user requests. These foundational elements provide a solid starting point for building scalable and maintainable web applications using Spring MVC.