Setup a Spring boot application with MVC and JPA
Introduction#
A Spring Boot application integrates several Spring projects, simplifying the development of Java applications. Here's a brief introduction to its main components:
- Spring Boot Web MVC:
- Spring Boot Web MVC simplifies web development by providing an out-of-the-box setup for creating web applications. It follows the Model-View-Controller (MVC) pattern to separate concerns:
- Model handles data (e.g., entities or domain objects).
- View manages the UI (e.g., Thymeleaf, JSP).
- Controller processes requests and returns views or data.
- Spring Boot automatically configures essential components like embedded web servers (e.g., Tomcat) and provides easy handling of RESTful endpoints.
- Spring Boot Web MVC simplifies web development by providing an out-of-the-box setup for creating web applications. It follows the Model-View-Controller (MVC) pattern to separate concerns:
- Spring Boot Data JPA:
- Spring Boot Data JPA simplifies data access and interaction with relational databases by integrating JPA (Java Persistence API). It provides easy CRUD operations, pagination, and query methods.
- JpaRepository offers built-in methods for interacting with the database, while custom query methods can be created with query derivation or JPQL.
Build A Spring Boot Application#
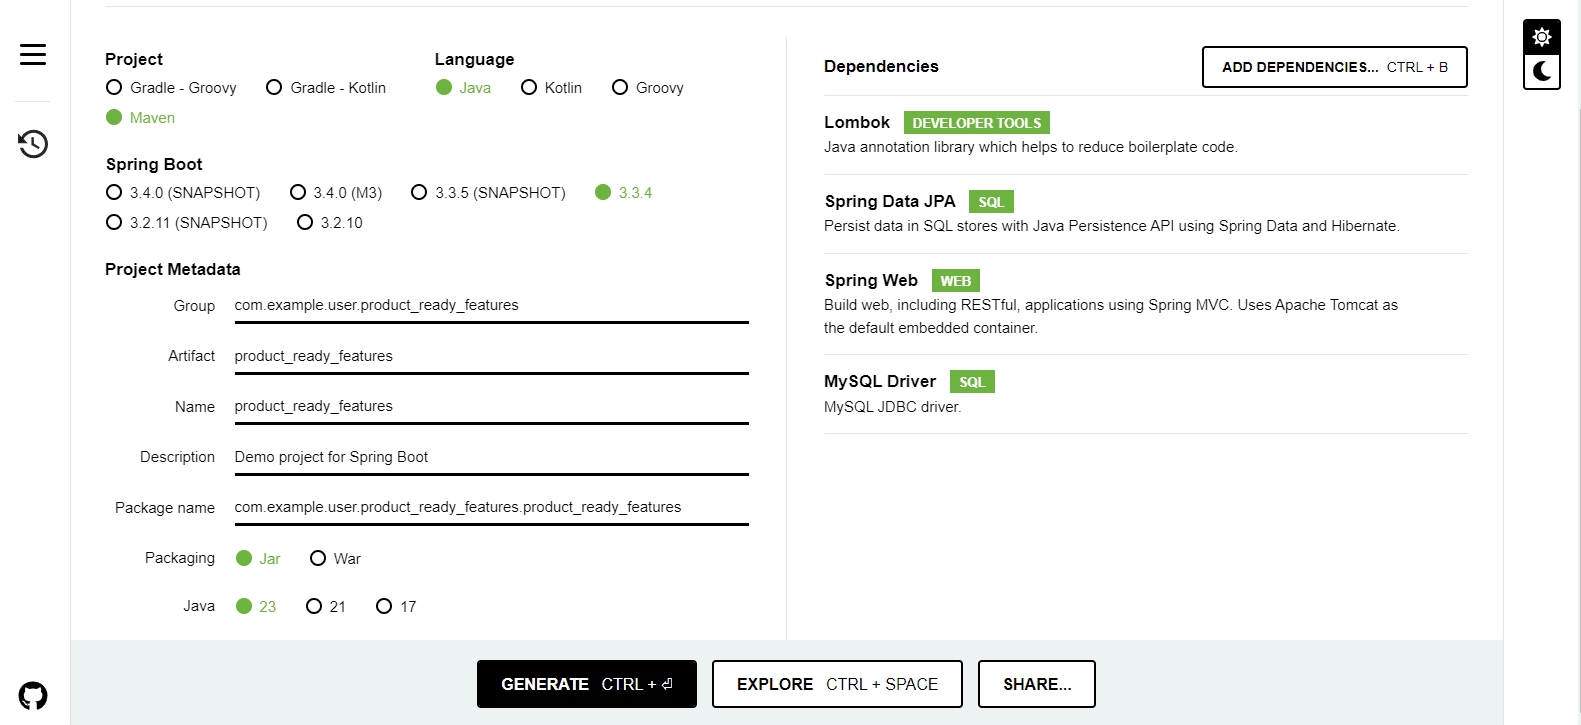
- Go to https://start.spring.io/, configure the necessary project settings as shown in the image, add the required dependencies, and generate the application as a ZIP file.
- After that, go to File Explorer > Downloads, and extract the ZIP file.
- After that, open the project in your preferred IDE. Here, we are using IntelliJ IDEA.
- After opening the project, the first thing we need to do is reload Maven.

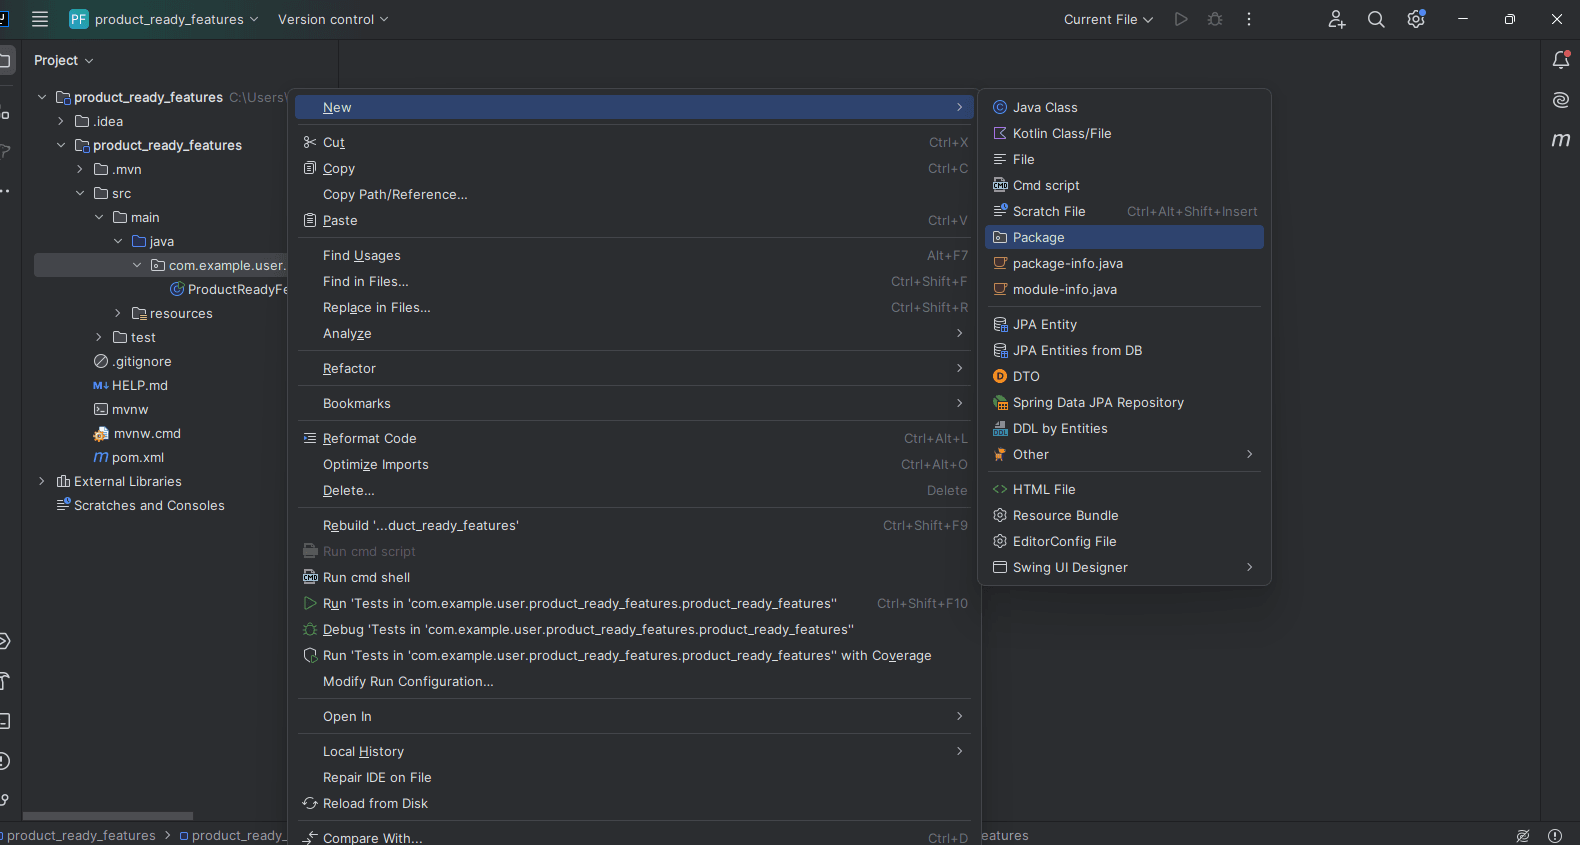
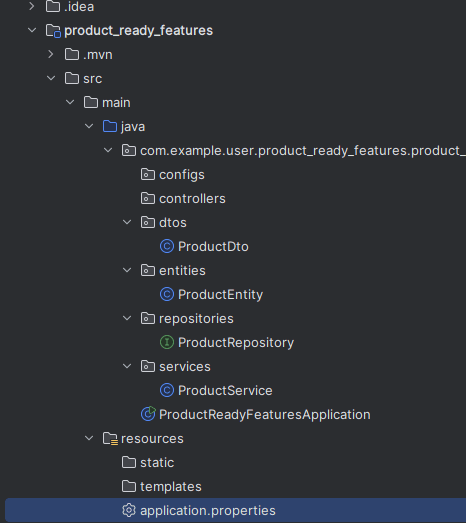
- Now, let's add some packages. To do this, navigate to src > main > java > <group package> . After that, right-click on <group package>, select New > Package or Java Class, and create the necessary packages and classes.
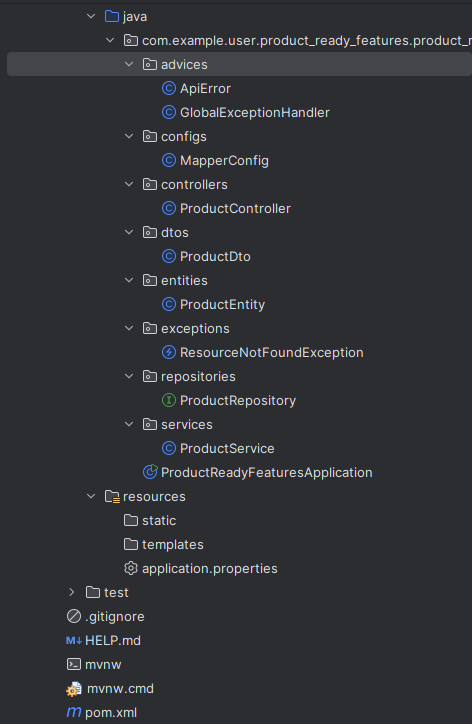
- In the same way, you can create different classes, interfaces, enums, and packages within your specific package.
Dto Class
Here, we are using @AllArgsConstructor and @NoArgsConstructor. These constructors are required by Jackson to convert JSON into DTO classes.
Entity Class
Here, we are using @AllArgsConstructor and @NoArgsConstructor because Hibernate requires these constructors to create entities and map database tables to entity objects.
Repository Interface
This repository interface extends JpaRepository<ProductEntity, Long>, where ProductEntity is the entity type and Long is the type of the entity's ID.
Controller Class
Service Class
Here, we need to create the necessary constructor, or we can use @RequiredArgsConstructor from Lombok, which automatically generates the required constructors for us.
Here, we use the DTO class for business logic, and we need to convert it to an Entity class. To do this, you should add the ModelMapper dependency and configure it as a bean.
Here, we need to handle all exceptions by creating custom exception classes.
Add dependency
Go to https://mvnrepository.com/artifact/org.modelmapper/modelmapper and copy the dependency for the latest version.
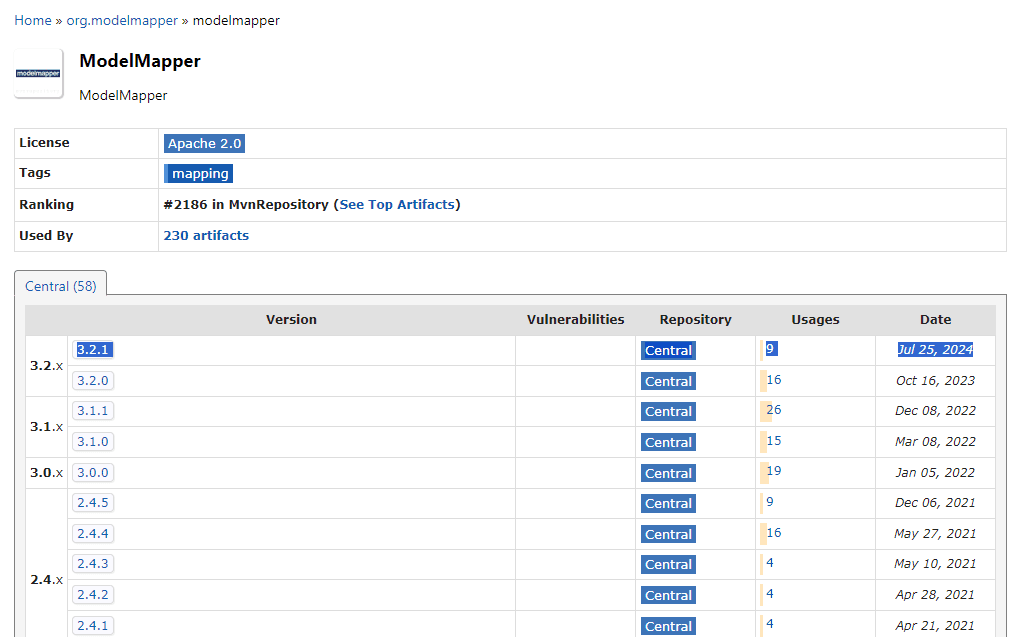
Add it in dependencies section of your Pom.xml file and after adding it, reload your maven.
Configuration Class
Custom Exception Class
Dependencies and Plugins
Database Setup#
To store our data, we need to connect to a real database (e.g., MySQL, PostgreSQL). We can familiarize ourselves with industry-standard practices using applications like DBeaver. While there are several other applications available for connecting to multiple databases and running queries, DBeaver is popular among developers due to its versatility. Let’s explore how to use it after installing the software.
Installing MySql
Visit Setting up MySQL db with Spring Data JPA page and for further guides you can check https://www.dataquest.io/blog/install-mysql-windows/
Installing DBeaver
- Visit https://dbeaver.io/download/ download page and download the latest version for your preferred operating system. You can check this documentation for further guides https://dbeaver.com/docs/dbeaver/ .
How to Connect to a Database in DBeaver:#
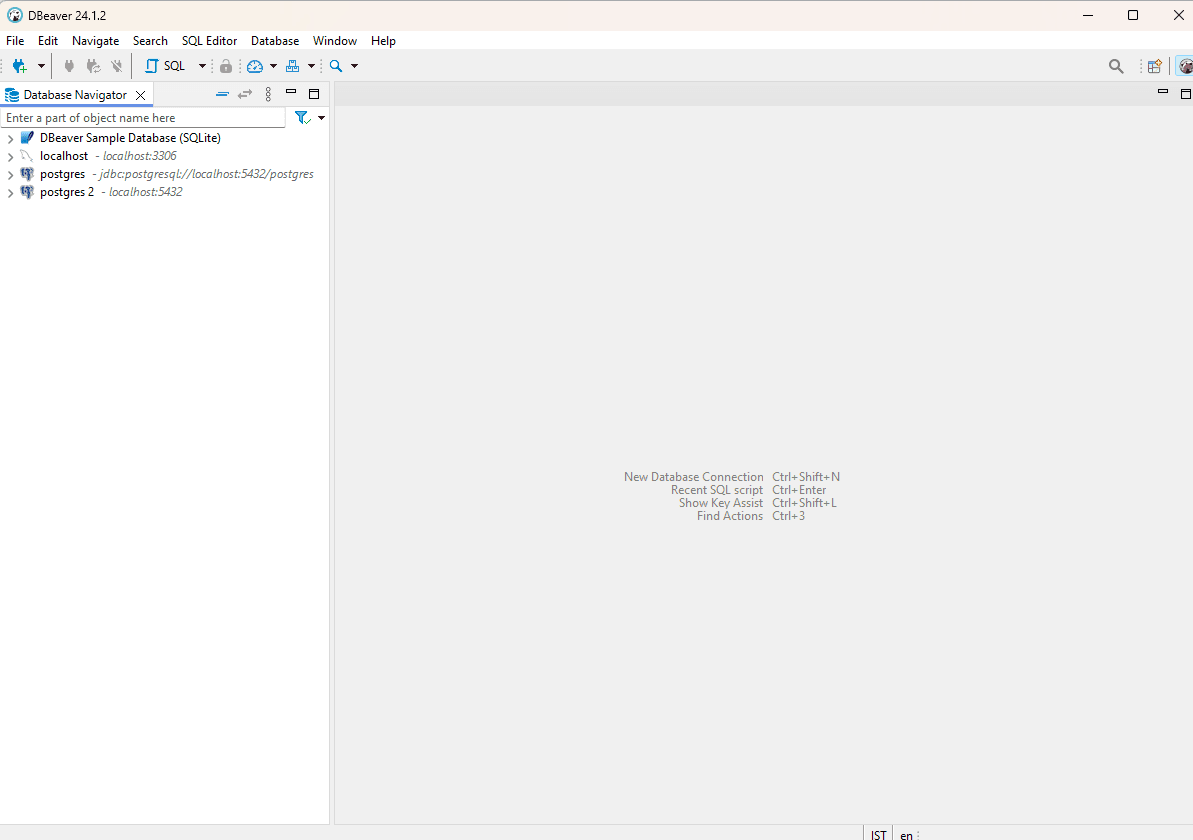
- Open DBeaver application
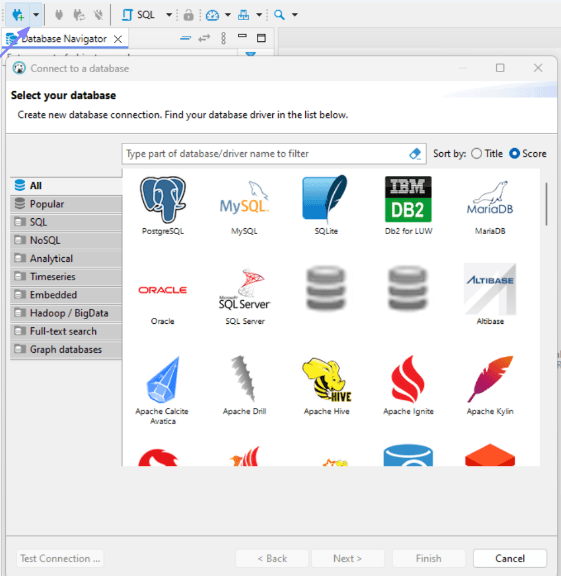
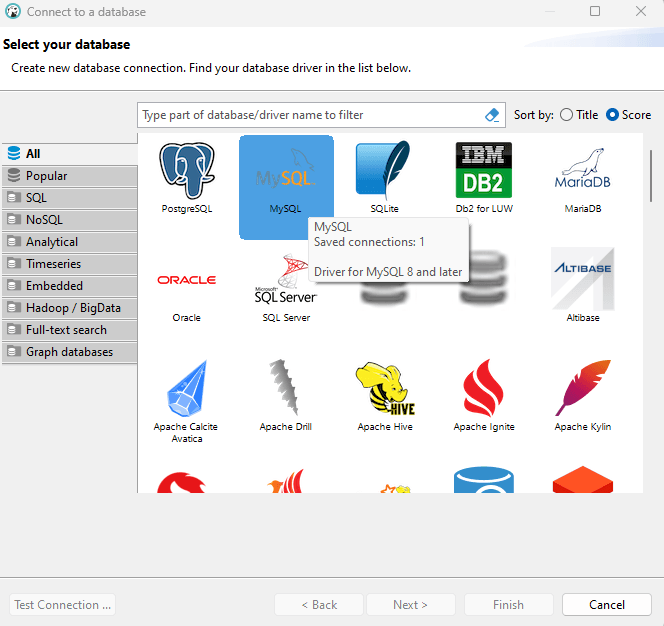
- Go to New Database Connection and select the database you want to connect to
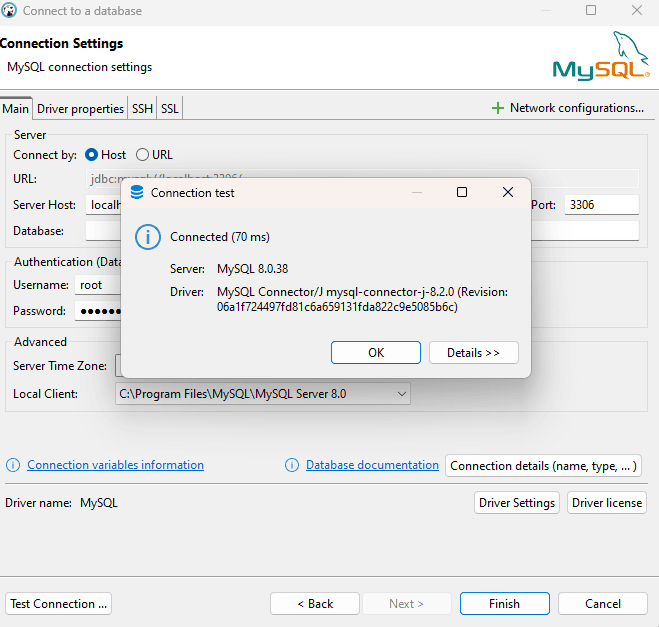
- Here, we have created a new database connection (MySQL) and clicked the Next button.
- Here, you enter the password.
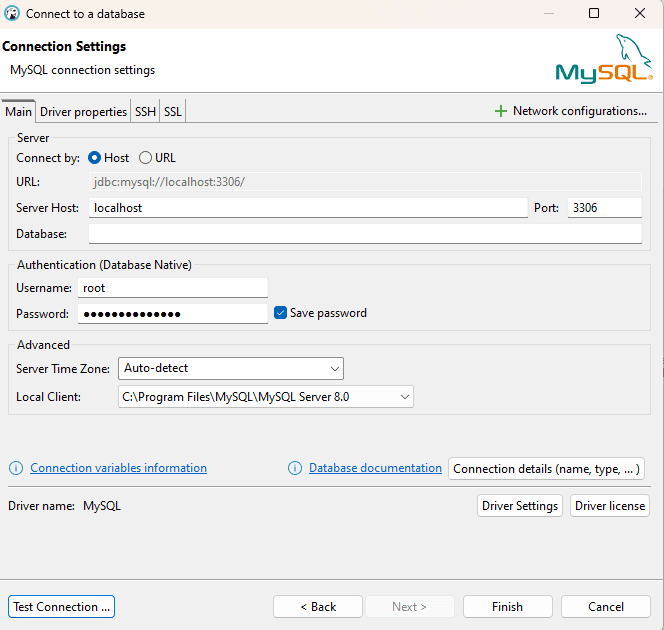
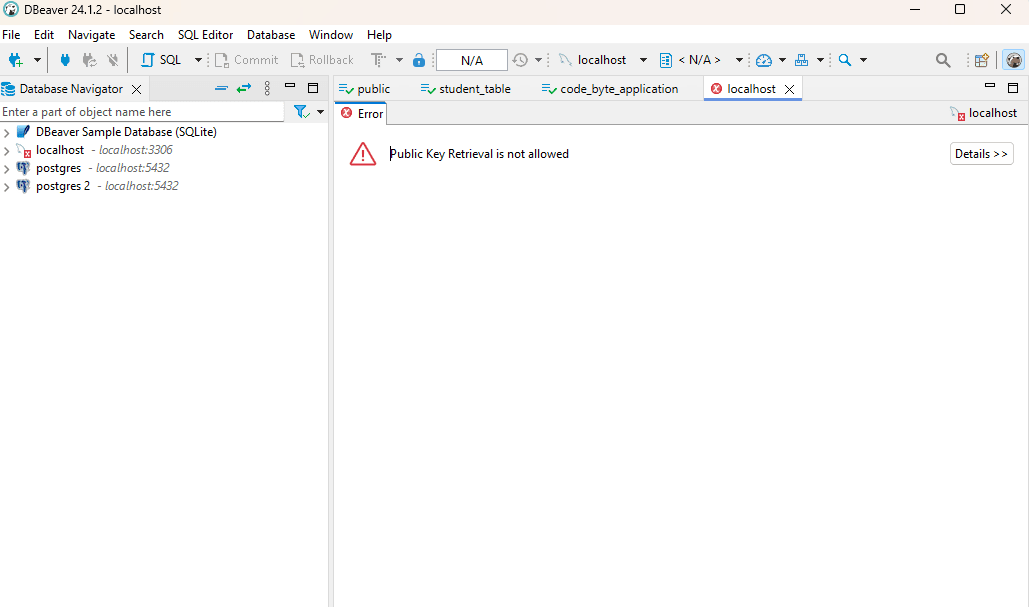
- Click ‘Test Connection’. After testing, you will see a pop-up like the image. Press ‘OK.’
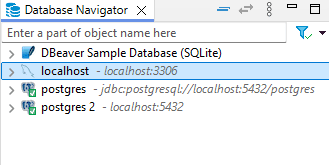
- After that, check ‘Database Navigator’; you should see the localhost:3306 (MySQL) connection.
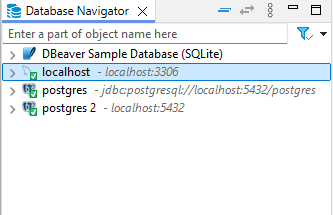
- You need to check every time whether the connection is established. Essentially, ‘the green tick’ indicates that you are connected.
- If you see nothing, that means you are disconnected, and you will need to reconnect. To do this, right-click on it, and you will see the ‘Connect’ option.
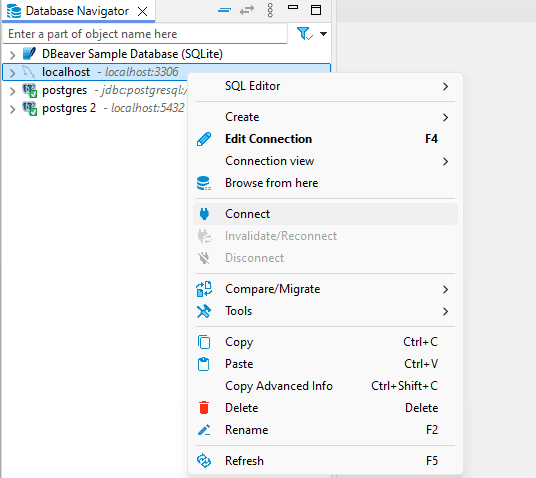
- If you see a ‘red cross,’ that means you need to log in to MySQL again using the MySQL command line. After that, you can reconnect.
How to Create a Database in DBeaver:#
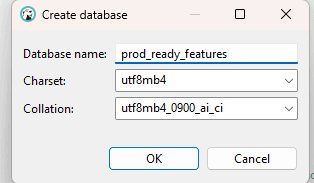
- After connecting to MySQL, you can go to localhost:3306 > Databases. Right-click on Databases to create new databases.
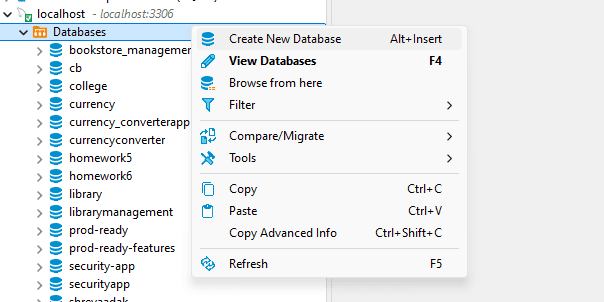
- Go to ‘Create New Database,’ and enter the name of the database you want to create, then press ‘OK.’
Application Configure Database Connection#
This configuration is crucial for connecting a Spring application to a MySQL database, defining how Hibernate interacts with that database, and providing useful logging for development. Adjustments should be made for production environments, especially concerning security and schema management. If you have specific areas you want to delve deeper into, let me know!
Go to resources > application.properties or resources > application.yml
Application Properties
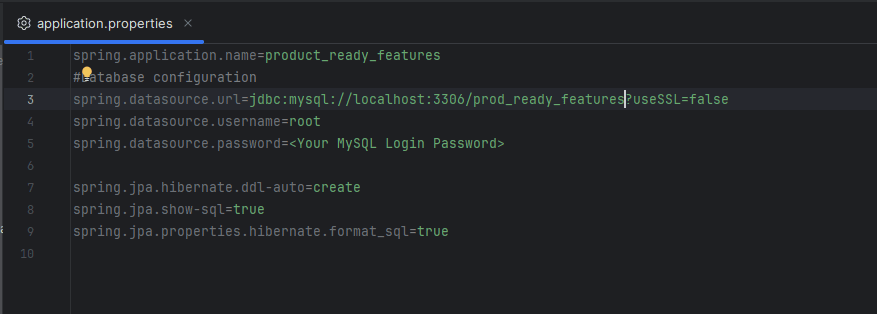
spring.application.name=product_ready_features
Purpose: Sets the name of the Spring application. This name can be useful for logging, monitoring, and managing different services in a microservices architecture.
Database Configuration
- spring.datasource.url
spring.datasource.url=jdbc:mysql://localhost:3306/<Your Database Name>?useSSL=false
Purpose: Specifies the URL for the database connection. In this case:
jdbc:mysql://indicates that the application will use the MySQL JDBC driver.localhost:3306refers to the database server running on the local machine at port 3306 (the default port for MySQL)./<Your Database Name>is the name of the database to connect to.?useSSL=falsedisables SSL for the connection, which can be useful in a development environment where SSL is not set up.
- spring.datasource.username
spring.datasource.username=root
Purpose: Specifies the username to connect to the database. In this case, it is set to root, which is the default administrative user for MySQL.
- spring.datasource.password
spring.datasource.password=<your mysql login password>
Purpose: Sets the password for the specified username to connect to the database. Ensure that sensitive information like passwords is handled securely (e.g., using environment variables or a secrets management tool).
- JPA Configuration
- spring.jpa.hibernate.ddl-auto
spring.jpa.hibernate.ddl-auto=create
Purpose
: Configures the behavior of the Hibernate framework regarding the database schema:
create: Drops the existing schema and creates a new one on application startup. This is useful during development but should be changed toupdateornonein production to avoid data loss.
spring.jpa.show-sql
spring.jpa.show-sql=true
Purpose: Enables the logging of SQL statements generated by Hibernate. This is useful for debugging and understanding what queries are being executed against the database.
spring.jpa.properties.hibernate.format_sql
spring.jpa.properties.hibernate.format_sql=true
Purpose: Formats the SQL output for better readability in the logs. When set to true, it indents the SQL statements, making it easier to read in the log files.
Run Application#
Go to main application file and go to run button to run it.
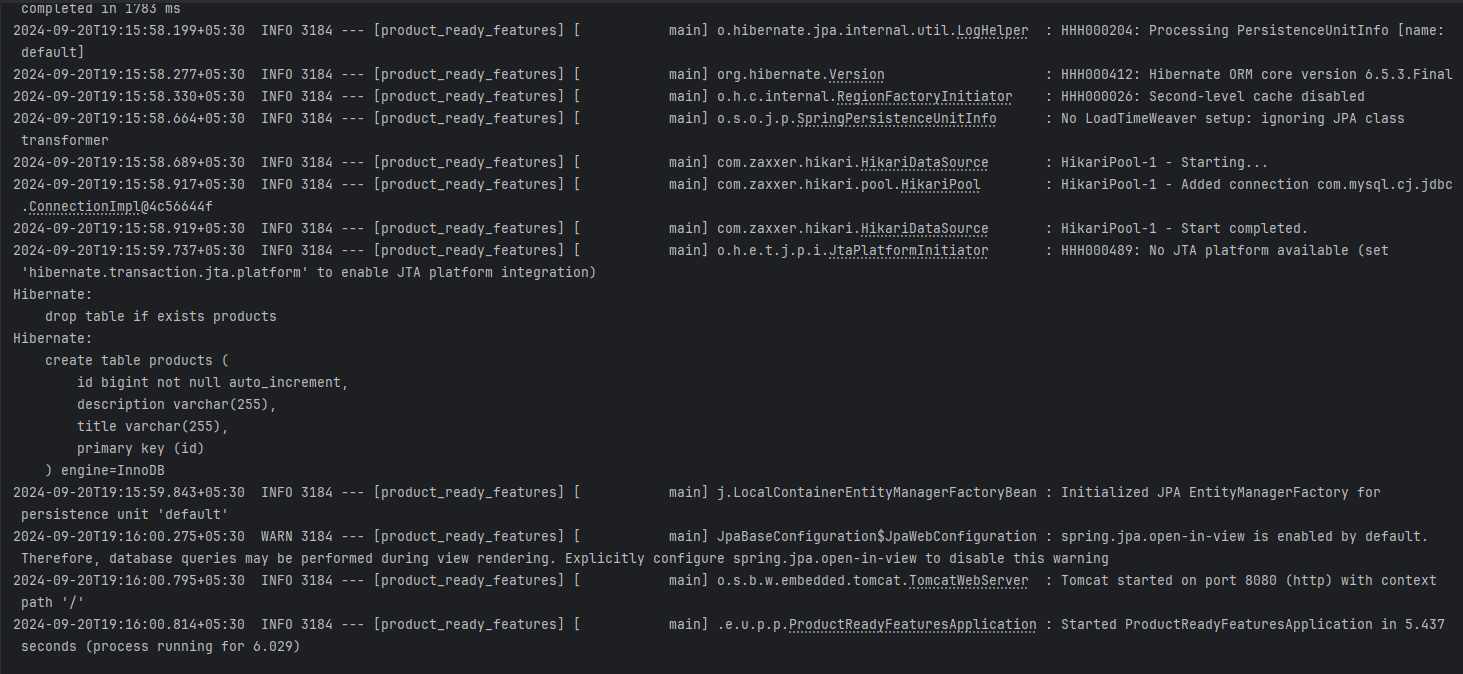
Output#
- Output of IDE Console:
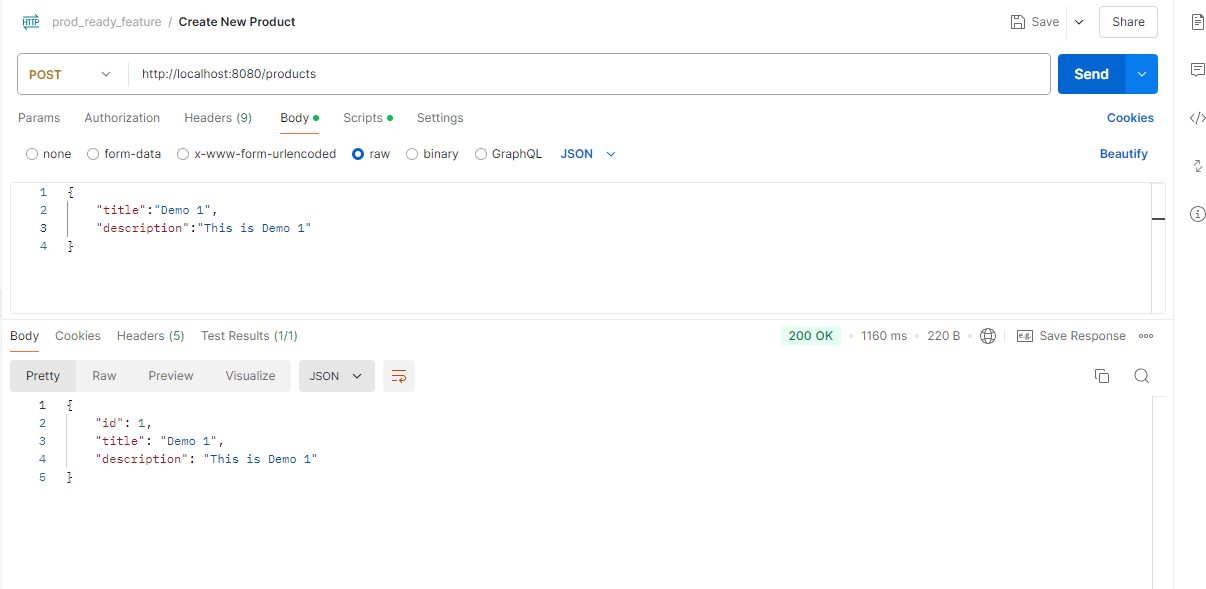
- Output of Postman Console:
- For creating a new product, getting all products, getting product by product id, we are basically sending the request through Postman.
- Create New Product
- For creating a new product, getting all products, getting product by product id, we are basically sending the request through Postman.
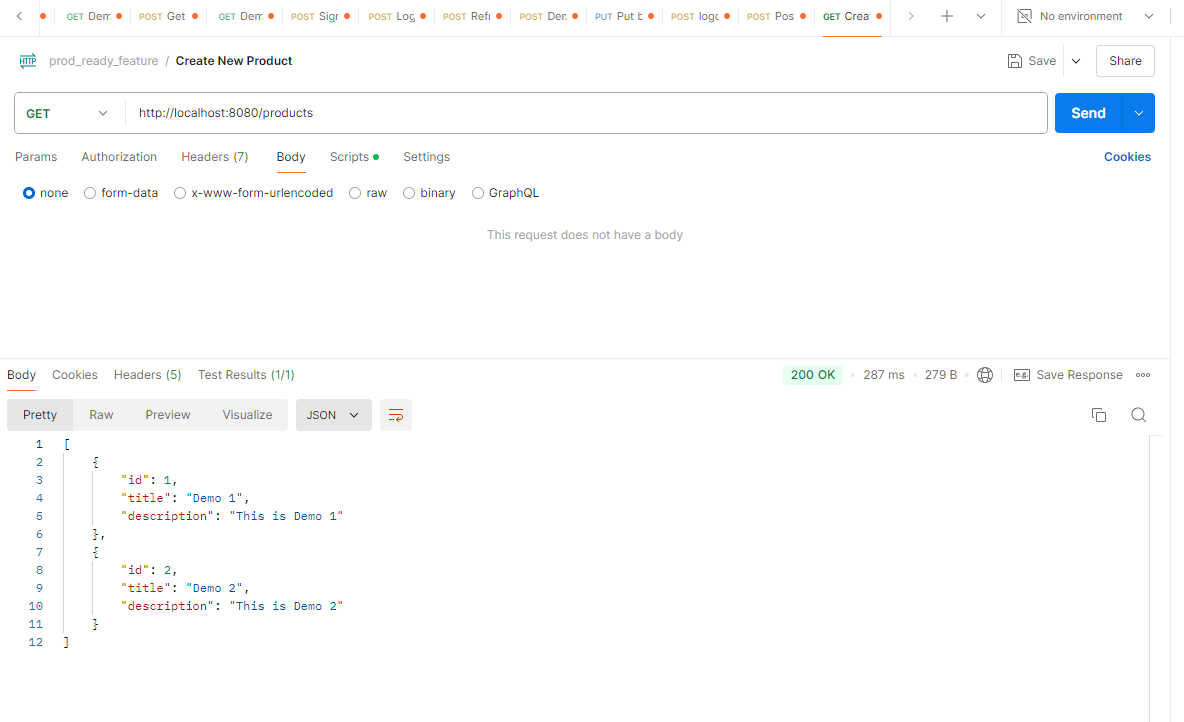
- Get All Products
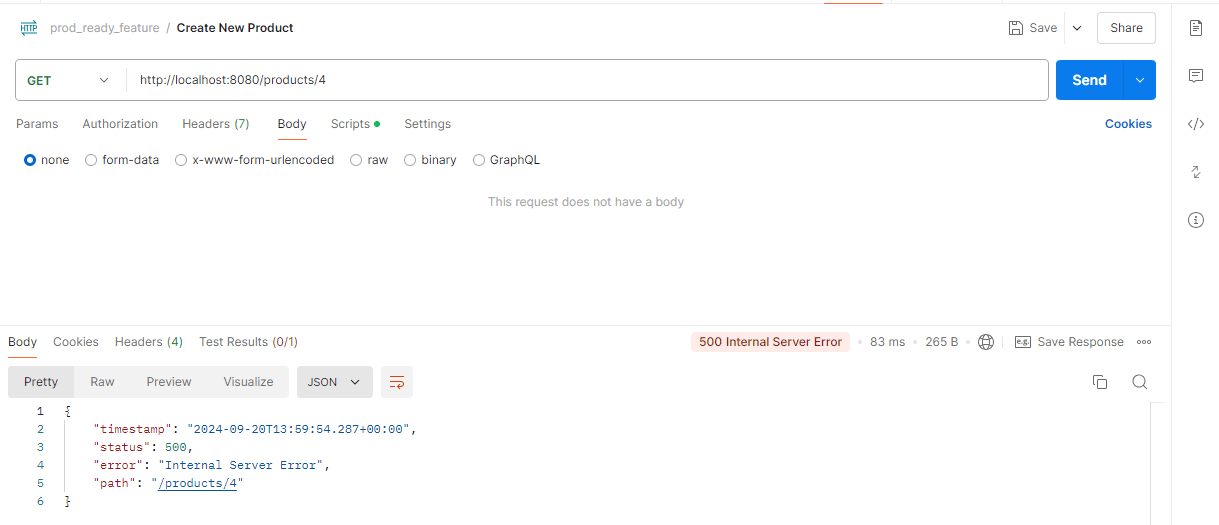
- Get Product By Id
- If the ID is present, the product is displayed.

- If the ID is not present, an internal server error is returned.
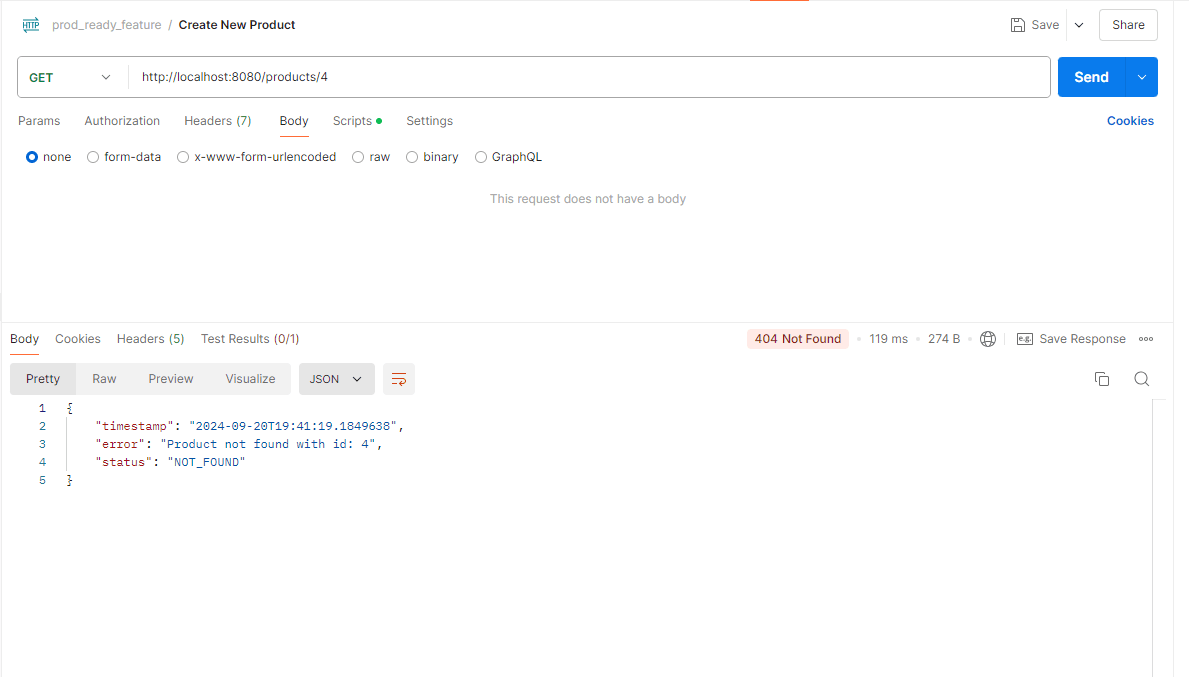
- To handle this server-related exception, we need to create a custom exception handler class (GlobalExceptionHandler).
- ApiError Class
- GlobalExceptionHandler
- In this class, we will specifically handle the 404 Not Found error.
- After running the application, if you send an invalid request, it will display a 404 Not Found error.
- Output of Database:
- After running applications
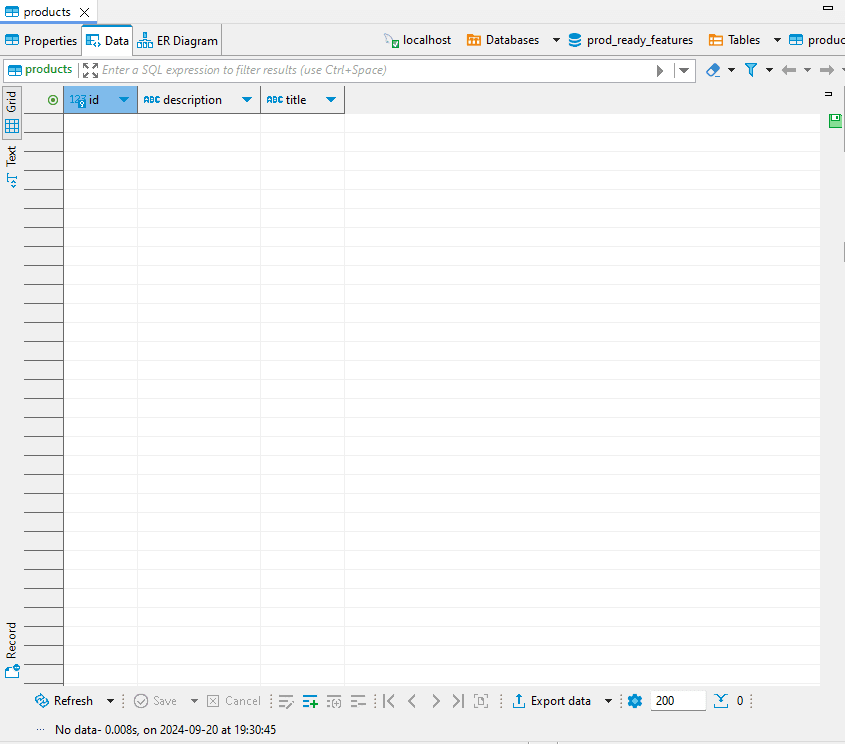
After creating new product. Let’s see our database.

Conclusion#
This article explains how to build a Spring Boot application with MVC and JPA, covering entities, services, controllers, and exception handling. It also highlights using ModelMapper for DTO conversions and best practices for maintainability. Spring Boot's simplicity and scalability make it ideal for modern Java development.