Setup CI/CD with AWS Code Pipeline
What is CI/CD?#
- Continuous Integration (CI): CI is the practice of automatically integrating code changes from multiple contributors into a shared repository, running tests, and validating that the new code works well with the existing codebase.
- Continuous Deployment (CD): CD automates the release of validated code into production, ensuring that new features and fixes are deployed efficiently.
Why AWS CodePipeline and CodeBuild for CI/CD?#
- AWS CodePipeline: A fully managed continuous delivery service that helps you automate your release pipelines for fast and reliable application updates.
- AWS CodeBuild: A fully managed build service that compiles source code, runs tests, and produces software packages.
- Integration with GitHub: CodePipeline and CodeBuild can seamlessly integrate with GitHub, allowing automatic triggers (hooks) for new code changes pushed to the repository.
Let us see steps to build CI/CD for our spring boot library management application.#
Note :- Before starting with building CI/CD for our spring boot project make sure you have crated elastic bean stalk environment for your spring boot application and your spring boot project repository is published on github.
We will be first creating pipeline, so open AWS and login with your account, search and Open Code Pipeline service.#
After that click on create pipeline button.

After that you have to complete the 6 steps to build the pipeline. So lets discuss all these 6 steps.
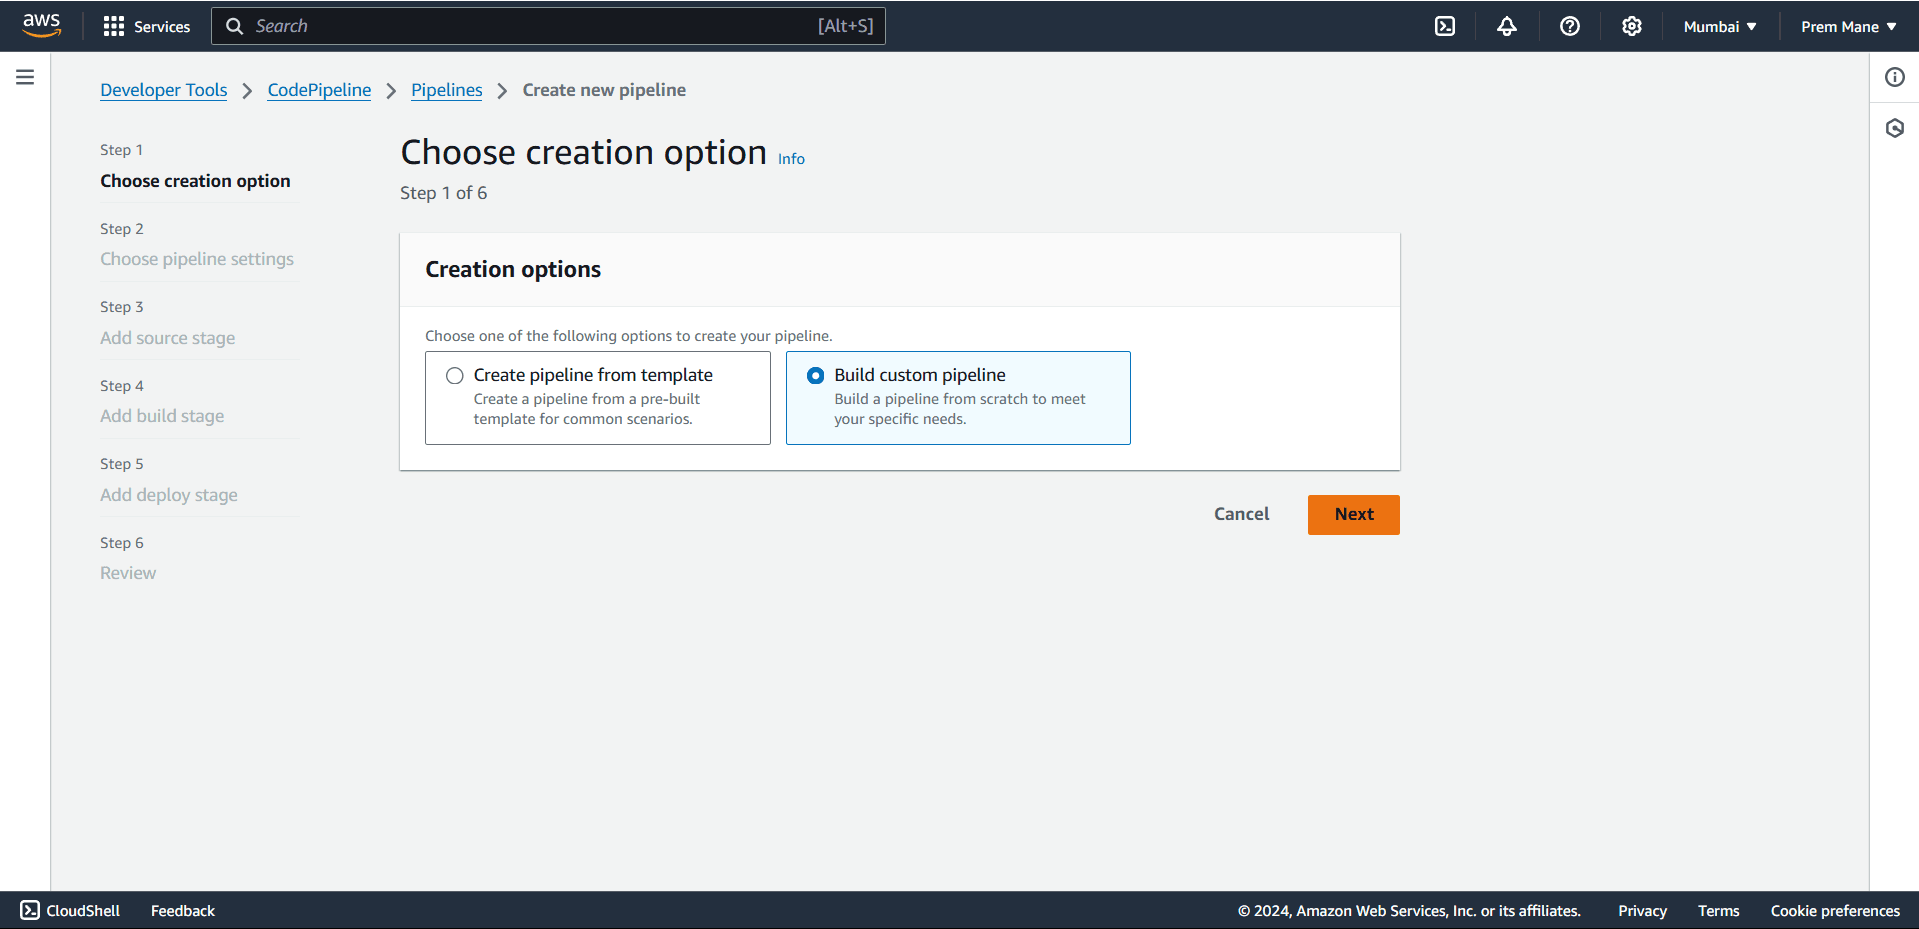
Step 1 : Choose creation option.#
Select build custom pipeline option and click on next button.
Step 2 : Choose pipeline settings.#
Give pipeline name that you want.
Choose Queued in execution mode.
In service role select new service role, this will create new service role for your pipeline and also give name to service role.
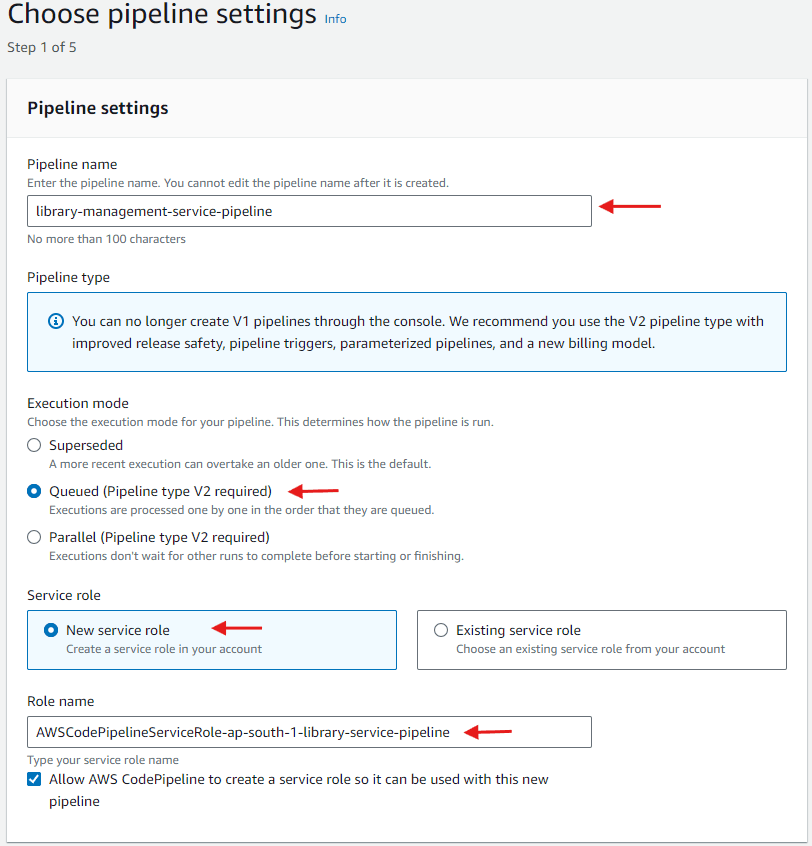
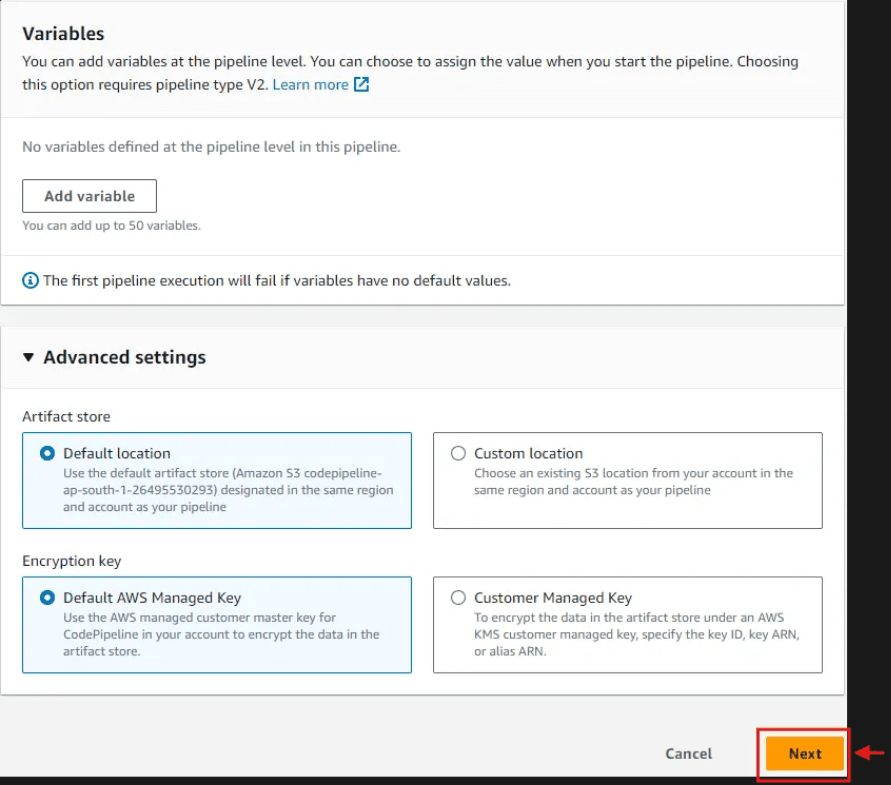
After that scroll down and keep all othe settings as default and click on next button.
Step 3 : Add source stage#
In the next step select GitHub (Version 1) in source provider.
After selecting you will see connect button click on it and you will be connected to your github account.
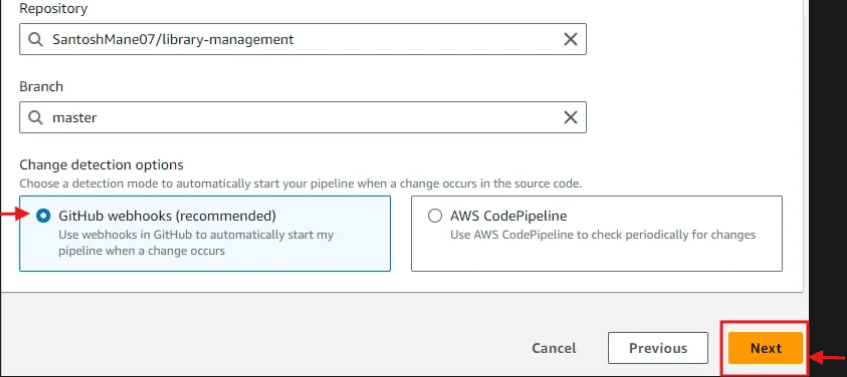
Next select the repository of your spring boot project for which you are building CI/CD pipeline and also select the branch on which commits will trigger the automatic CI/CD, we have selected master branch you can select other branch as per requirement like prod or dev branch.
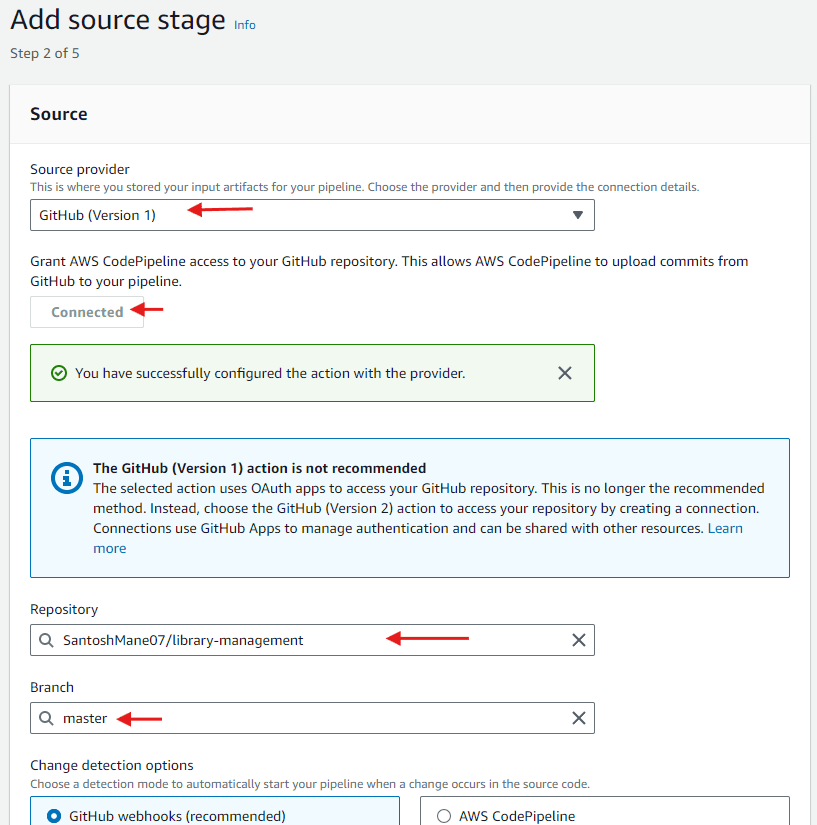
Next select github webhooks in change detection options so that your pipeline will automatically start when there is change in github repository on master branch of specified repository.
And click Next button.
Step 4 : Add build stage#
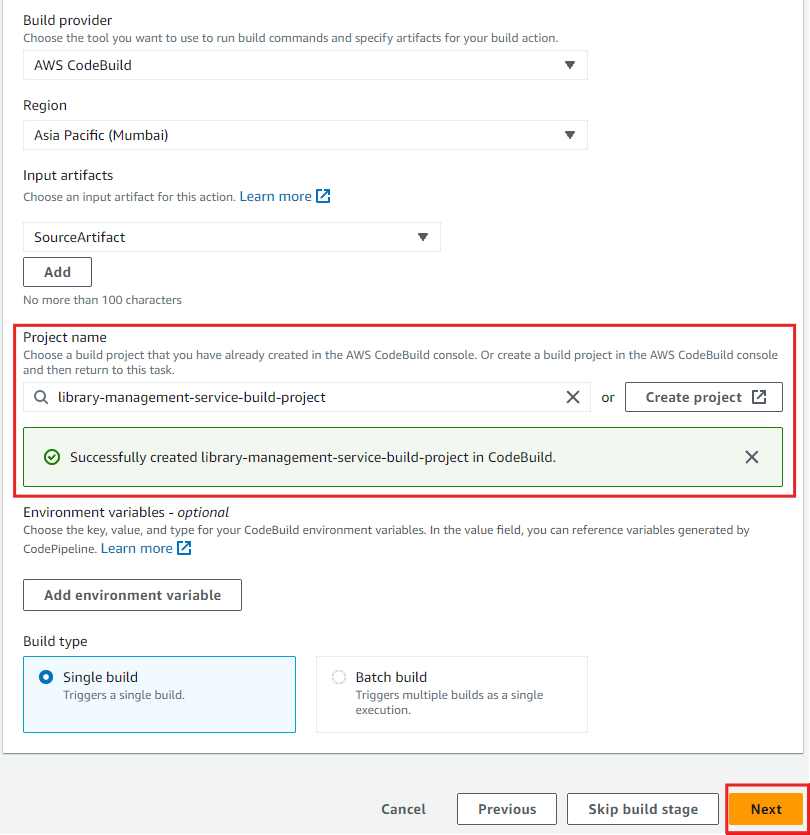
In the next step we have to select the build provider, we have two options in dropdown Jenkins and AWS CodeBuild, we will select AWS CodeBuild.
Next we will select Asisa Pacific (Mumbai) Region, you can select the region which is nearest to your city.
Next in Input Artifacts we will select sourceArtifact so that whatever comes from sournce (i.e github) will be given input.
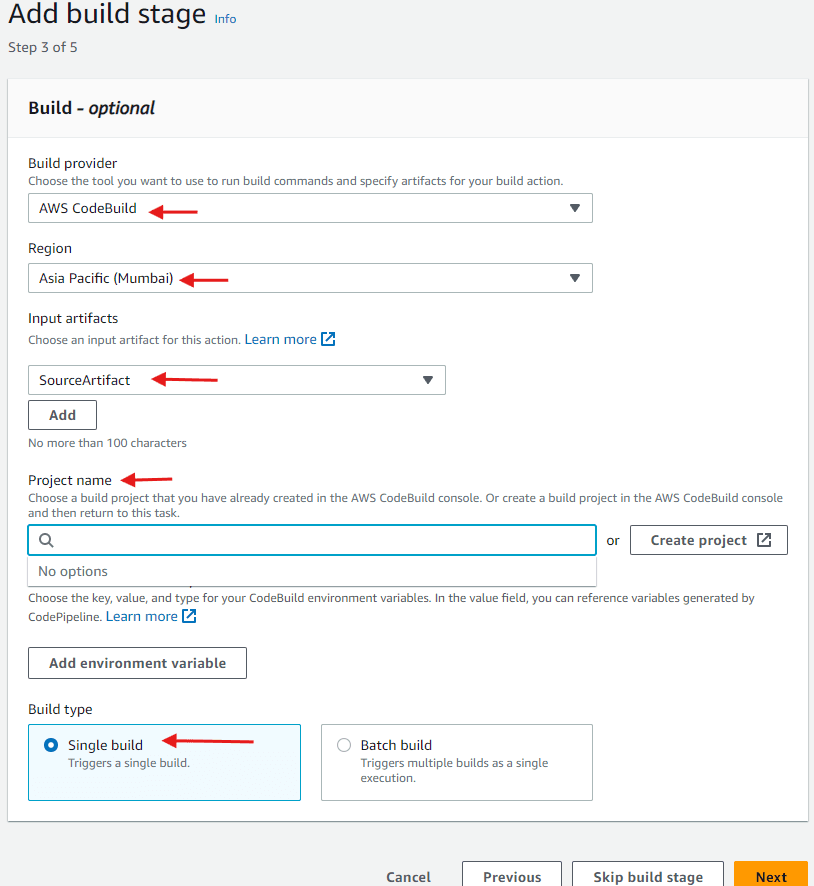
Next you can see the Project name option this requires a build project which we don’t have, so as we don’t have any build project we will create a bild project by simply clicking on Create project button.
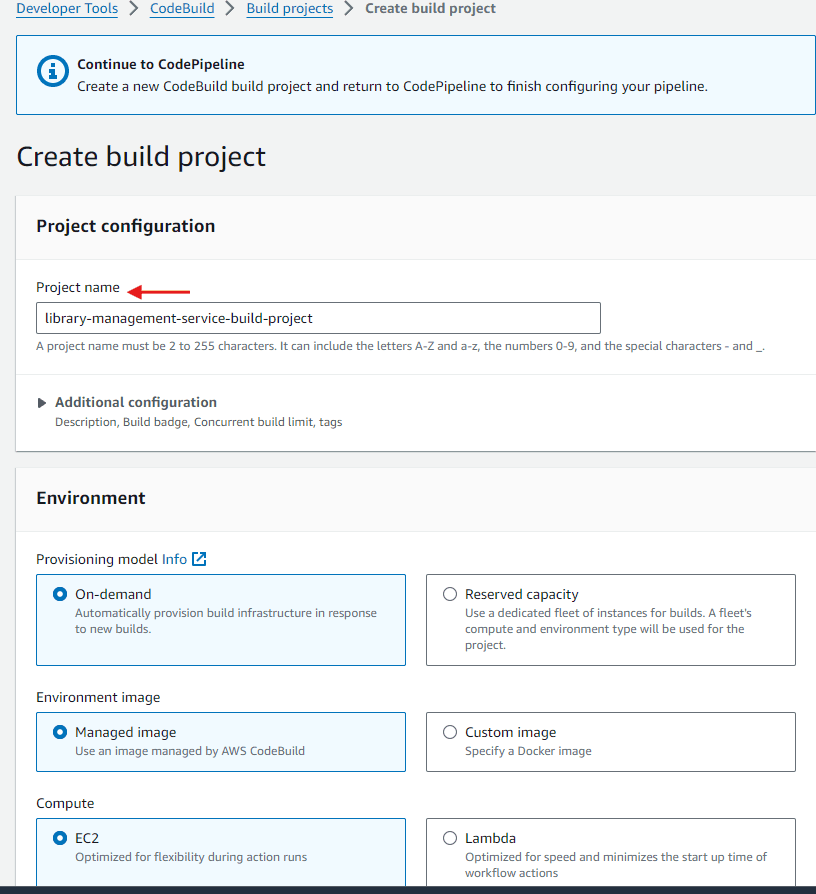
This will take you to a new page build project page.
Give project name that you want.
Rest In Environment section keep provisioning model, Environment image, Compute all as default.
After scrolling you will see more settings of Environment section
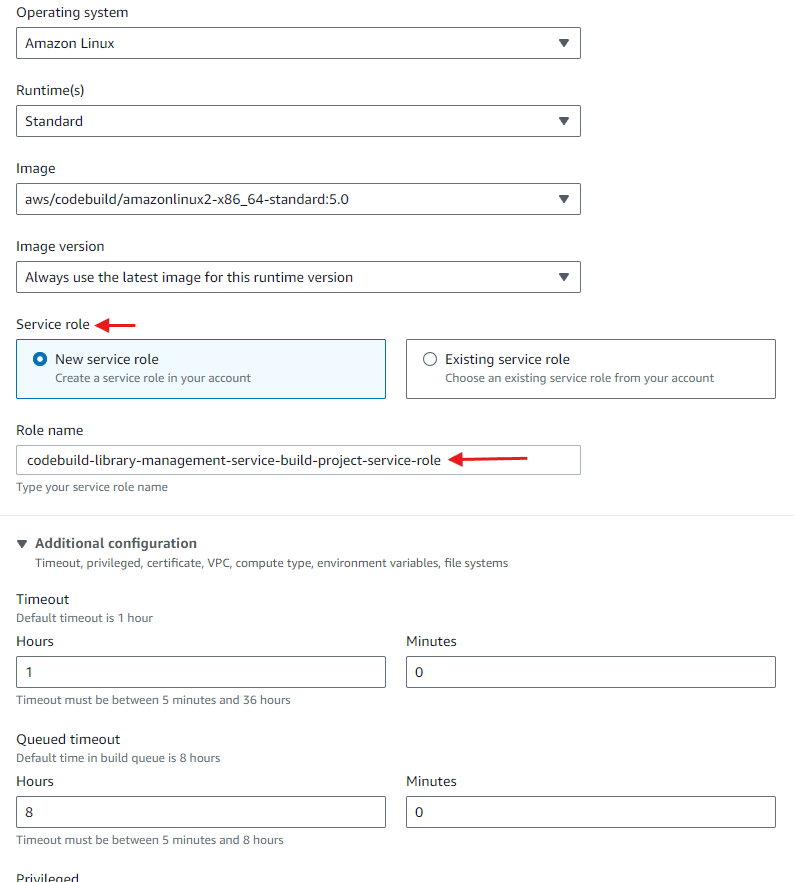
Select operating system as Amazon Linux and Runtime(s) as standard, image select default the latest one.
Next in Service role select new service role and give name to the role.
Next in Additional configuration keep Timeout as default 1 Hr this make sure if your build is stucked for 1 Hr it will stop the build. Rest keep all settings as default.
Rest keep all this settings as default.
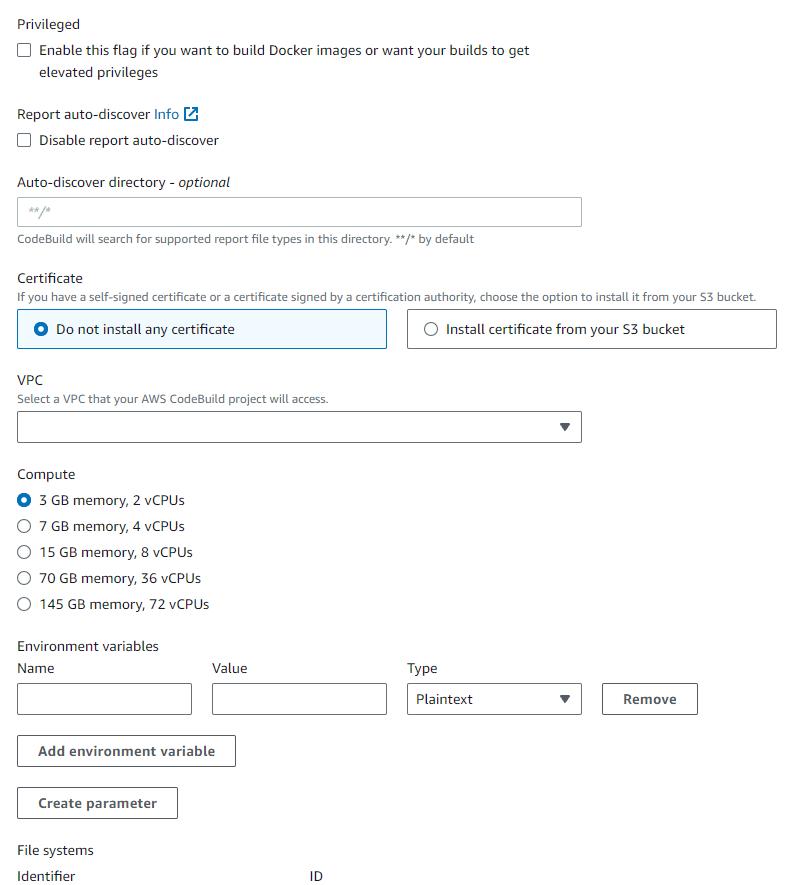
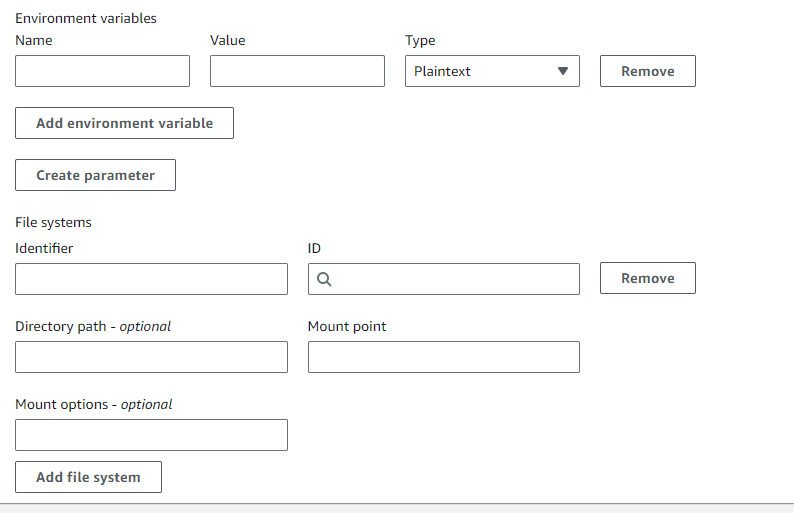
We will be not adding any environment variables during build if you want you can add
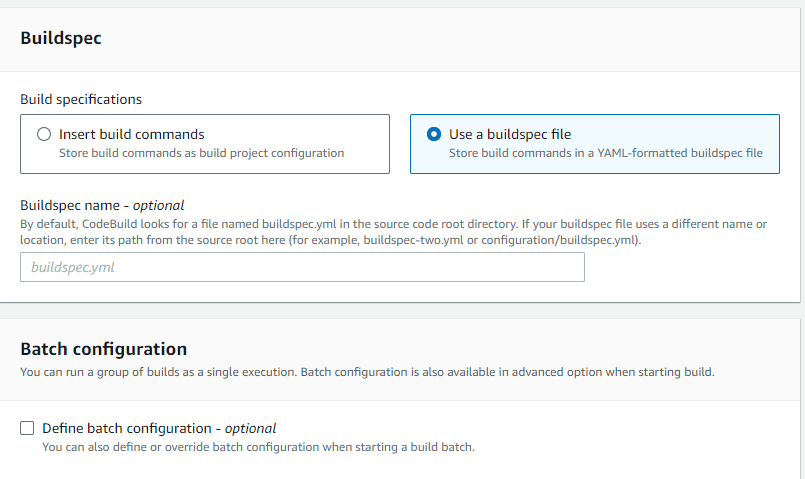
Next scroll down and you will see the Buildspec section.
Select Use a buildspec file, this will be a buildspec.yaml file present in our root folder of project it will use this file to run the commands that we want while building our project in CI/CD we will actually see this further. You can also select insert build commands option and write those commands directly here.
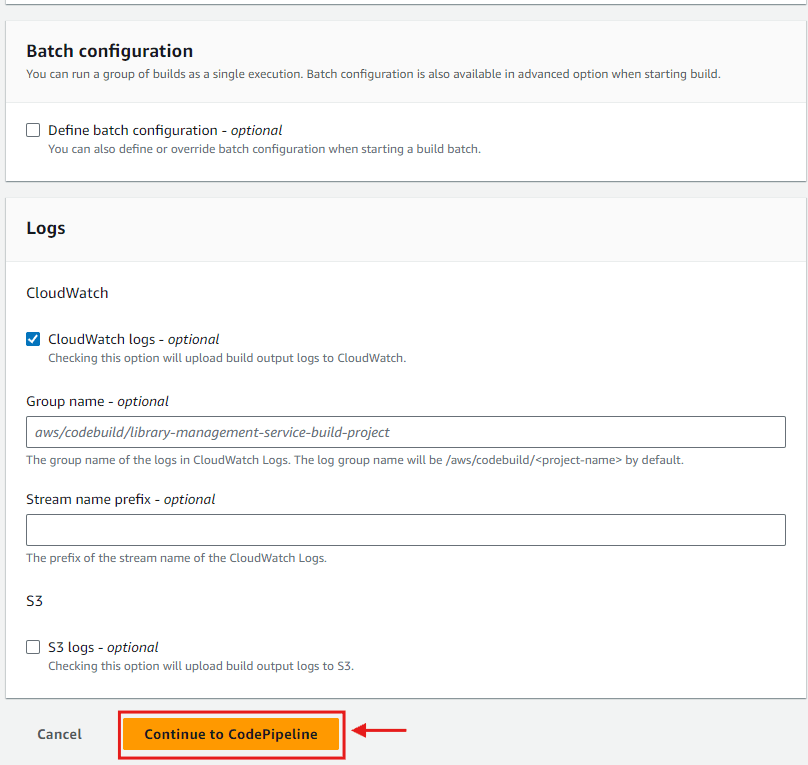
Next scroll down and keep all other setttings to default and click on Continue to CodePipeline.
And now coming back to Step 3 of our codepipeline you will see the Project name is added successfully that we have created.
Now select build type as Single build and click on next button to move to next step.
Step 5 : Add deploy stage#
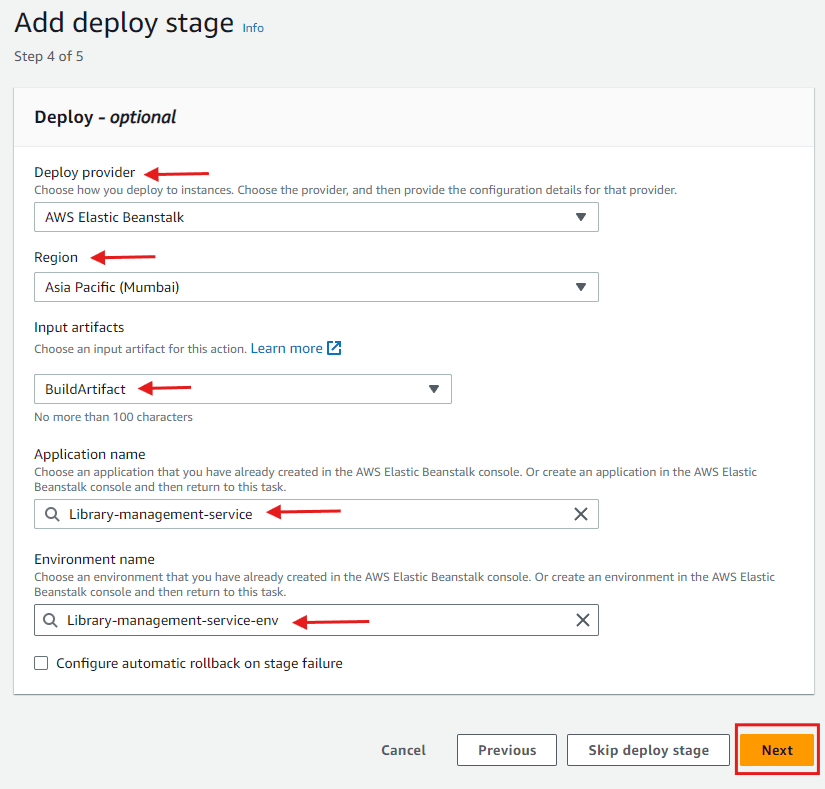
In this we will select deploy provider as AWS ELastic Beanstalk as we are going to deploy our Spring boot application to ec2 with the Elastic beanstalk and region of that elastic beanstalk.
And the artifact name will be the BuildArtifact (jar file) to the elastic beanstalk.
Select the application name of the elastic bean stalk application and then select the environment name and then click next button.
Step 6 : Review#
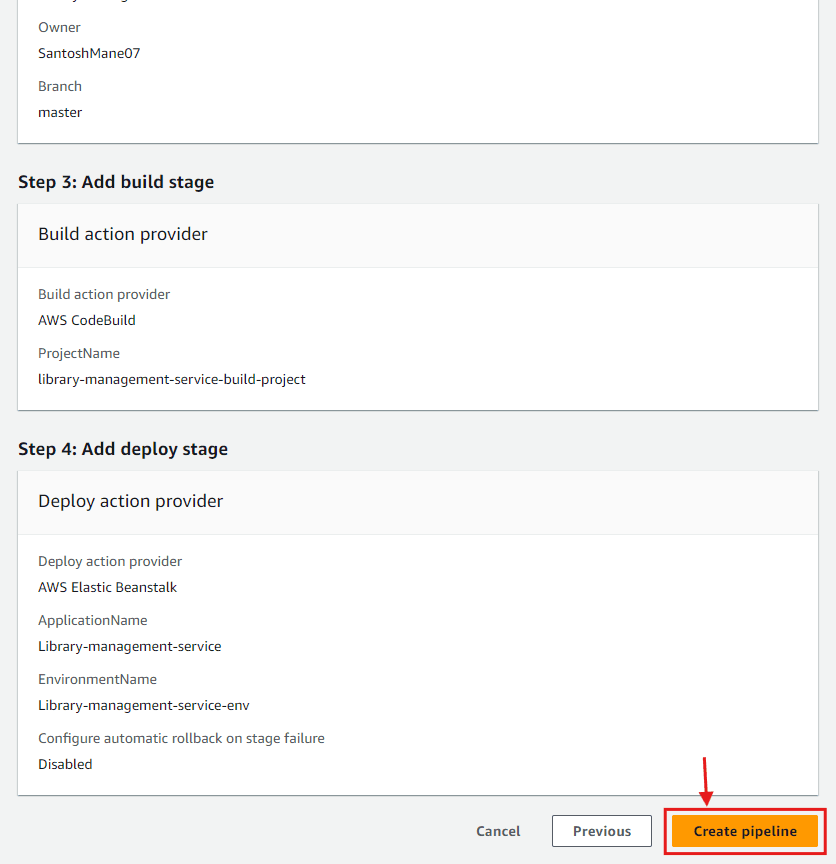
In the next step Review all the settings and click on Create pipeline button.
After creating pipeline your build will start and it will fail because we have not added buildspec.yml file in our root directory of project.#
So to add build spect file open your project in editor and add buildspec.yml file in root directory and commit changes to github.
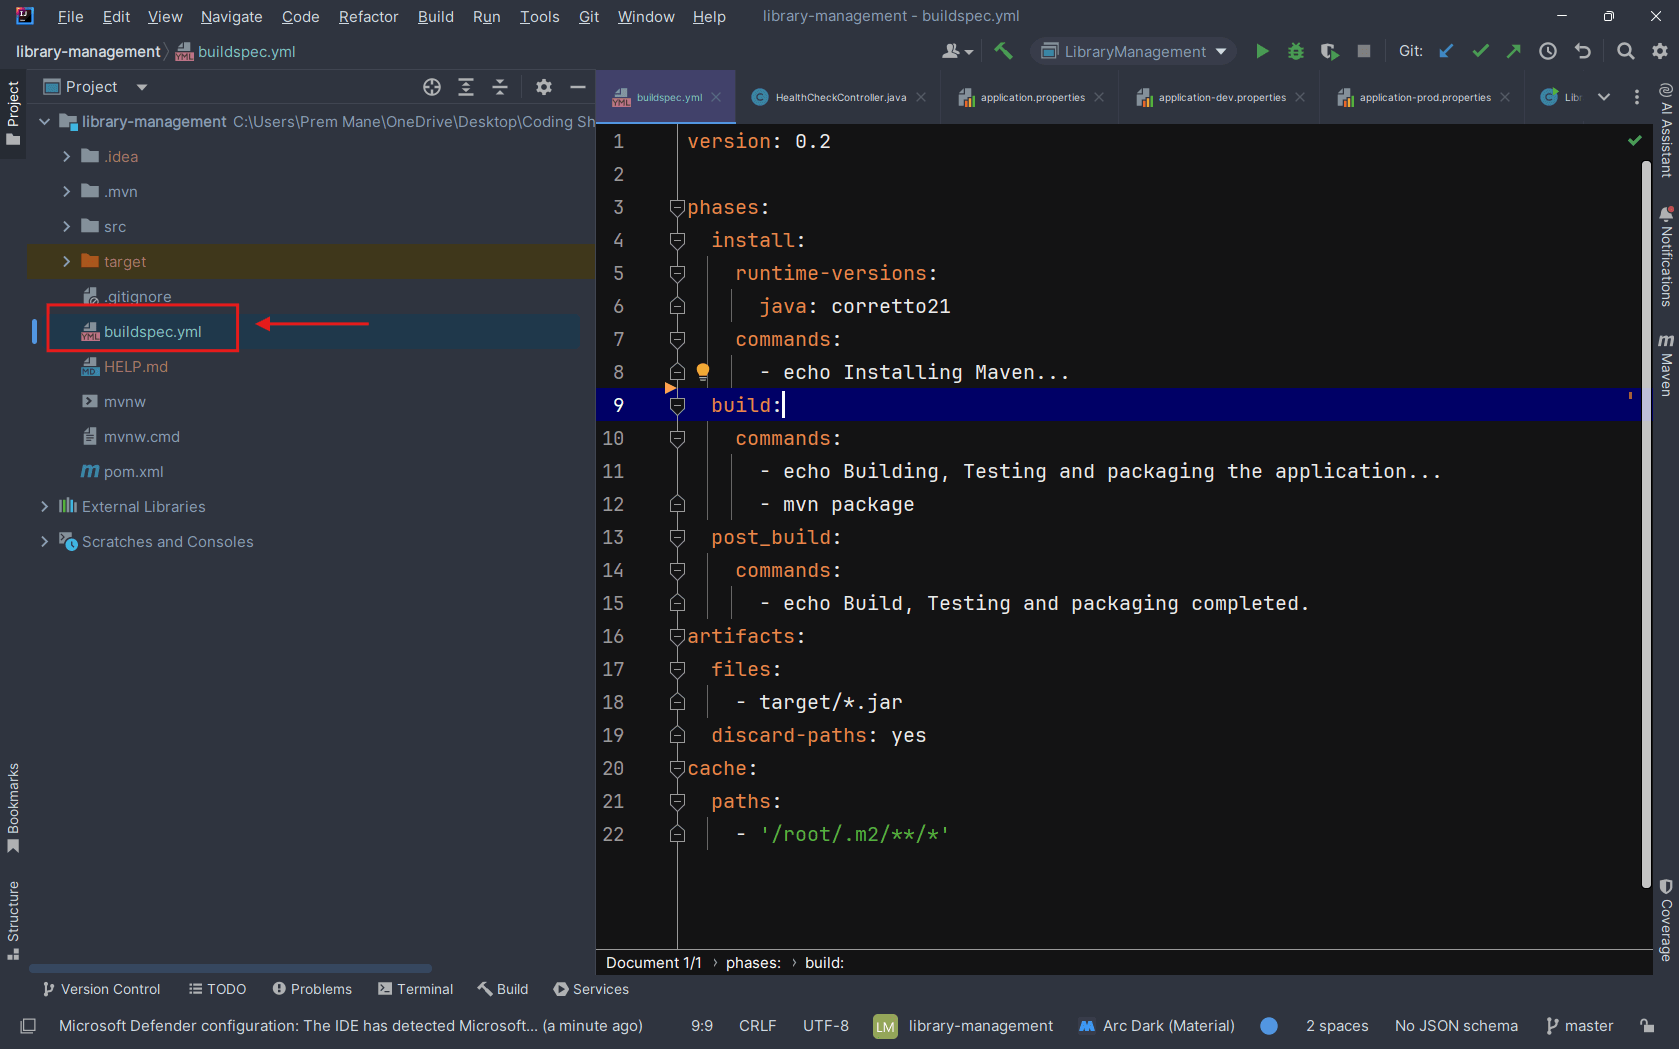
We added the following commands in the file.
Here we have the different phases like →
- Install phase : Here we are writing command to install java version 21.
- Build phase : Here we are running the mvn package command.
- Post build phase : here we are running commands that we want to run after build phase.
After phases we have Artifacts, where we store artifacts the files which will be passed to next stage, here we are passing the jar file as artifact that is generated after running mvn package command to the next stage (deploy stage in our code pipeline).
We also have discard-paths: yes setting under artifacts
- This setting under
artifactsspecifies whether or not to preserve the directory structure when uploading the generated artifacts. - When set to
yes: All files listed underartifactswill be copied to a single folder without their original directory structure. - When set to
no: The original file paths will be preserved when uploading the artifacts. This is useful if you want to keep the directory structure intact in the output.
And last we have cache: paths: '/root/.m2/**/*' this speeds up future builds by caching the Maven dependencies stored in the .m2 directory.
During build if you want to skip test cases then you have to add -DskipTests flag with mvn command.
After adding file commit the changes and push the changes to remote repository. As the new changes are commited in remote repository on master branch the automatic build and deploy process will be started by AWS codepipeline.
You can add pre build commands, like if you want to login in to docker to run the test cases with test container.
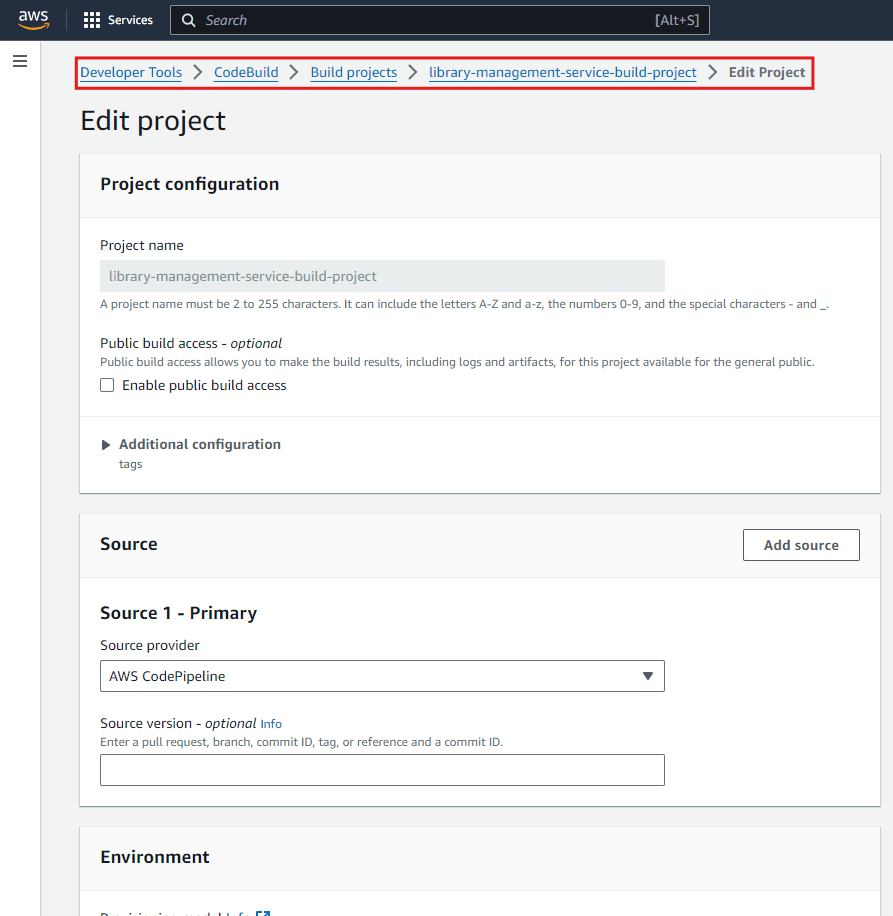
And you have to also allow build projects to run test containers also, for that go to build project and edit project.
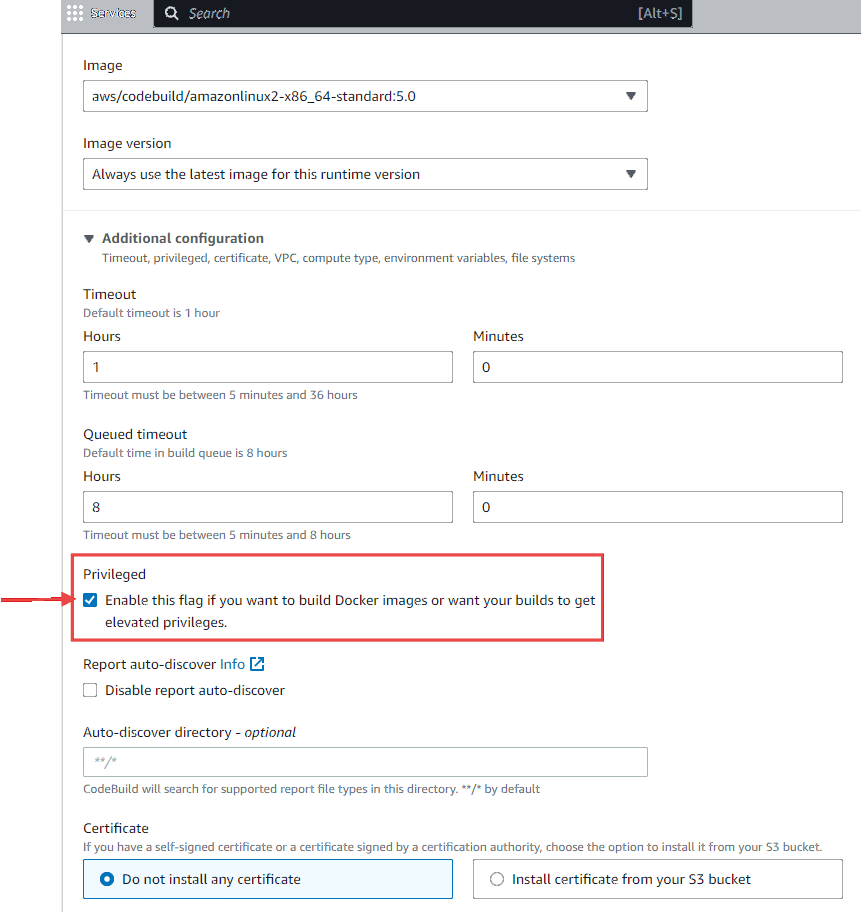
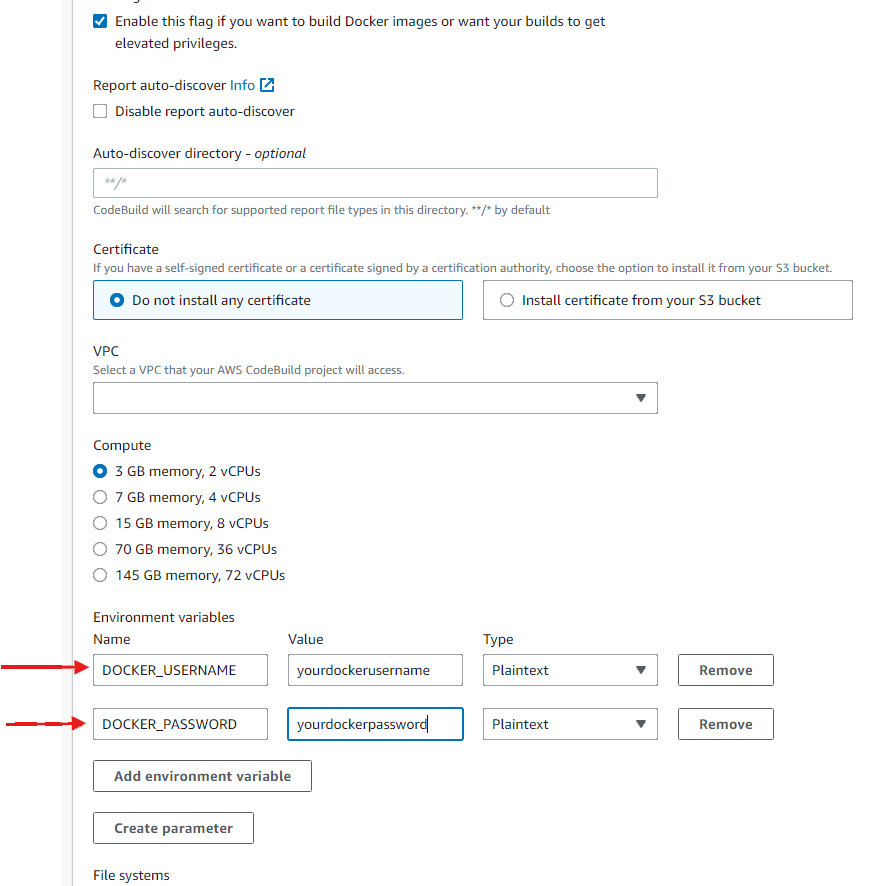
Here scroll down and enable the flag to build docker images.
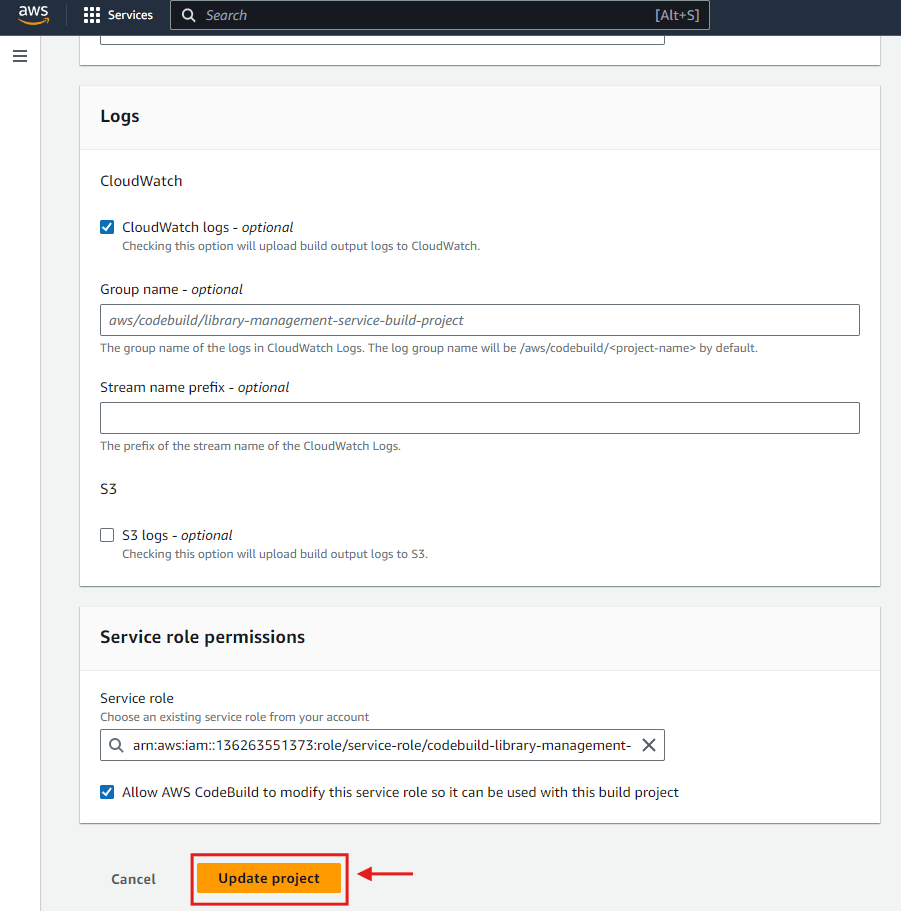
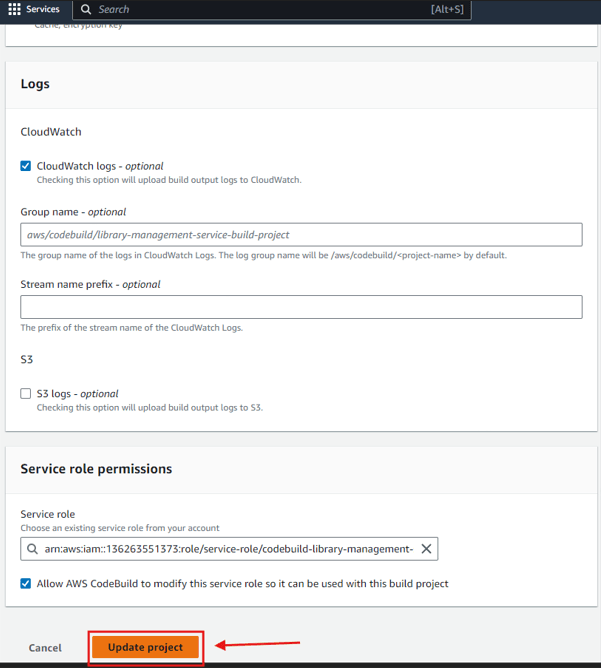
And scroll down and click on update project button.
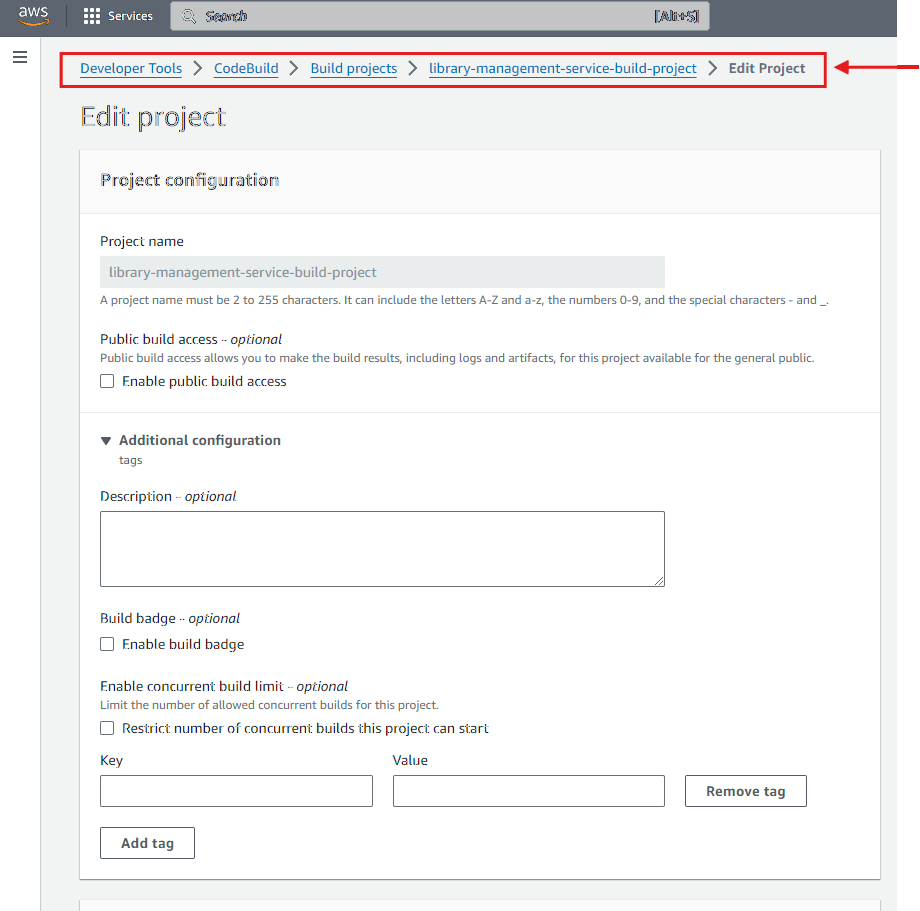
Now you have to also set your docker username and password as environent variables in Build project configuration.
Go to elastic benastalk environment and go to configuration page and in Updates, monitoring, and logging section click on edit button.
After than scroll down and got to Environment section and expand the addition configuration option and you will see Environment variables section, here add docker username and docker password.
And scroll down and click on update project button.
After adding the build spec yml file and pushing the changes to remote you can see that your pipeline will start the process to build and deploy in code pipeline.#
You will see that all the stages has successfully executed by the pipeline.
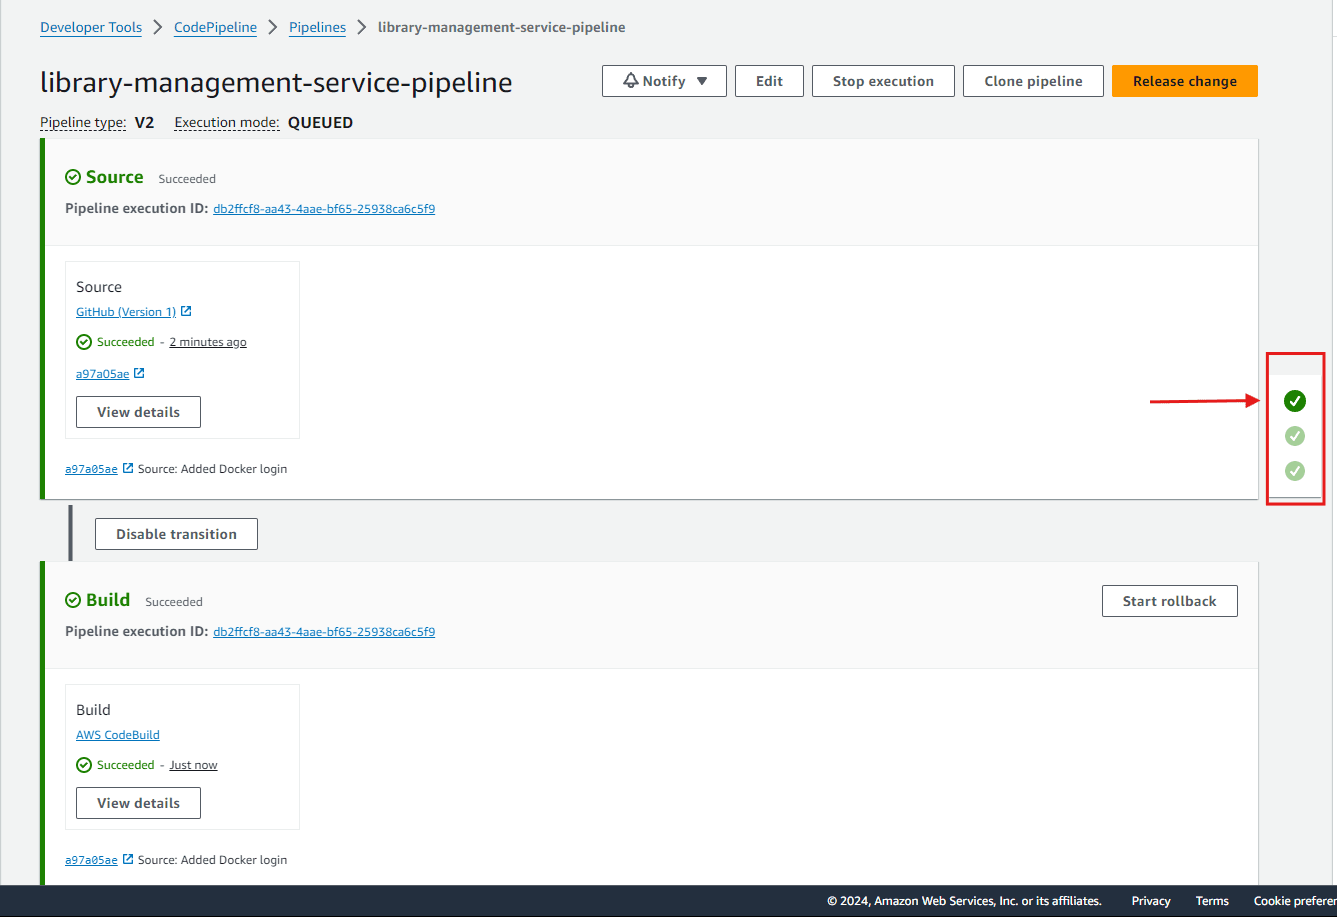
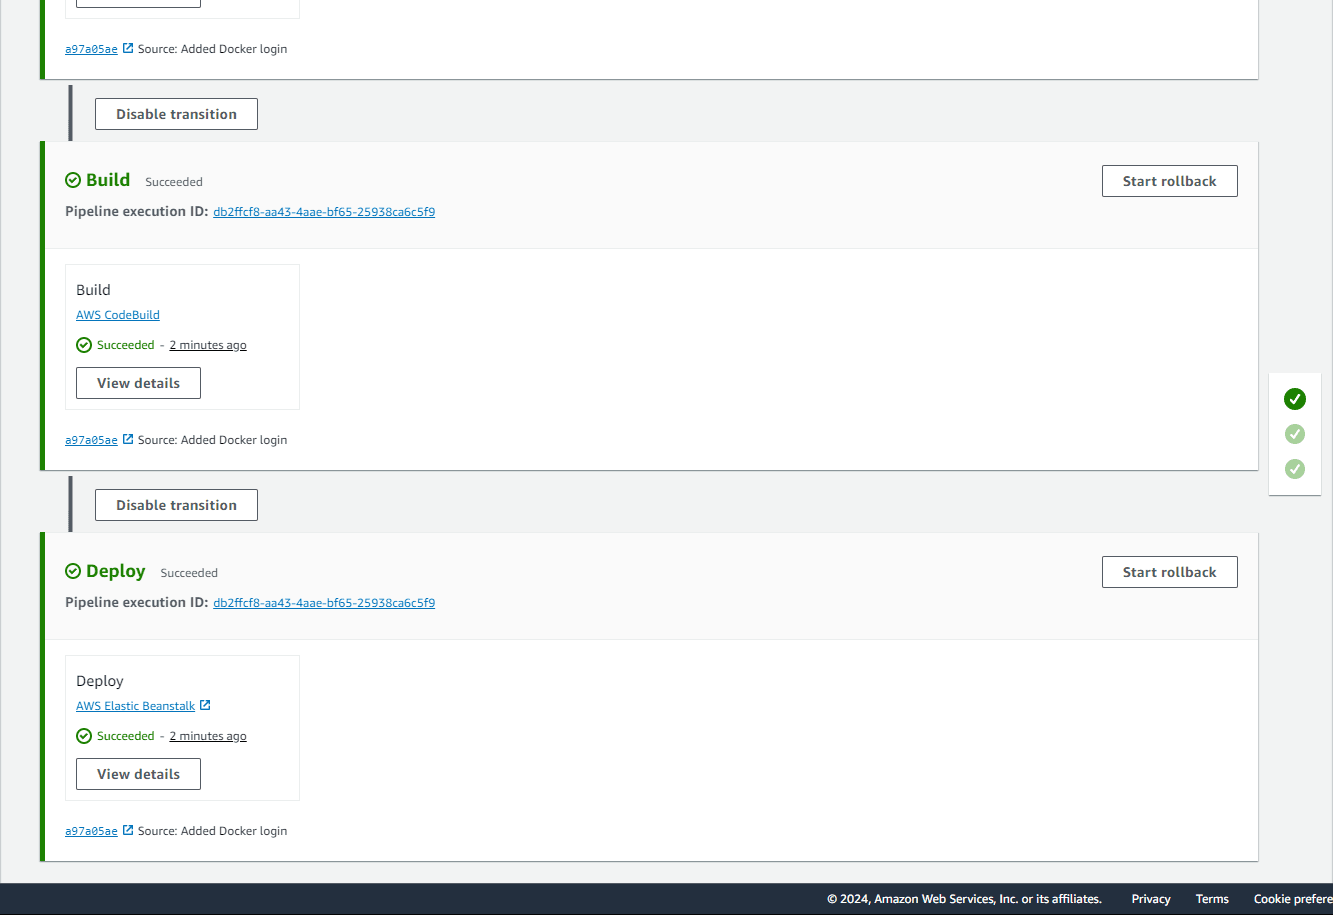
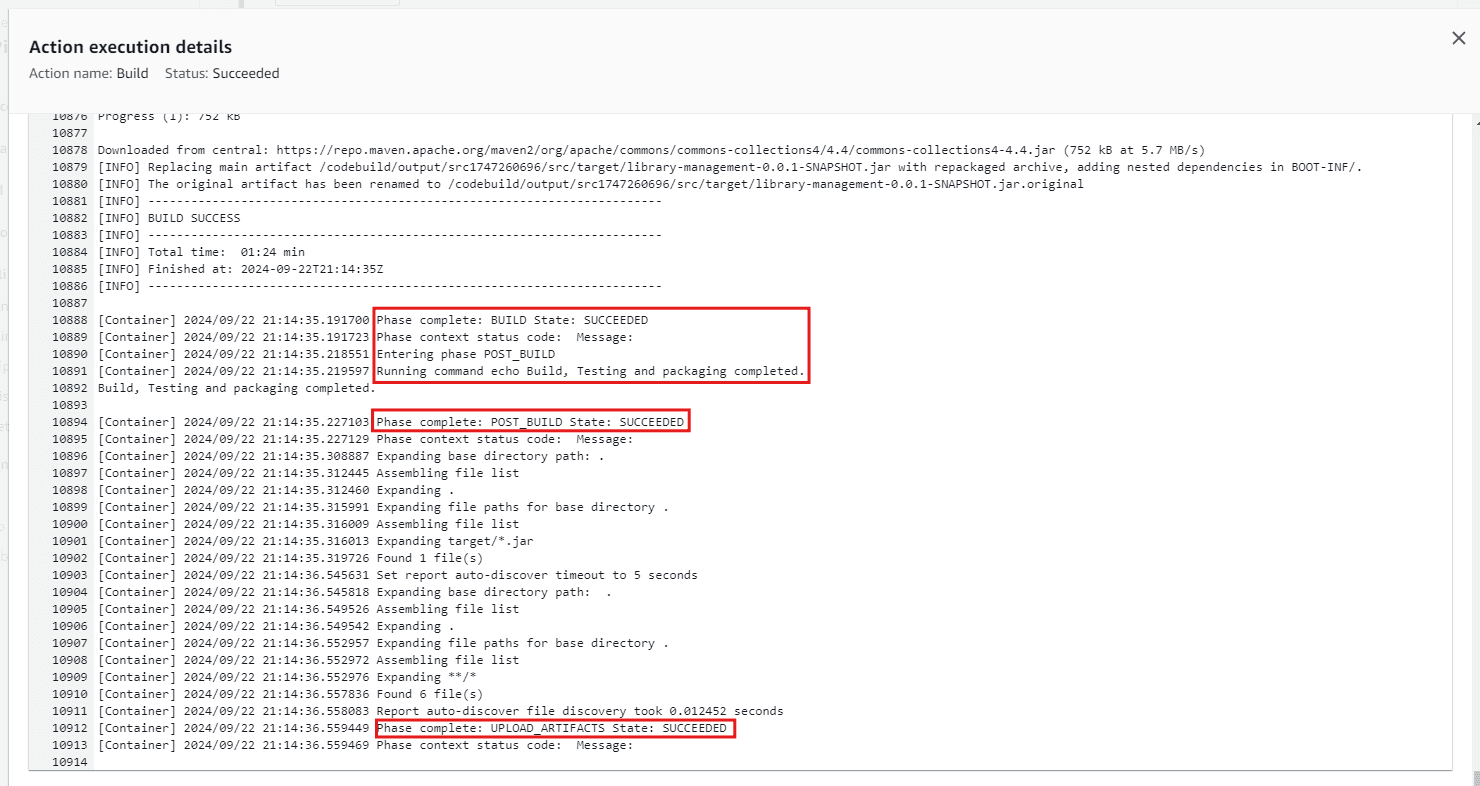
You can just click on vide details and see the logs.
If you view details of build stage logs you will see the commands that mvn package of jar file has completed and build state is success.
Now go to your elastic bean stalk environment and click on domain.#

You will see the reponse from the health controller og your spring boot application if health status is green.

Finally you have successfully created CI/CD pipeline for your application and now your application is available to entire world!
In this article, we explored the essential concepts of Continuous Integration (CI) and Continuous Deployment (CD) within the context of AWS services, specifically AWS CodePipeline and CodeBuild. We walked through the step-by-step process of setting up a CI/CD pipeline for a Spring Boot library management application, detailing the configuration and integration with GitHub.