Role-based authorization is a method of restricting access to certain parts of an application based on the roles assigned to users. Each role corresponds to a set of permissions, and users are granted these permissions according to their roles. This ensures that users only have access to the resources and actions necessary for their responsibilities.
Real Life Analogy:
Imagine you're in a company where there are different levels of employees: an intern, a manager, and a CEO. Each employee has different access to certain areas of the office and different permissions.
Intern: They have access to the office but are only allowed to enter specific areas, like the general workspace. They can't access the meeting rooms or secure areas.
Manager: A manager can enter more areas than an intern. They have access to meeting rooms, the general workspace, and can make decisions about certain projects.
CEO: The CEO has the highest level of access. They can go anywhere in the office, access secure areas, and even approve new policies or decisions.
Roles: The intern, manager, and CEO represent roles.
Permissions: What they are allowed to do (enter rooms, make decisions, etc.) represent the permissions tied to their roles.
System: When an employee tries to access a restricted area (like the meeting room), the system checks their role. If the role matches the required permissions for that area, they are granted access.
Purpose: To determine what you can access or what actions you're allowed to perform.
Analogy: After you're identified by the security guard (authentication), they check if you're authorized to enter certain areas. Maybe you're allowed in the general office space but not in the restricted server room.
Example: In an app, once you're logged in, the system checks what resources you're allowed to access (e.g., viewing certain pages or performing specific actions based on your role).
In our UserEntity class we have to implement the getAuthorities() method. Here we define the roles also.
import jakarta.persistence.*;import lombok.*;import org.springframework.security.core.GrantedAuthority;import org.springframework.security.core.authority.SimpleGrantedAuthority;import org.springframework.security.core.userdetails.UserDetails;import java.util.Collection;import java.util.List;import java.util.Set;import java.util.stream.Collectors;@Entity@Getter@Setter@NoArgsConstructor@AllArgsConstructor@ToString@Builderpublic class UserEntity implements UserDetails { @Id @GeneratedValue(strategy = GenerationType.IDENTITY) private Long id; @Column(unique = true)//indicate that email should be unique private String email; private String password; private String name;// @Enumerated(EnumType.STRING)// private Roles role; //One user have one Role @ElementCollection(fetch = FetchType.EAGER) @Enumerated(EnumType.STRING) private Set<Roles> roles; //one user have multiple role //we have to implement these three methods @Override public Collection<? extends GrantedAuthority> getAuthorities() { return roles .stream() .map(role -> new SimpleGrantedAuthority("ROLE_" +role.name())) .collect(Collectors.toSet()); } @Override public String getPassword() { return this.password; } @Override public String getUsername() { return this.name; }}
Basically when we will signup, we have to add the roles also. For this we have to define roles here also.
In our WebSecurityConfig class we used requestMachers() to allow that who have the access for the particular method of the particular endpoint.
import lombok.RequiredArgsConstructor;import org.springframework.context.annotation.Bean;import org.springframework.context.annotation.Configuration;import org.springframework.http.HttpMethod;import org.springframework.security.authentication.AuthenticationManager;import org.springframework.security.config.annotation.authentication.configuration.AuthenticationConfiguration;import org.springframework.security.config.annotation.web.builders.HttpSecurity;import org.springframework.security.config.annotation.web.configuration.EnableWebSecurity;import org.springframework.security.config.http.SessionCreationPolicy;import org.springframework.security.crypto.bcrypt.BCryptPasswordEncoder;import org.springframework.security.crypto.password.PasswordEncoder;import org.springframework.security.web.SecurityFilterChain;import org.springframework.security.web.authentication.UsernamePasswordAuthenticationFilter;@Configuration@EnableWebSecurity //by adding this annotation we are telling springboot that we want to we want to configure this SpringSecurityFilterChain@RequiredArgsConstructorpublic class WebSecurityConfig { private final JWTAuthFilter jwtAuthFilter; private final OAuth2SuccessHandler oAuth2SuccessHandler; private static final String[] publicRoutes = { "/error","/auth/**","/home.html" }; @Bean SecurityFilterChain securityFilterChain(HttpSecurity httpSecurity) throws Exception { httpSecurity .authorizeHttpRequests(auth-> auth .requestMatchers(publicRoutes).permitAll() // Public endpoints .requestMatchers("/endpoint/**").hasRole(Roles.ADMIN.name()) // all the routes after endpoint will be allowed for "ADMIN" only without admin if any one is trying to send any request on this endpoint then it will show a forbidden error .anyRequest().authenticated()) // All other requests require authentication .csrf(csrfConfig-> // Disable CSRF for simplicity, not recommended for production csrfConfig .disable()) .sessionManagement(sessionConfig -> // Disable JSESSIONID for simplicity, not recommended for production sessionConfig .sessionCreationPolicy(SessionCreationPolicy.STATELESS)) .addFilterBefore(jwtAuthFilter, UsernamePasswordAuthenticationFilter.class) .oauth2Login(oauth2Config->oauth2Config .failureUrl("/login?error=true") .successHandler(oAuth2SuccessHandler)); return httpSecurity.build(); //when you add build this throws an exception } @Bean AuthenticationManager authenticationManager(AuthenticationConfiguration authenticationConfiguration) throws Exception { return authenticationConfiguration.getAuthenticationManager(); } @Bean PasswordEncoder passwordEncoder(){ return new BCryptPasswordEncoder(); }}
Create JWT token using user’s roles.
import io.jsonwebtoken.Claims;import io.jsonwebtoken.Jwts;import io.jsonwebtoken.security.Keys;import org.springframework.beans.factory.annotation.Value;import org.springframework.stereotype.Service;import javax.crypto.SecretKey;import java.nio.charset.StandardCharsets;import java.util.Date;@Servicepublic class JWTService { @Value("${jwt.secretKey}") private String jwtSecreteKey ; public SecretKey generateSecreteKey(){ return Keys.hmacShaKeyFor(jwtSecreteKey.getBytes(StandardCharsets.UTF_8)); }//create a jwt public String createAccessToken(UserEntity user) { return Jwts.builder() .subject(user.getId().toString()) .claim("email",user.getEmail()) .claim("roles", user.getRoles().toString()) //for roles .issuedAt(new Date()) .expiration(new Date(System.currentTimeMillis()+1000*60*10)) //setting it for 10 mins only .signWith(generateSecreteKey()) .compact(); } public String createRefreshToken(UserEntity user) { return Jwts.builder() .subject(user.getId().toString()) .issuedAt(new Date()) .expiration(new Date(System.currentTimeMillis()+ 1000L *60*60*24*30*6)) //here we have to set it for long time 6 months .signWith(generateSecreteKey()) .compact(); } //verify the token public Long generateUserIdFromToken(String token) { Claims claim = Jwts.parser() // to parse it .verifyWith(generateSecreteKey())// verify the key that we have .build() // we will get out the token .parseSignedClaims(token) .getPayload(); //to get the payload return Long.valueOf(claim.getSubject()); }}
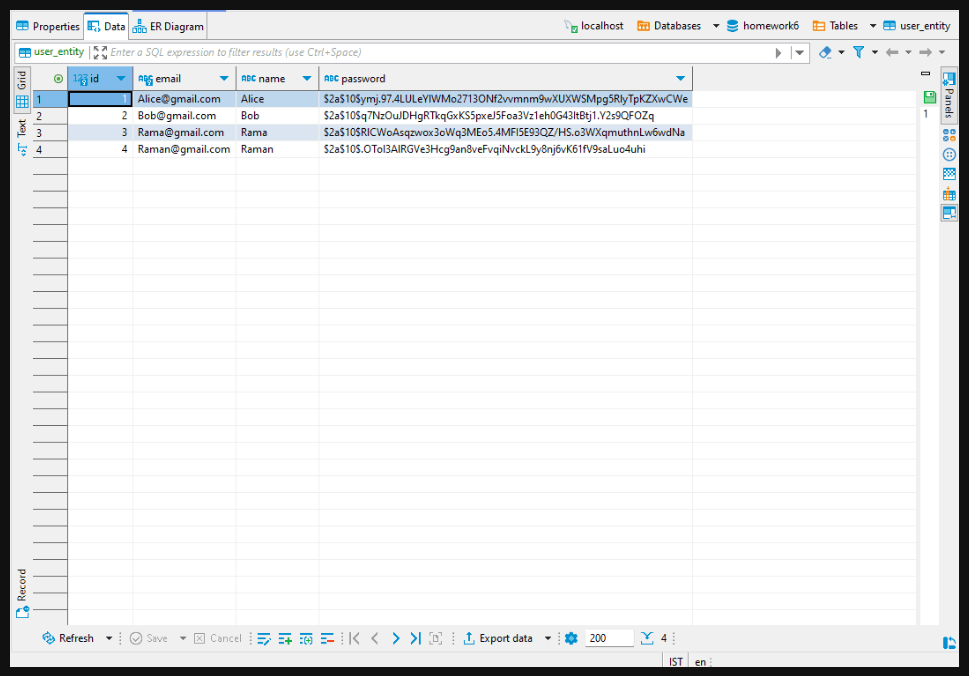
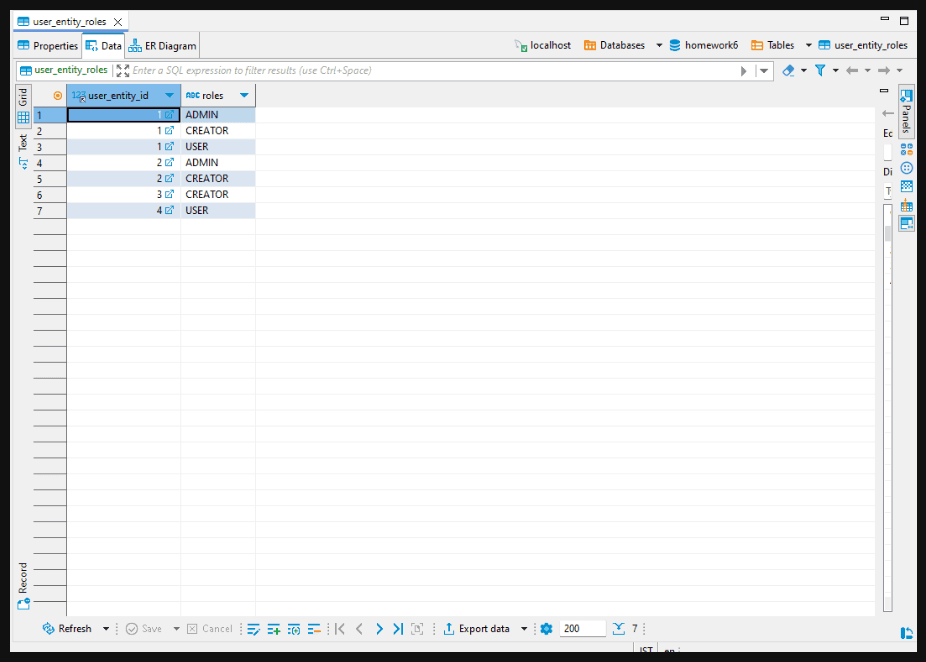
According to our logic only ‘ADMIN’ can access all the routes after “/endpoint”. According to our database only “Alice” and “Bob” can be accessed this. If we login with any of them then after login AT and RT are generated. And if we want to create a post on “/endpoint” we will be allowed.
According to our logic, only users with the 'ADMIN' role can access all routes starting with /endpoint. In our database, only Alice and Bob are assigned the 'ADMIN' role, so they are the only users who can access these routes.
When Alice or Bob logs in, they will be successfully authenticated, and Access Token (AT) and Refresh Token (RT) are generated for them.
After successful authentication, they will be authorized to access the routes under /endpoint because their role ('ADMIN') grants them permission to do so.
If they want to create a post on /endpoint (e.g., POST /endpoint), their 'ADMIN' role gives them the required authorization to perform that action.
In summary, only Alice and Bob can access and create posts on /endpoint because they are both 'ADMIN' users.
Generate AT and RT.
Generate AT RT
You need to authenticate the '/endpoint' route by including your access token in the 'Headers' or 'Authorization' section.
hitting /endpoint with bearer token
You can also include a body in your '/endpoint' route.
hitting /endpoint endpoint with body postman view
Since 'Rama' and 'Raman' are not assigned the 'ADMIN' role, they do not have the necessary permissions to access routes under /endpoint. So, if Rama or Raman tries to create a post using POST /endpoint, they will be denied access and will receive a "403 Forbidden Error".
This is because the 'ADMIN' role is required to access and create posts on these routes, and Rama and Raman do not have that role.
Login with Rama.
hitting /login endpoint for user Rama postman view
If you include the accessToken and body and try to send the request, it gives you a 'Forbidden' error.
403 forbidden error postman view
If we try to create a post on /endpointwithout any authentication, the request will be redirected to the login page. This is because authentication is required before accessing any protected routes like /endpoint. Since the user is not logged in, the system redirects them to the login page to verify their identity.
/endpoint without any authentication postman view(html page)
The .requestMatchers() method is used in Spring Security to define security configurations for specific HTTP requests based on their URL patterns. It allows you to specify which routes or endpoints should be secured or require certain permissions.
This article explored role-based authorization, explaining how it controls access based on user roles to protect sensitive data. It demonstrated how roles are mapped to users and enforced through Spring Security, JWT tokens, and security filters. Ultimately, role-based authorization is crucial for building secure, scalable applications by restricting access to authorized resources.