Redis Cache in Spring Boot
Introduction:#
In modern application development, performance and scalability are critical factors for success. Redis, a powerful in-memory data structure store, has emerged as a go-to solution for caching due to its exceptional speed and versatility. When integrated with Spring Boot, Redis Cache becomes an invaluable tool for optimizing application performance by reducing the load on databases, accelerating response times, and ensuring a seamless user experience. With Spring Boot's robust caching support and Redis's flexibility, developers can easily implement a high-secured, reliable, and efficient caching layer tailored to their application's needs.
Installing Redis#
- Installing Redis on Windows using WSL (Windows Subsystem for Linux) Redis does not natively support Windows, but you can install it using WSL, which allows you to run a Linux environment directly on Windows.
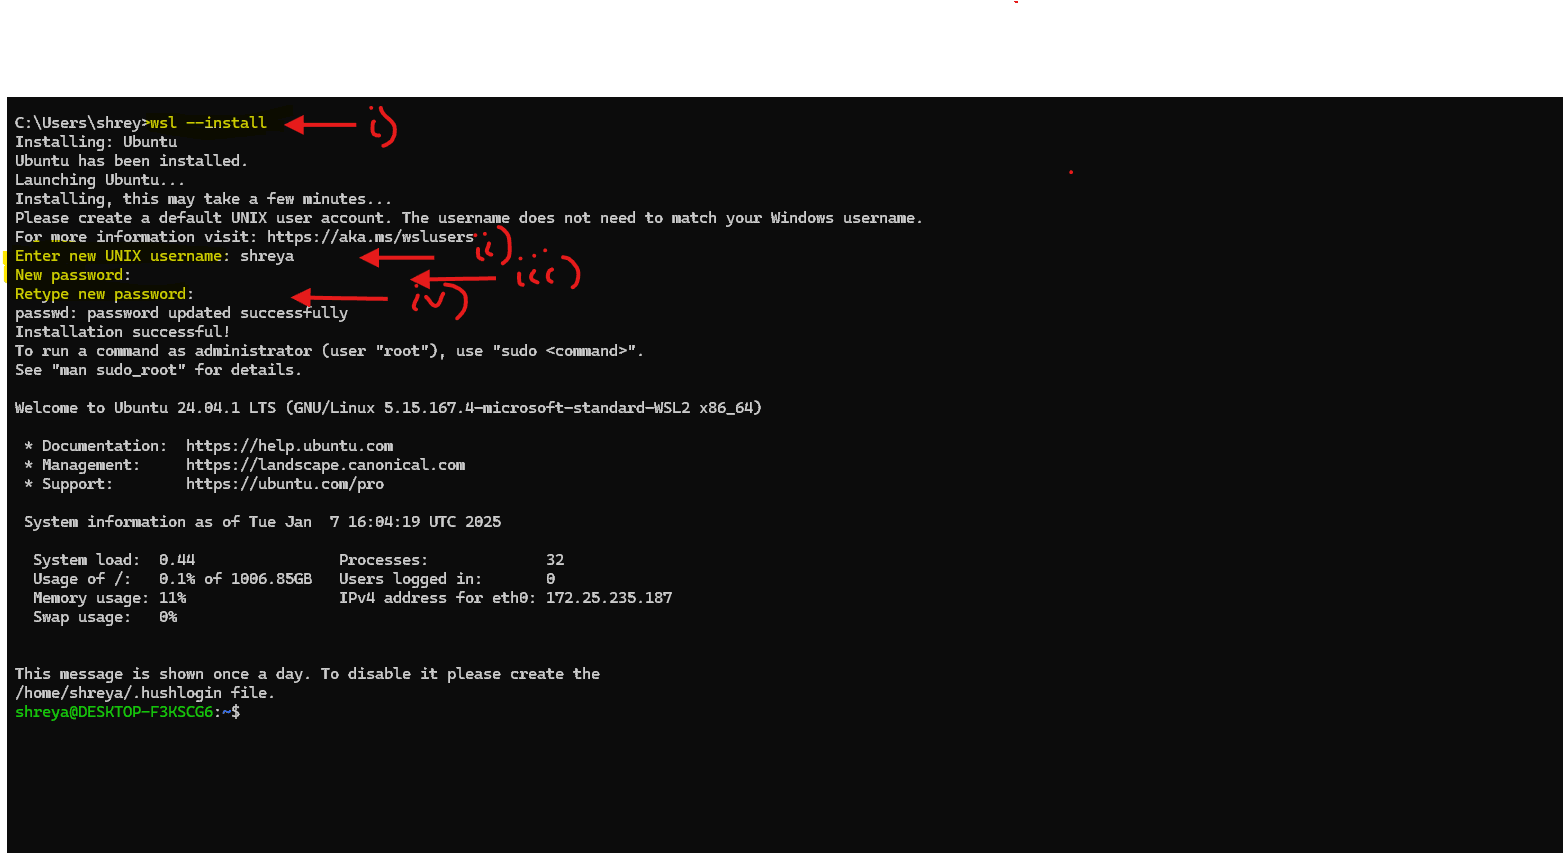
- Install WSL (Windows Subsystem for Linux):
- From Command Line: Open PowerShell as Administrator and run the following command to install WSL:
- Install WSL (Windows Subsystem for Linux):
- Set up Ubuntu:
- Once installed, launch the Ubuntu application.
- Follow the on-screen prompts to set up your user account and password.
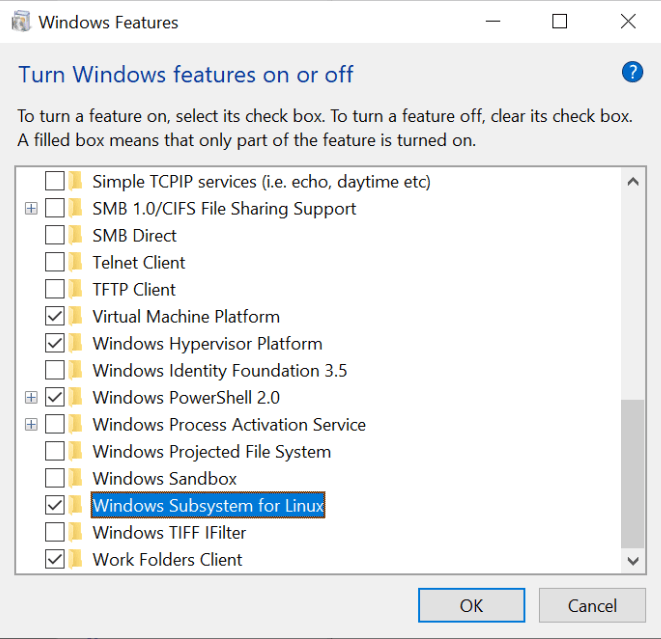
- From GUI:
- From Start, search for Turn Windows features on or off (type
turn) - Select Windows Subsystem for Linux
- From Start, search for Turn Windows features on or off (type
- iii. Install Ubuntu from the Microsoft Store:
- Go to the Microsoft Store and search for "Ubuntu".
- Select the version you'd like (preferably the latest) and click Install.
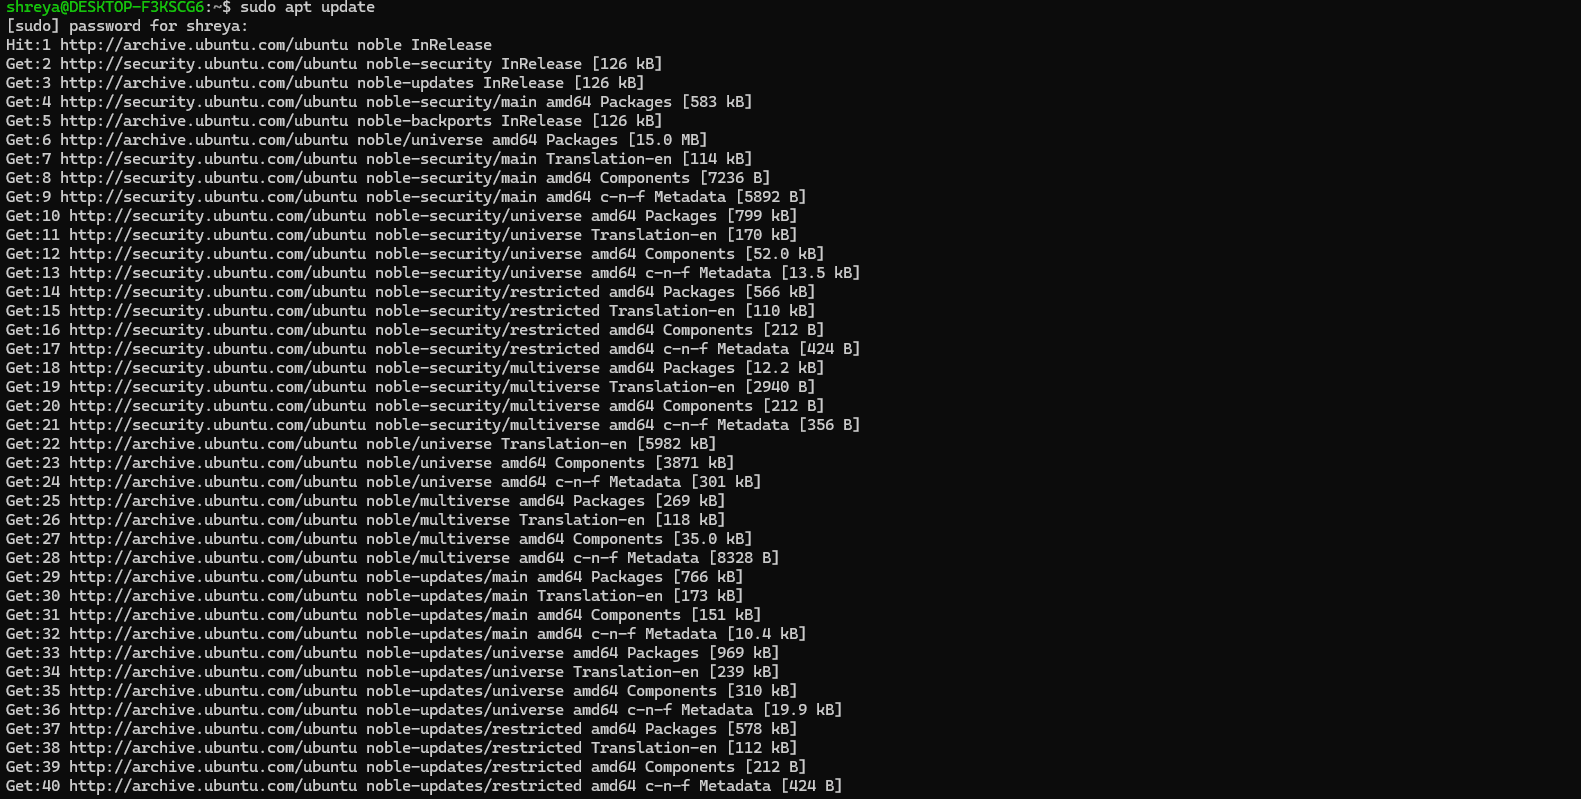
- Update the Package List:
- Run the following command to update the package list in your Ubuntu terminal: sudo apt update
- Install Redis:
- After updating, install Redis by running: sudo apt-get install redis
- Verify Redis Installation:
- Check if Redis is working by running the Redis CLI: redis-cli
- In the Redis CLI, type “ping” If Redis is running correctly, it will reply with “pong”

- Enable Redis to Start on Boot (optional):
- You can configure Redis to start automatically when your system boots by running: sudo systemctl enable redis-server
Note: For further details you can visit https://docs.servicestack.net/install-redis-windows#option-1-install-redis-on-ubuntu-on-windows website.
- Installing Redis on macOS For macOS, the easiest way to install Redis is through Homebrew:
- Install Homebrew (if you don't have it already):
- Run the following command in your terminal:
/bin/bash -c "$(curl -fsSL https://raw.githubusercontent.com/Homebrew/install/HEAD/install.sh)" - Install Redis:
- Install Redis using Homebrew: brew install redis
- Start Redis:
- Start Redis with the command: brew services start redis
- Verify Redis Installation:
- You can check Redis by running the Redis CLI and typing: redis-cli ping
- It should return
PONG.
- Run the following command in your terminal:
- Install Homebrew (if you don't have it already):
Note: For further details visit https://redis.io/docs/latest/operate/oss_and_stack/install/install-redis/install-redis-on-mac-os/ website.
Add Redis Cache#
Integrating Redis Cache into a Spring Boot project can significantly boost performance by reducing the load on databases and optimizing data retrieval. Here's a step-by-step guide to add Redis caching:
1. Add Dependency#
Include the Redis dependency in your pom.xml file if you're using Maven:
Configure Redis in Spring Boot#
Add Redis configuration properties to your application.properties or application.yml file:
spring.cache.type=redis
spring.data.redis.host=<your-redis-host>
spring.data.redis.port=<your-redis-ports>
pring.data.redis.password=<your-redis-password>
spring.data.redis.ssl.enabled=false
By default redis port = 6379 and redis host = localhost (127.0.0.1).

Note: After adding dependencies and configuring the default port and hostname, if you attempt to hit any endpoint to create a record in tables (e.g., employee, product, etc.), and your entity or dto/dao classes implement serialization-dependent features (e.g., caching or distributed session storage) without implementing
Serializable, you might encounter errors.
@Data
public class EmployeeDto implements Serializable {...}
Redis Cloud Console#
- Go to https://redis.io/docs/latest/operate/oss_and_stack/install/install-redis/ page. We need to login.

- Create new database.
- To use Redis for Cache.
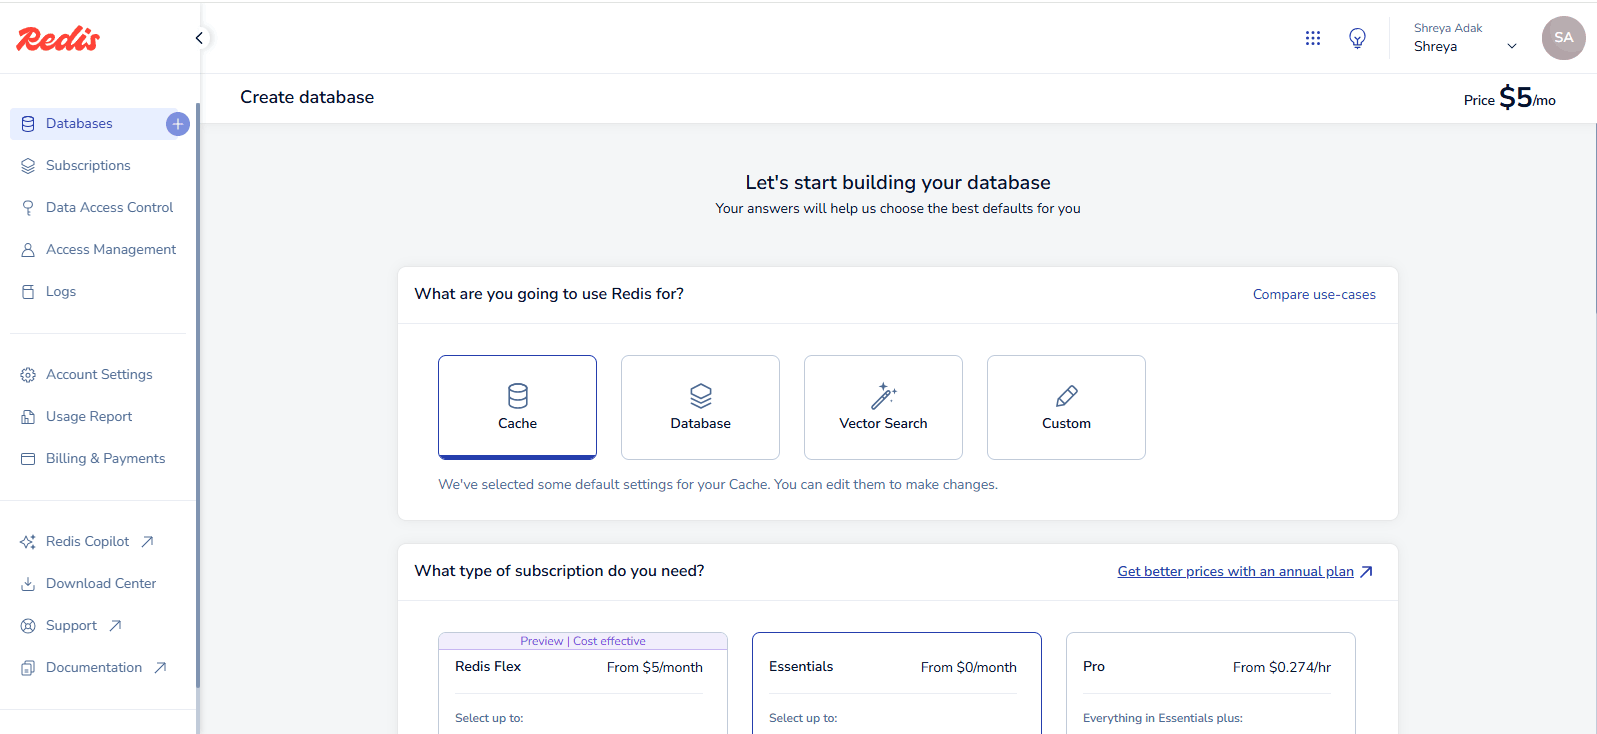
Select free subscription.
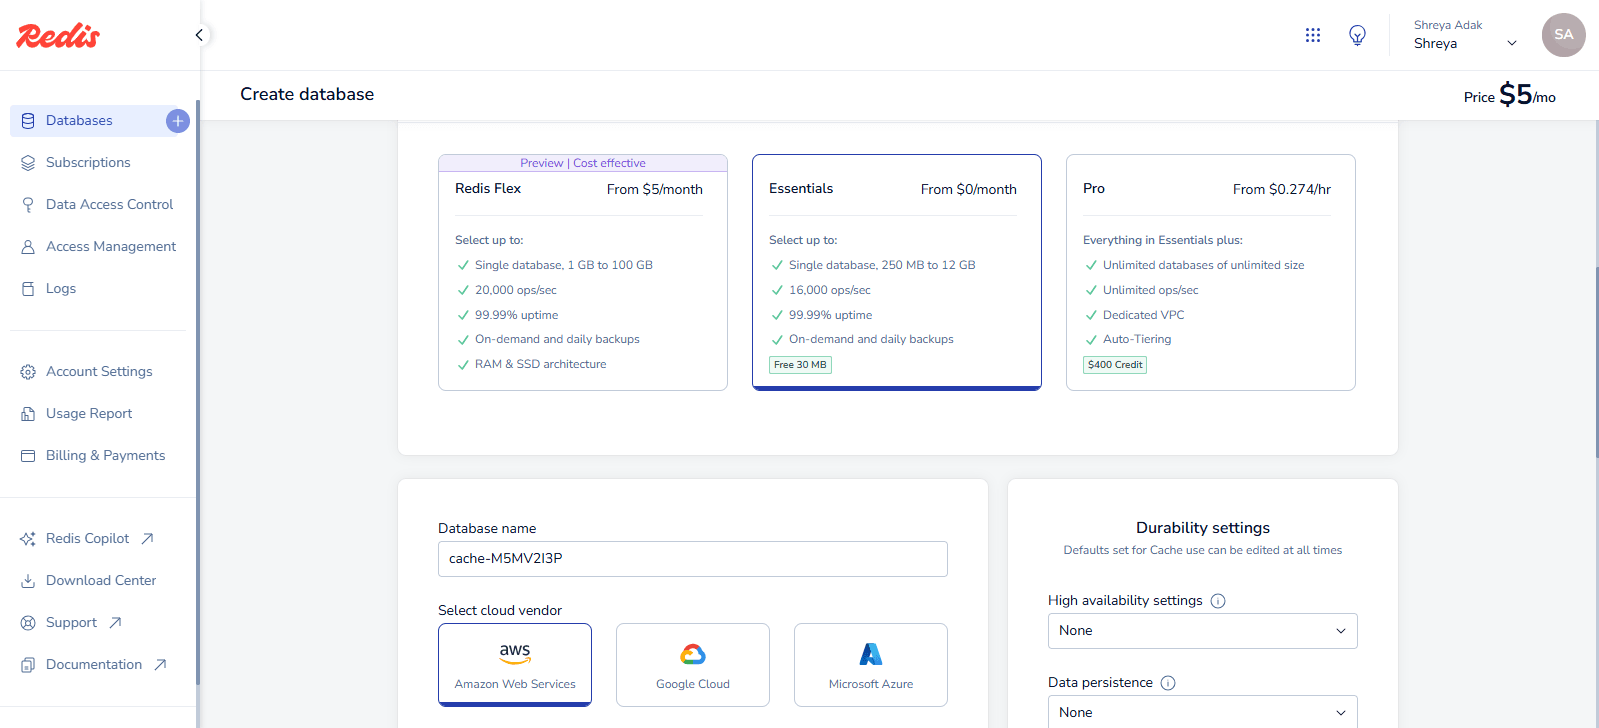
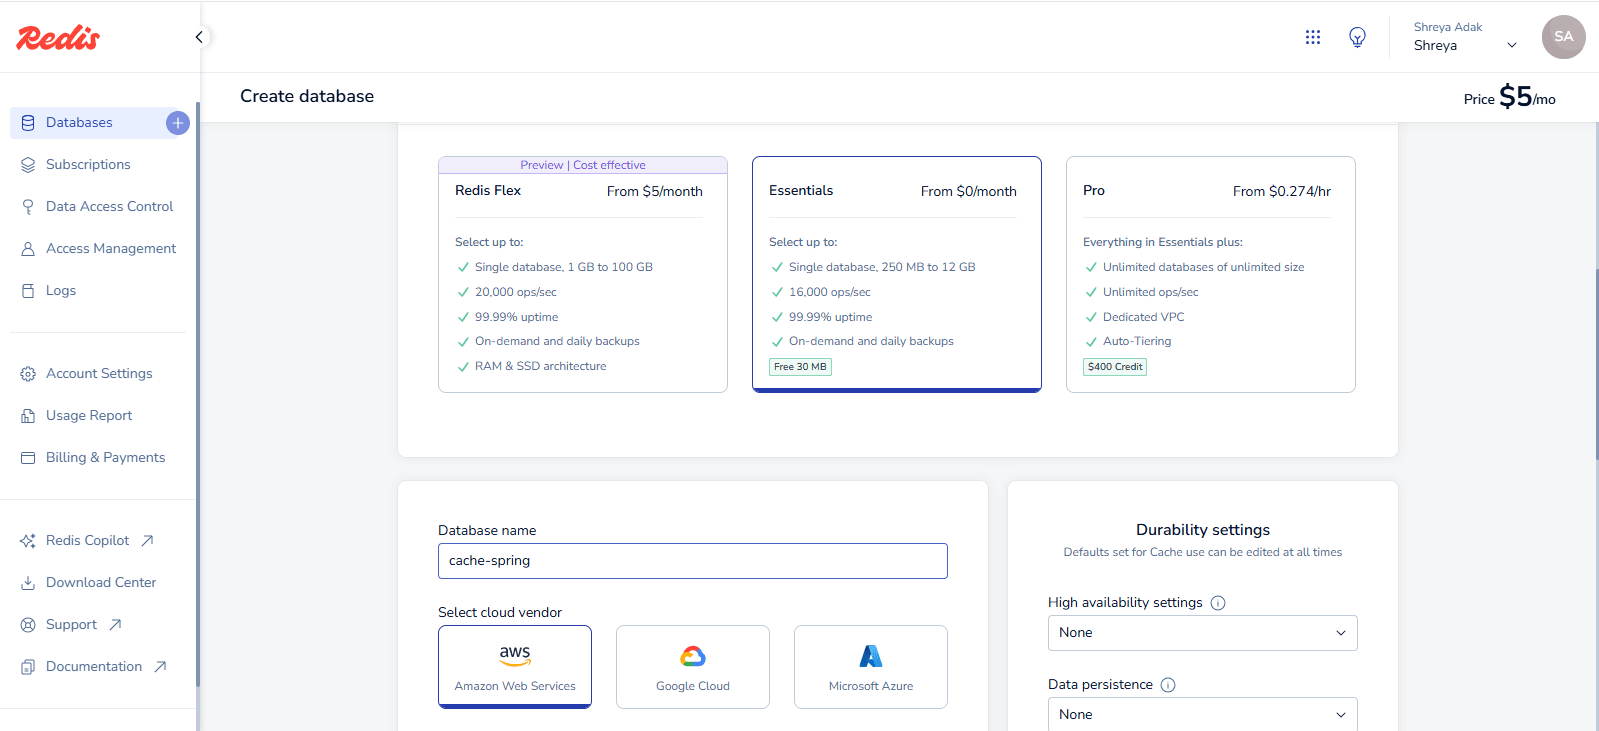
Write a database name and select aws as cloud vendor.
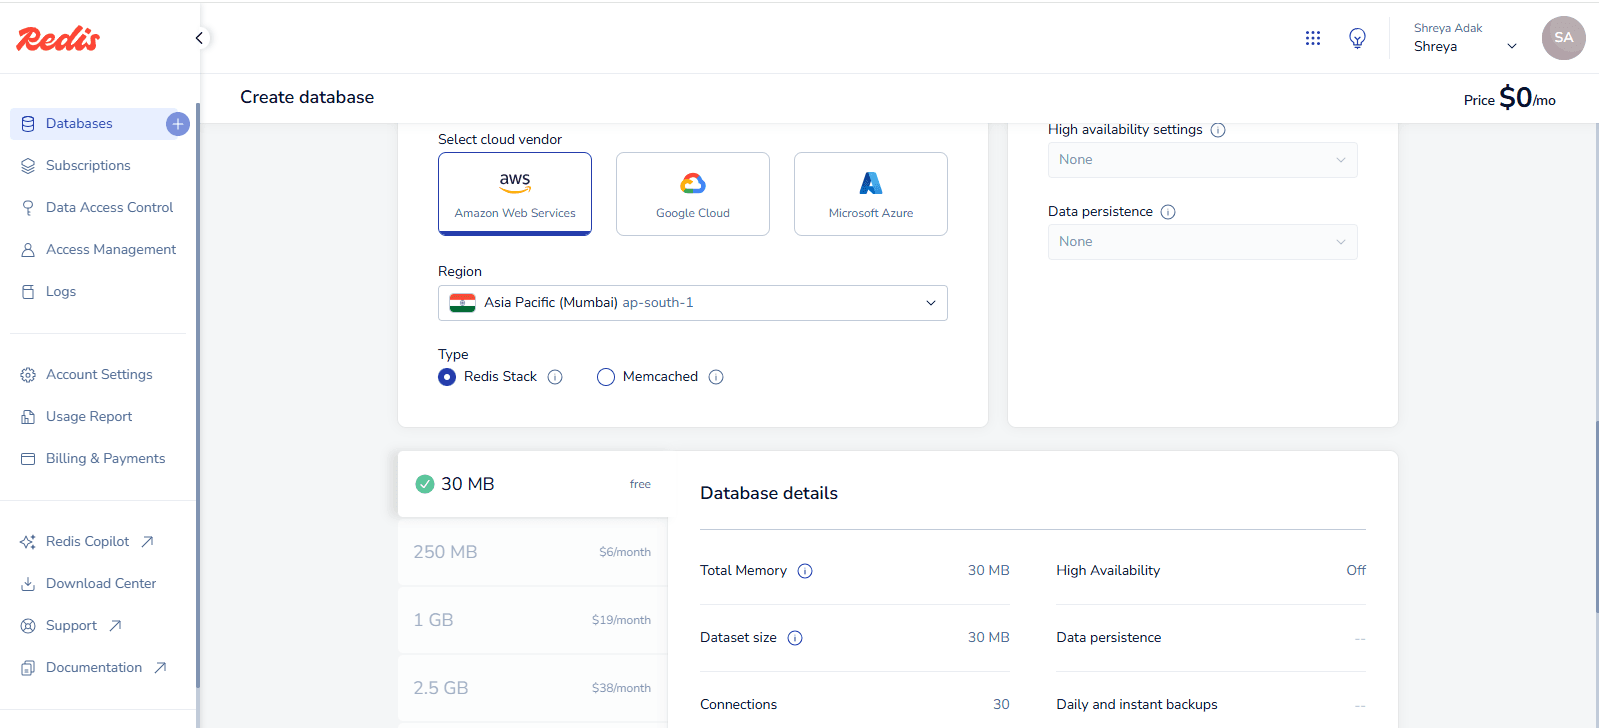
Set region and select 30MB free.
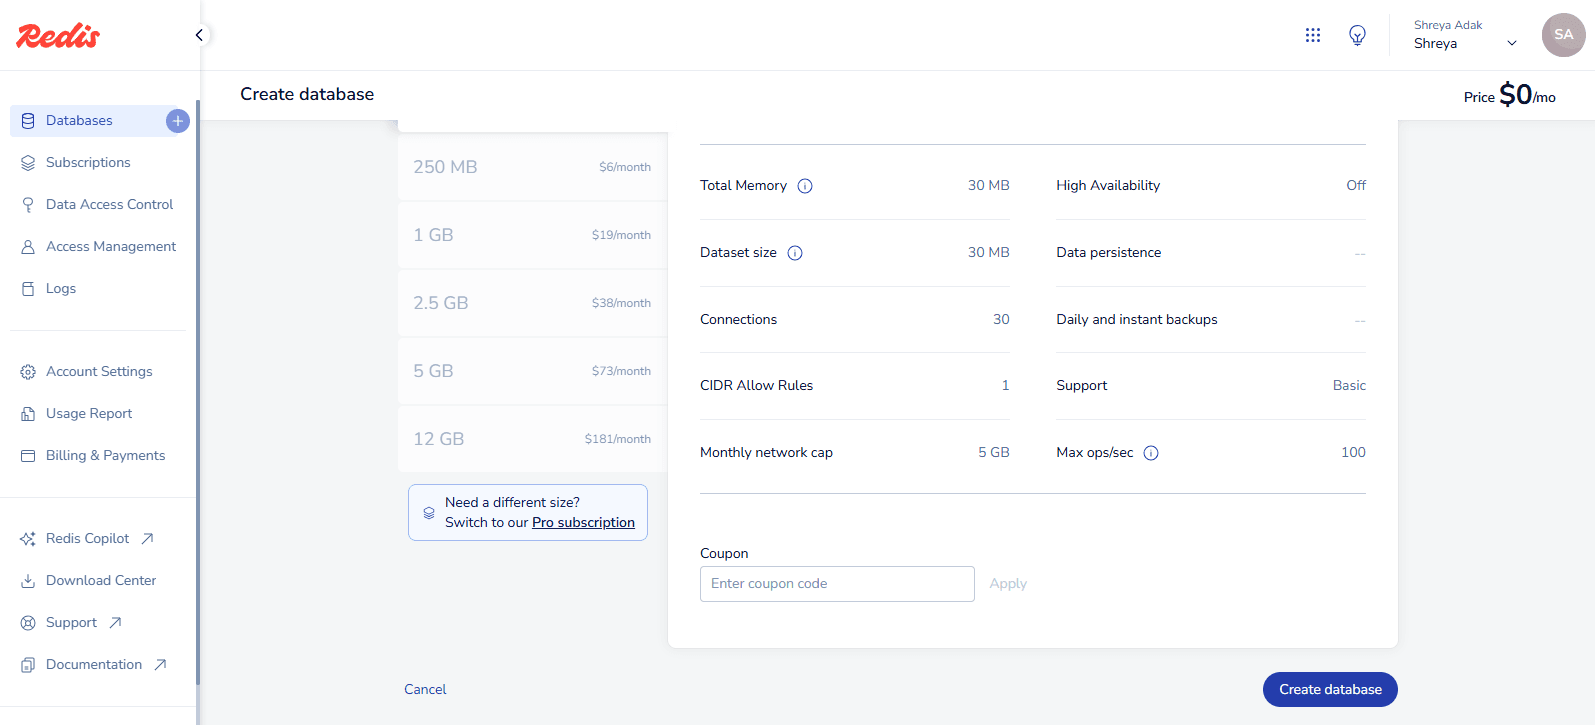
Click on create database.
- Connect to database.
- Click on Connect. After that go to Redis Insights and click on download.
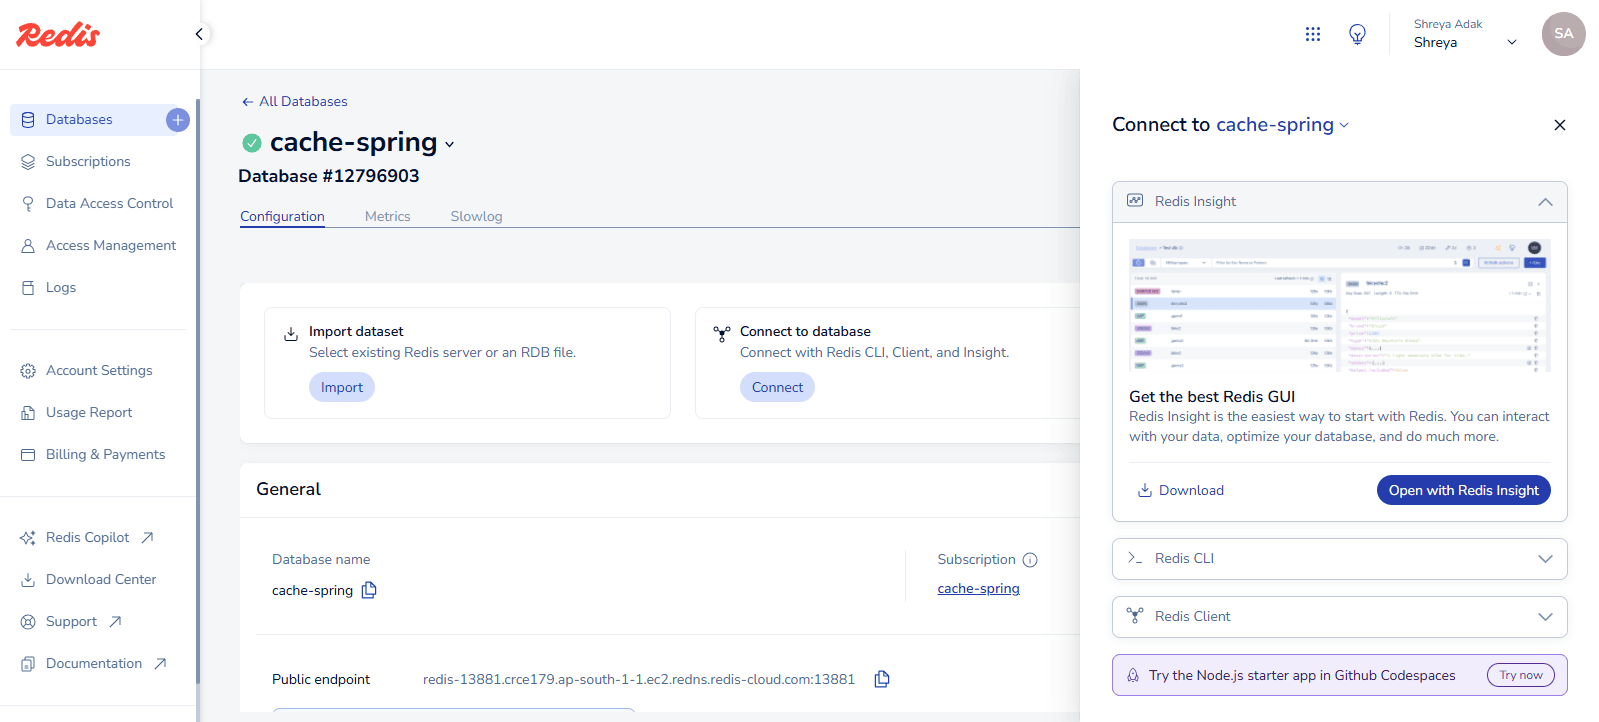
After downloading and installing it… if you click on Open with Redis Insights you can get a pop-up message. And click on Open URL:redisinsight .

You will connect with your created database.

- Configure Redis using the generated port, host, and password after creating the database.
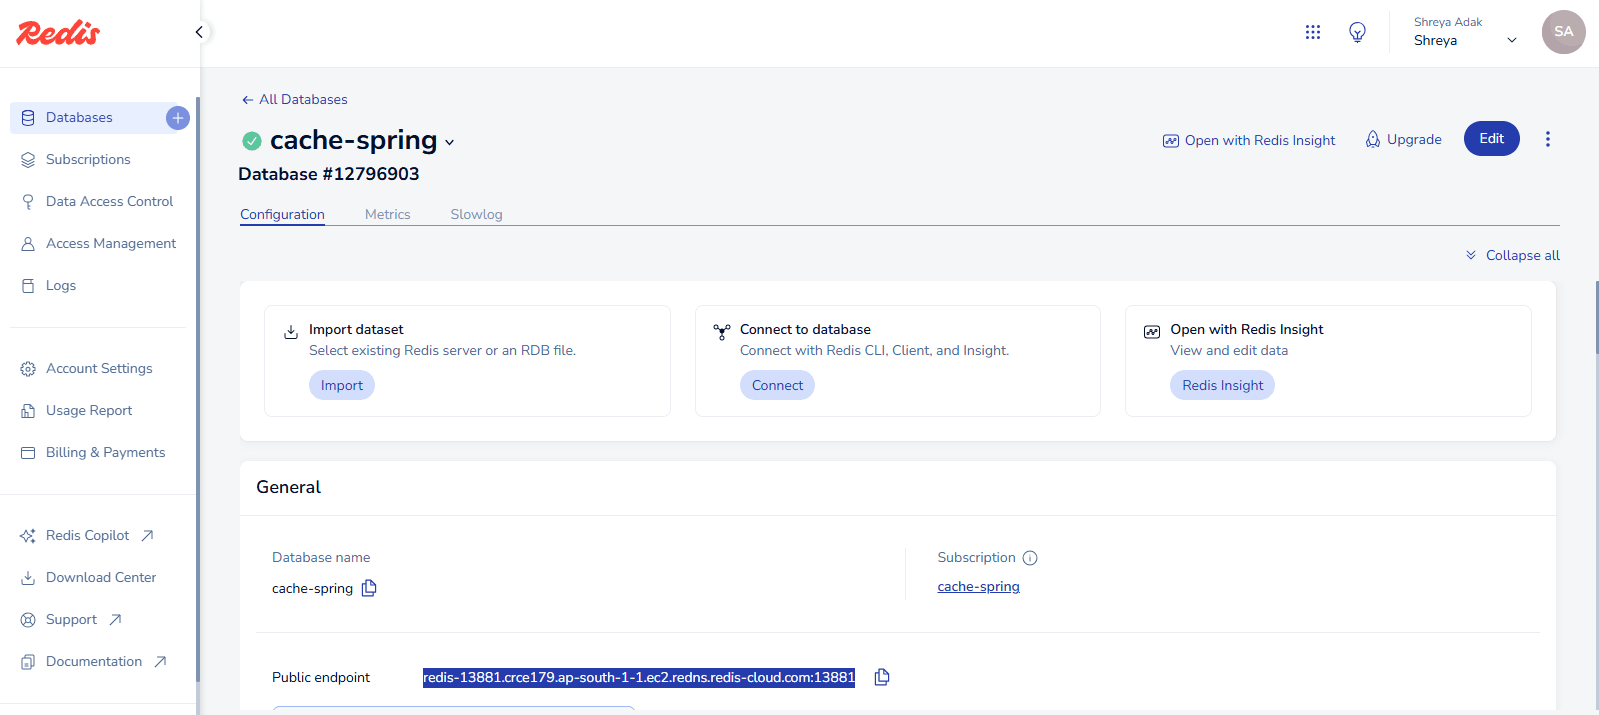
- Just copy the public endpoint. And go to the
application.propertiesfile and set the public endpoint as a host just remove the “:” to the after portion and set that remove number of 4 or 5 digits as a port.spring.data.redis.host=redis-13881.crce179.ap-south-1-1.ec2.redns.redis-cloud.com spring.data.redis.port=13881
- Just copy the public endpoint. And go to the
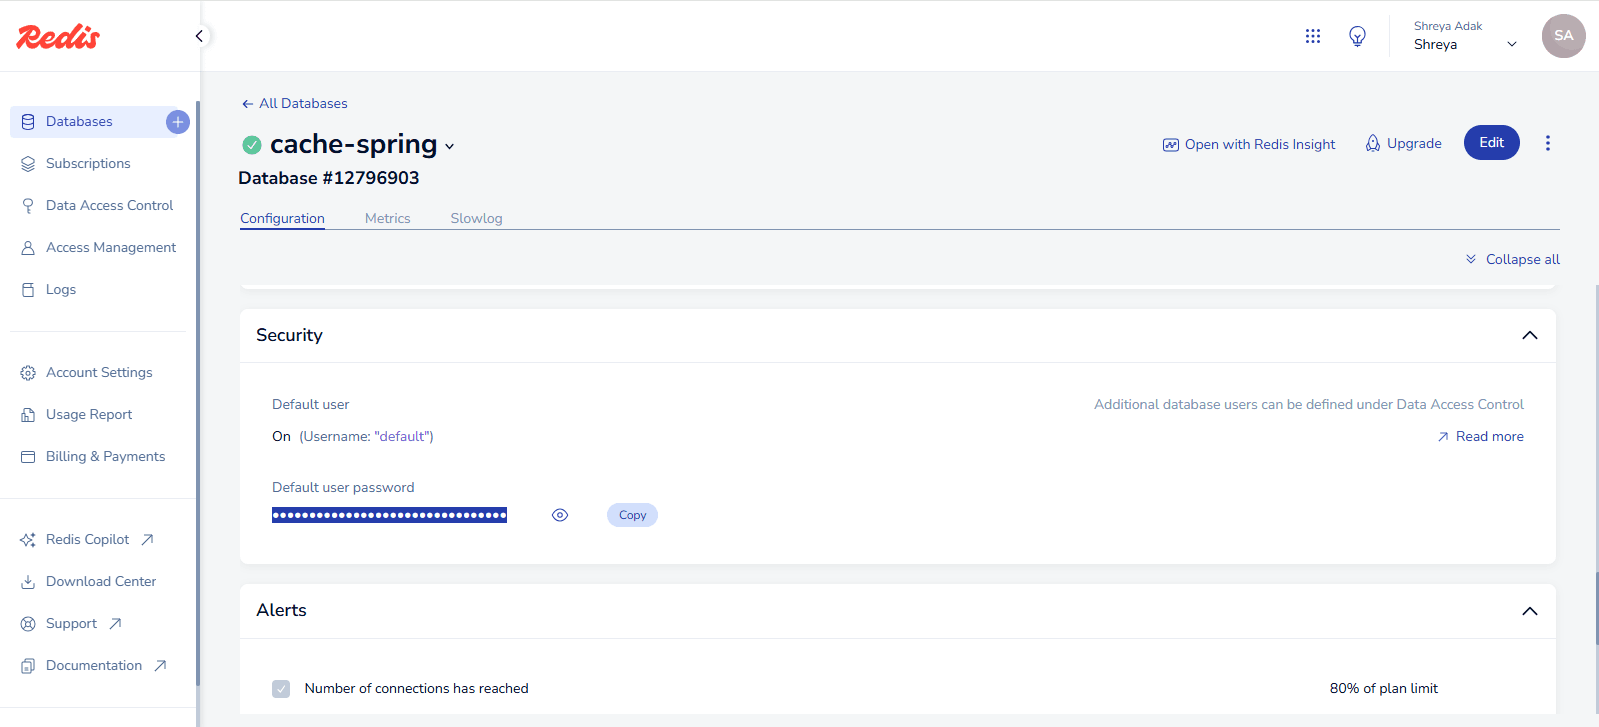
After scrolling down you can find out a password will also be generated. Set it as a password. spring.data.redis.password=your password
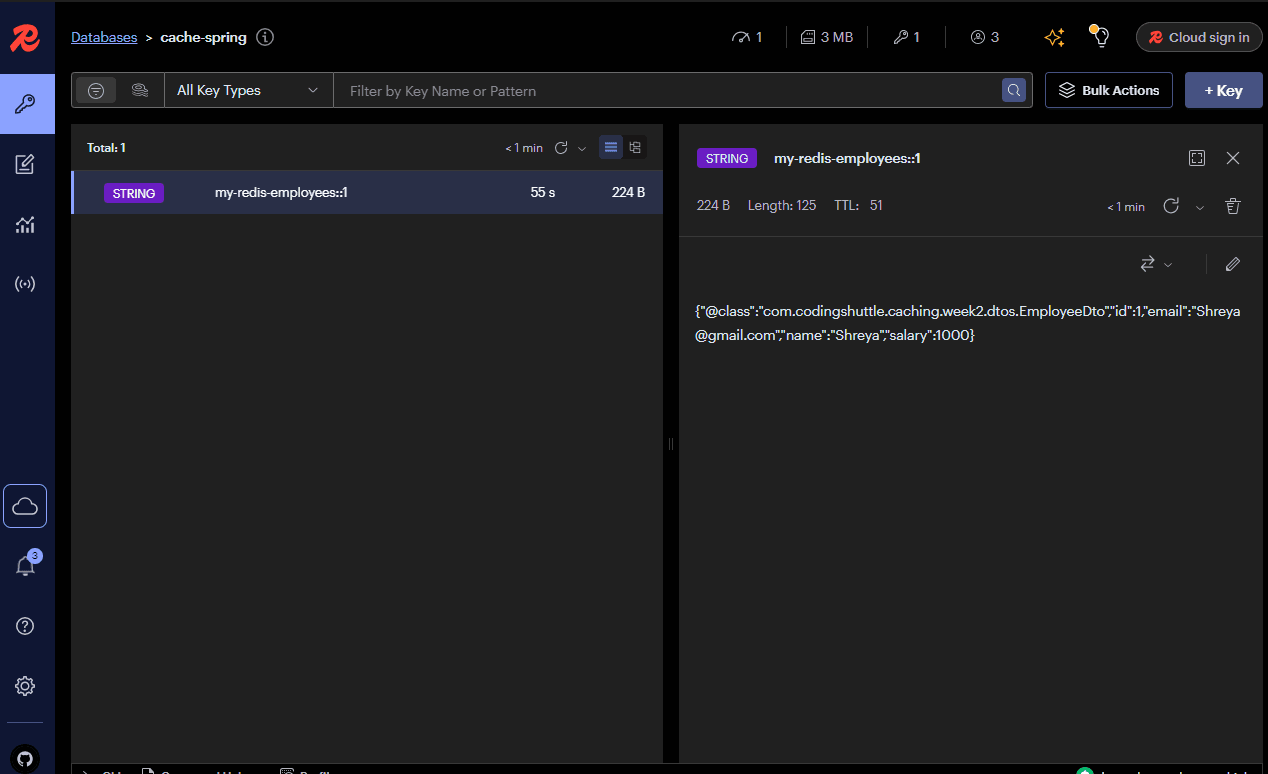
- After completing all these settings, you will successfully connect to Redis Insights. When you hit the endpoint to create new data, it will be created. You can then view it in the 'Redis Insights' app, and after refreshing, the data will be stored.
RedisCacheManager#
RedisCacheManager is a Spring implementation of the CacheManager interface, designed to simplify caching with Redis. It works seamlessly with Spring's caching annotations (@Cacheable, @CachePut, and @CacheEvict) to manage caching operations efficiently.
- Key Features:
- Abstracts caching logic for easy integration.
- Supports centralized management of multiple caches.
- Allows configuration of cache-specific properties like time-to-live (TTL) and eviction policies.
- Integrates with Redis for high-performance caching.
- Setup Steps:
- Add Dependencies: Include the
spring-boot-starter-data-redisdependency in your project. - Enable Caching: Use
@EnableCachingin the main application class. - Configure RedisCacheManager:
- Define default TTL and cache behavior in a custom configuration class.
- Add Dependencies: Include the
Redis Cache Configuration:
RedisCacheConfiguration.defaultCacheConfig(): This provides the default configuration for the cache. You can modify it with various options such as cache prefix, TTL, key-value serialization, and more.prefixCacheNameWith("my-redis-"): Adds a prefix to the cache names. For example, a cache namedmyCachewill becomemy-redis-myCachein Redis.entryTtl(Duration.ofSeconds(60)): Sets the time-to-live (TTL) for cache entries to 60 seconds. After 60 seconds, the cache entry will expire.enableTimeToIdle(): Enables the idle timeout, so cache entries will expire if not accessed within a certain period.serializeKeysWith(...): This sets the serialization strategy for the cache keys. In this case, it uses aStringRedisSerializer, which means the cache keys will be stored as strings.serializeValuesWith(...): This sets the serialization strategy for cache values. Here, you're usingGenericJackson2JsonRedisSerializer, which serializes the values to JSON format. This is useful if you're storing complex objects in the cache.- Optionally, specify unique settings for individual caches.
- Annotate Methods: Use
@Cacheableto cache method results,@CachePutto update cache, and@CacheEvictto remove cache entries.
Output:#
When you are trying to hit the endpoint to create data you can see the output inside RedisInsight.
Conclusion#
This article covers the integration of Redis Cache with Spring Boot to improve application performance by reducing database load and speeding up data retrieval. It explains how to install Redis, configure it, and use RedisCacheManager for efficient caching. Caching annotations like @Cacheable, @CachePut, and @CacheEvict enable scalable, high-performance caching solutions.