Kafka Schema registry with Confluent
Introduction#
In this blog, we will explore Kafka Schema Registry with Confluent. Imagine a scenario where you have hundreds of microservices using Kafka for inter-service communication. Managing the event schema formats across these microservices can become a significant challenge. If an event schema is modified, such as adding or removing fields, you would need to notify all the microservices to use the updated schema. This approach is inefficient and can lead to issues as the system scales.
This is where Kafka Schema Registry comes into play. It provides a centralized system to manage and enforce event schemas, ensuring consistency across all microservices. Schema Registry helps producers adhere to a defined schema, preventing bad messages from being pushed into Kafka topics. This reduces downstream consumer errors and simplifies data governance in a distributed messaging environment.
How Kafka Schema Registry Works#
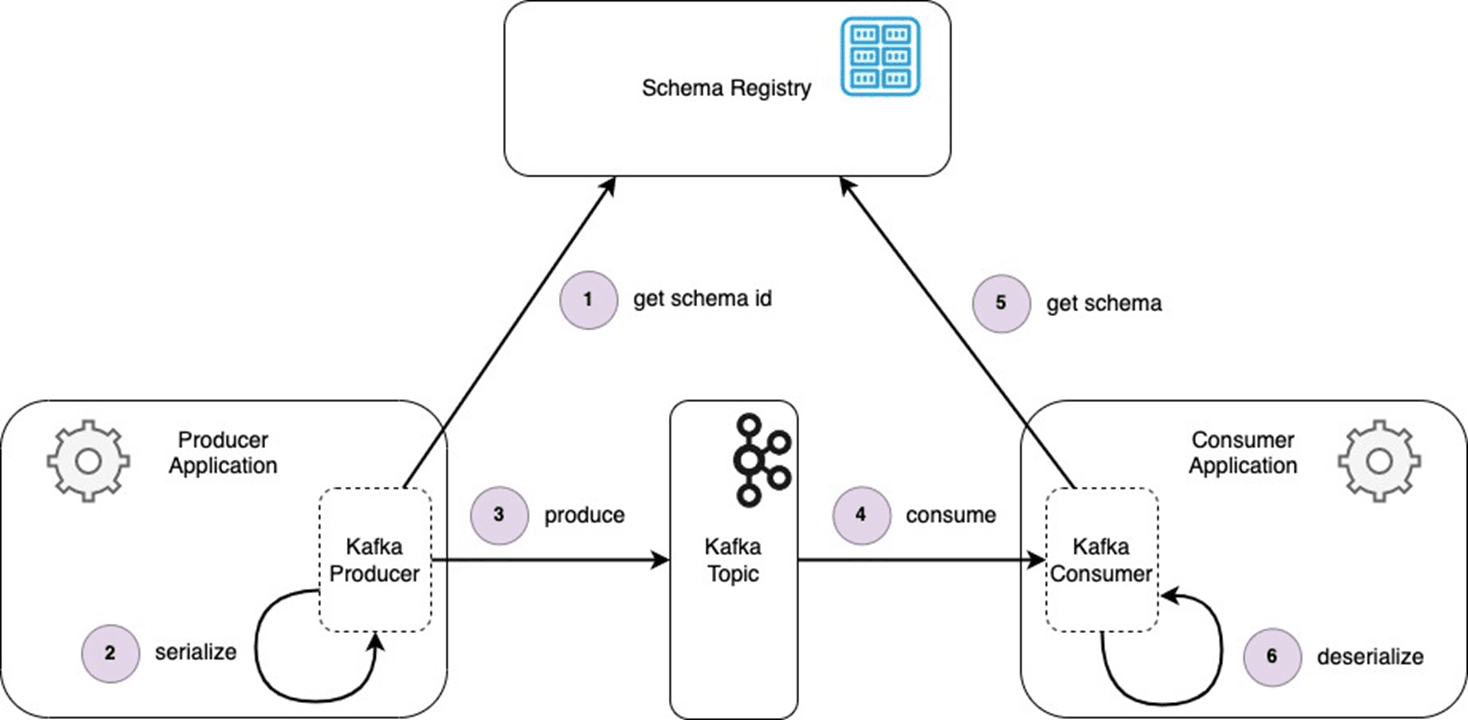
Producer Workflow
When a producer sends data (events or messages) to a Kafka topic, it first checks the Schema Registry for the schema ID associated with the data. The Schema Registry serves as a centralized repository that all microservices can access.
- The producer serializes the data using the schema obtained from the Schema Registry.
- Once serialized, the producer sends the data to the Kafka topic.
Consumer Workflow
When a consumer retrieves data from a Kafka topic:
- It first queries the Schema Registry to obtain the schema ID associated with the data.
- Using the schema, the consumer deserializes the data and processes it.
By using the Schema Registry, both producers and consumers operate seamlessly without needing to maintain or hard-code event schemas. This ensures compatibility and reduces the overhead of manually syncing schema changes across microservices.
Steps to add Kafka Registry locally with your project#
Note: We will be using the same project, user-service and notification-service, introduced in our previous blog, “Advanced Kafka Configuration.” In this setup:
- A POST request to
user-servicecreates a user, saves the user in the database, and publishes aUserCreatedEventto a Kafka topic. - The
notification-serviceconsumes messages from theuser-created-topicand logs the JSON object to the console.
We will enhance the existing project by adding Avro schema support, eliminating the need to maintain the UserCreatedEvent class separately in both services, as they will be auto-generated.
Step-1: Run the confluent schema registry server using the docker-compose.yml#
To set up a Kafka Schema Registry locally, start by running the Confluent Schema Registry server using the following docker-compose.yml file:
You can get this file from the link:- https://github.com/confluentinc/cp-all-in-one/blob/7.7.1-post/cp-all-in-one-kraft/docker-compose.yml
Create the docker-compose.yml file
Place the above YAML content into a file named docker-compose.yml at the root level of your project.
Run the Docker-Compose
Use the following command in your terminal:
This will spin up the Kafka broker, Schema Registry, and other components locally.
The provided docker-compose.yml file sets up a complete local environment for working with Kafka and its ecosystem. Each service defined in the file plays a crucial role in enabling seamless data streaming, schema management, and processing. Below is an explanation of each service and its significance in the setup.
1. Kafka Broker
- Image:
confluentinc/cp-kafka:7.7.1 - Purpose: Kafka brokers are the core components that handle the messaging functionality. They store, process, and serve messages between producers and consumers.
- Key Configuration:
KAFKA_LISTENERSandKAFKA_ADVERTISED_LISTENERS: Configure the broker's communication endpoints.KAFKA_OFFSETS_TOPIC_REPLICATION_FACTOR: Ensures offsets are replicated to prevent data loss.CLUSTER_ID: A unique identifier for the Kafka cluster.
2. Schema Registry
- Image:
confluentinc/cp-schema-registry:7.7.1 - Purpose: The Schema Registry stores and validates Avro schemas used by Kafka topics to ensure compatibility between producers and consumers.
- Key Configuration:
SCHEMA_REGISTRY_HOST_NAME: Hostname for the Schema Registry.SCHEMA_REGISTRY_KAFKASTORE_BOOTSTRAP_SERVERS: Points to the Kafka broker to store schema data.- Port: Exposed on
8081for client communication.
3. Kafka Connect
- Image:
cnfldemos/cp-server-connect-datagen:0.6.4-7.6.0 - Purpose: Kafka Connect simplifies integration with external systems, allowing data to flow between Kafka topics and external data sources like databases or cloud storage.
- Key Configuration:
CONNECT_BOOTSTRAP_SERVERS: Points to the Kafka broker.CONNECT_VALUE_CONVERTER: Specifies Avro as the data format and uses the Schema Registry.CONNECT_PLUGIN_PATH: Defines where additional connectors are located.
4. Control Center
- Image:
confluentinc/cp-enterprise-control-center:7.7.1 - Purpose: Confluent Control Center provides a web-based interface for monitoring and managing Kafka, Schema Registry, and Kafka Connect.
- Key Configuration:
CONTROL_CENTER_BOOTSTRAP_SERVERS: Points to the Kafka broker.CONTROL_CENTER_SCHEMA_REGISTRY_URL: URL of the Schema Registry.- Port: Exposed on
9021for accessing the Control Center UI.
5. ksqlDB Server
- Image:
confluentinc/cp-ksqldb-server:7.7.1 - Purpose: ksqlDB is a real-time streaming SQL engine that allows you to query and process data in Kafka topics.
- Key Configuration:
KSQL_BOOTSTRAP_SERVERS: Points to the Kafka broker.KSQL_KSQL_SCHEMA_REGISTRY_URL: URL of the Schema Registry for handling Avro data.- Port: Exposed on
8088for ksqlDB server access.
Why These Components Are Needed
- Kafka Broker: Central messaging service.
- Schema Registry: Ensures data consistency and compatibility when using Avro or other structured data formats.
- Kafka Connect: Simplifies integration with other systems, enabling data ingestion and export.
- Control Center: Provides monitoring, configuration, and debugging capabilities for Kafka.
- ksqlDB Server: Facilitates real-time data processing and querying of Kafka topics.
By following these steps, you’ll have a fully functional Kafka Schema Registry setup integrated with your local environment.
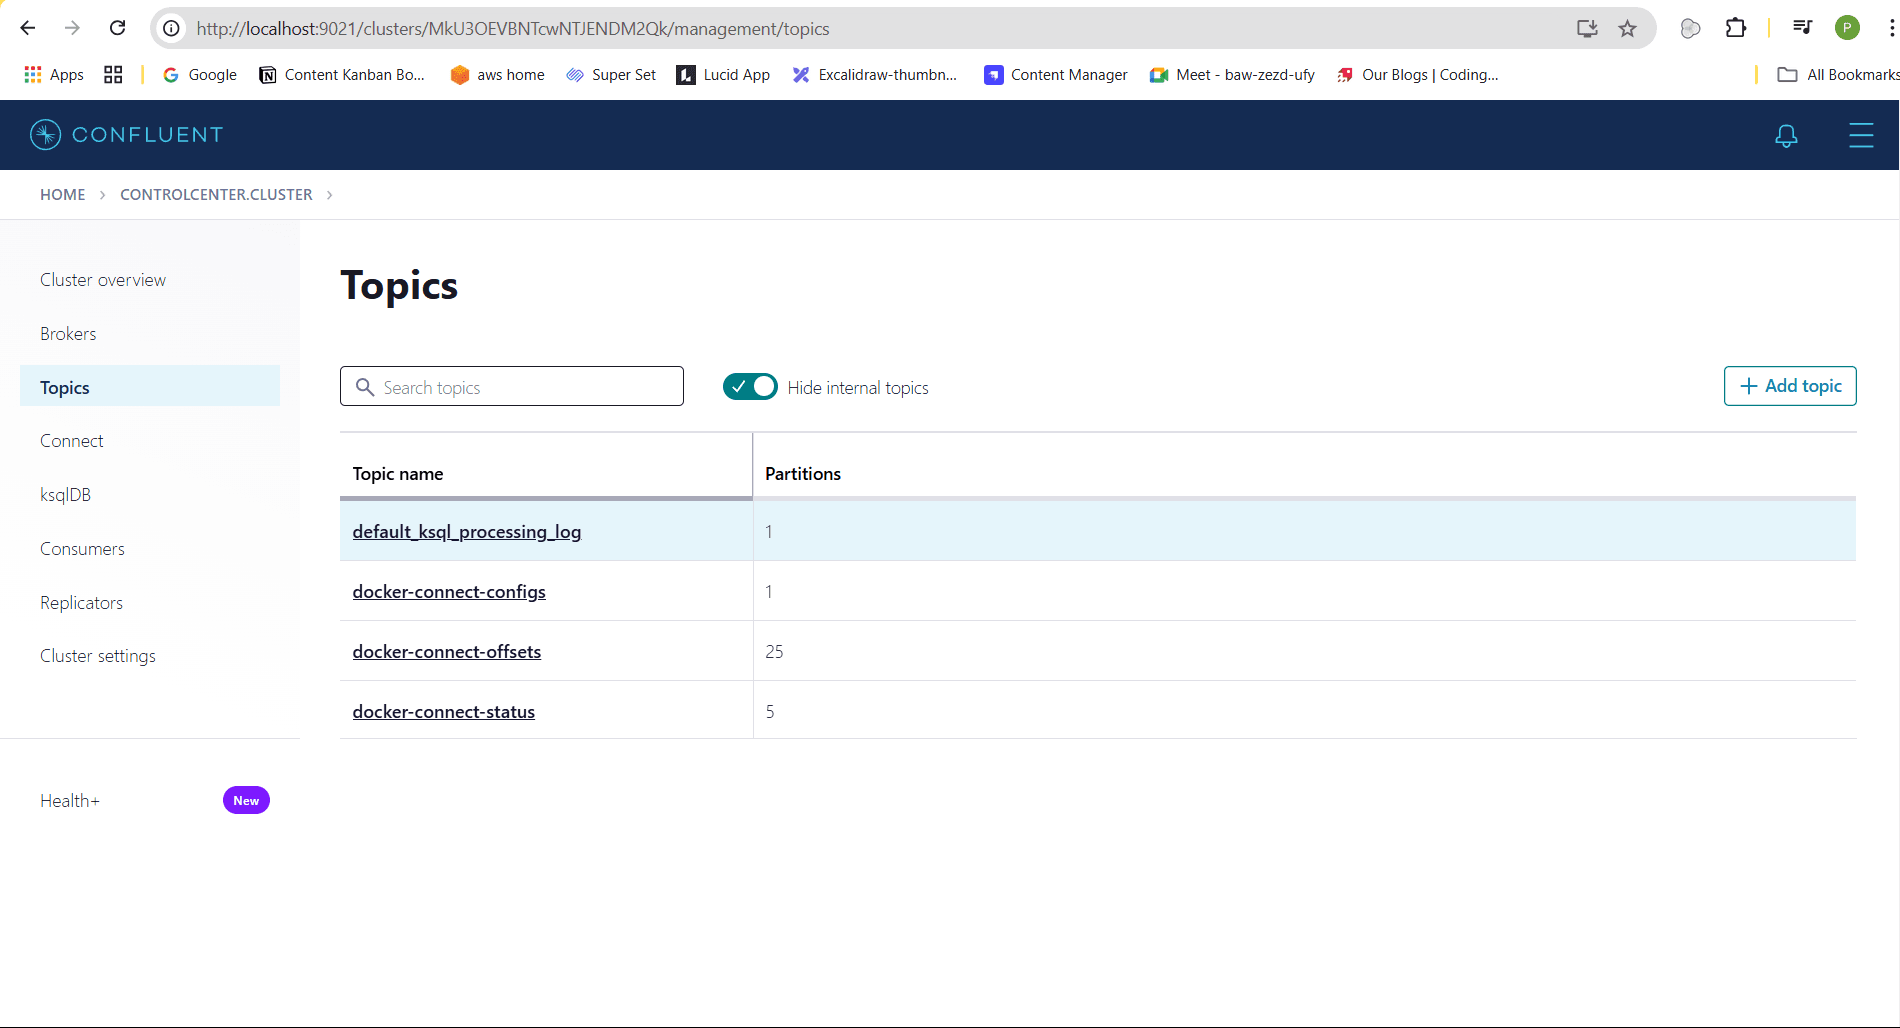
You can visit the confluent control center at:- https://localhost:9021, it is similar to Kafbat UI.
Step 2: Add the Avro schema files in the producer and consumer resources#
In both the user-service (producer) and notification-service (consumer), create an avro folder inside the resources directory. Add the following schema file named user-created-event.avsc to this folder.
This schema defines the structure of the UserCreatedEvent with three fields:
id: Alongfield to store the user ID.name: Astringfield for the user's name.email: Astringfield for the user's email address.
The "namespace" field ("com.codingshuttle.learnKafka.event") specifies the package where the generated UserCreatedEvent Java class will be created. This ensures that the class is placed in the correct package hierarchy (com.codingshuttle.learnKafka.event) in both services.
By placing this schema in both services, you ensure a consistent event format across the producer (user-service) and consumer (notification-service).
Step 3: Add the avro, confluent schema registry related dependencies into the producer and consumer microservices.#
To generate the UserCreatedEvent class from the schema user-created-event.avsc file, additional dependencies and a plugin must be added to your project. These dependencies ensure the class is automatically generated during the Maven build lifecycle (mvn install phase). Add the following to the repositories section of your pom.xml:
Add the required dependencies:
Add the Avro Maven Plugin to the plugins section:
This plugin will generate UserCreatedEvent class file using the user-created-event.avsc file during mvn install phase.
Explanation:#
Dependencies:
kafka-avro-serializerandkafka-schema-registry-client: Enable serialization and interaction with the Schema Registry.avro: Provides support for working with Avro schemas.
Avro Maven Plugin:
This plugin scans the specified directory for .avsc files and generates corresponding Java classes during the generate-sources phase.
sourceDirectory: Points to the folder containing Avro schema files.outputDirectory: Specifies where the generated Java classes will be placed.
By adding these configurations, the UserCreatedEvent Java class will be automatically generated during the build process, ensuring consistency and reducing manual effort.
Step 4: Build the project with the install lifecycle event to auto build the Avro java class files.#
Run the Maven install command for both the User Service and Notification Service. This step ensures the UserCreatedEvent class file is automatically generated from the Avro schema during the build process.
Steps:
Navigate to the project directory of each service (User Service and Notification Service).
Execute the following Maven command:
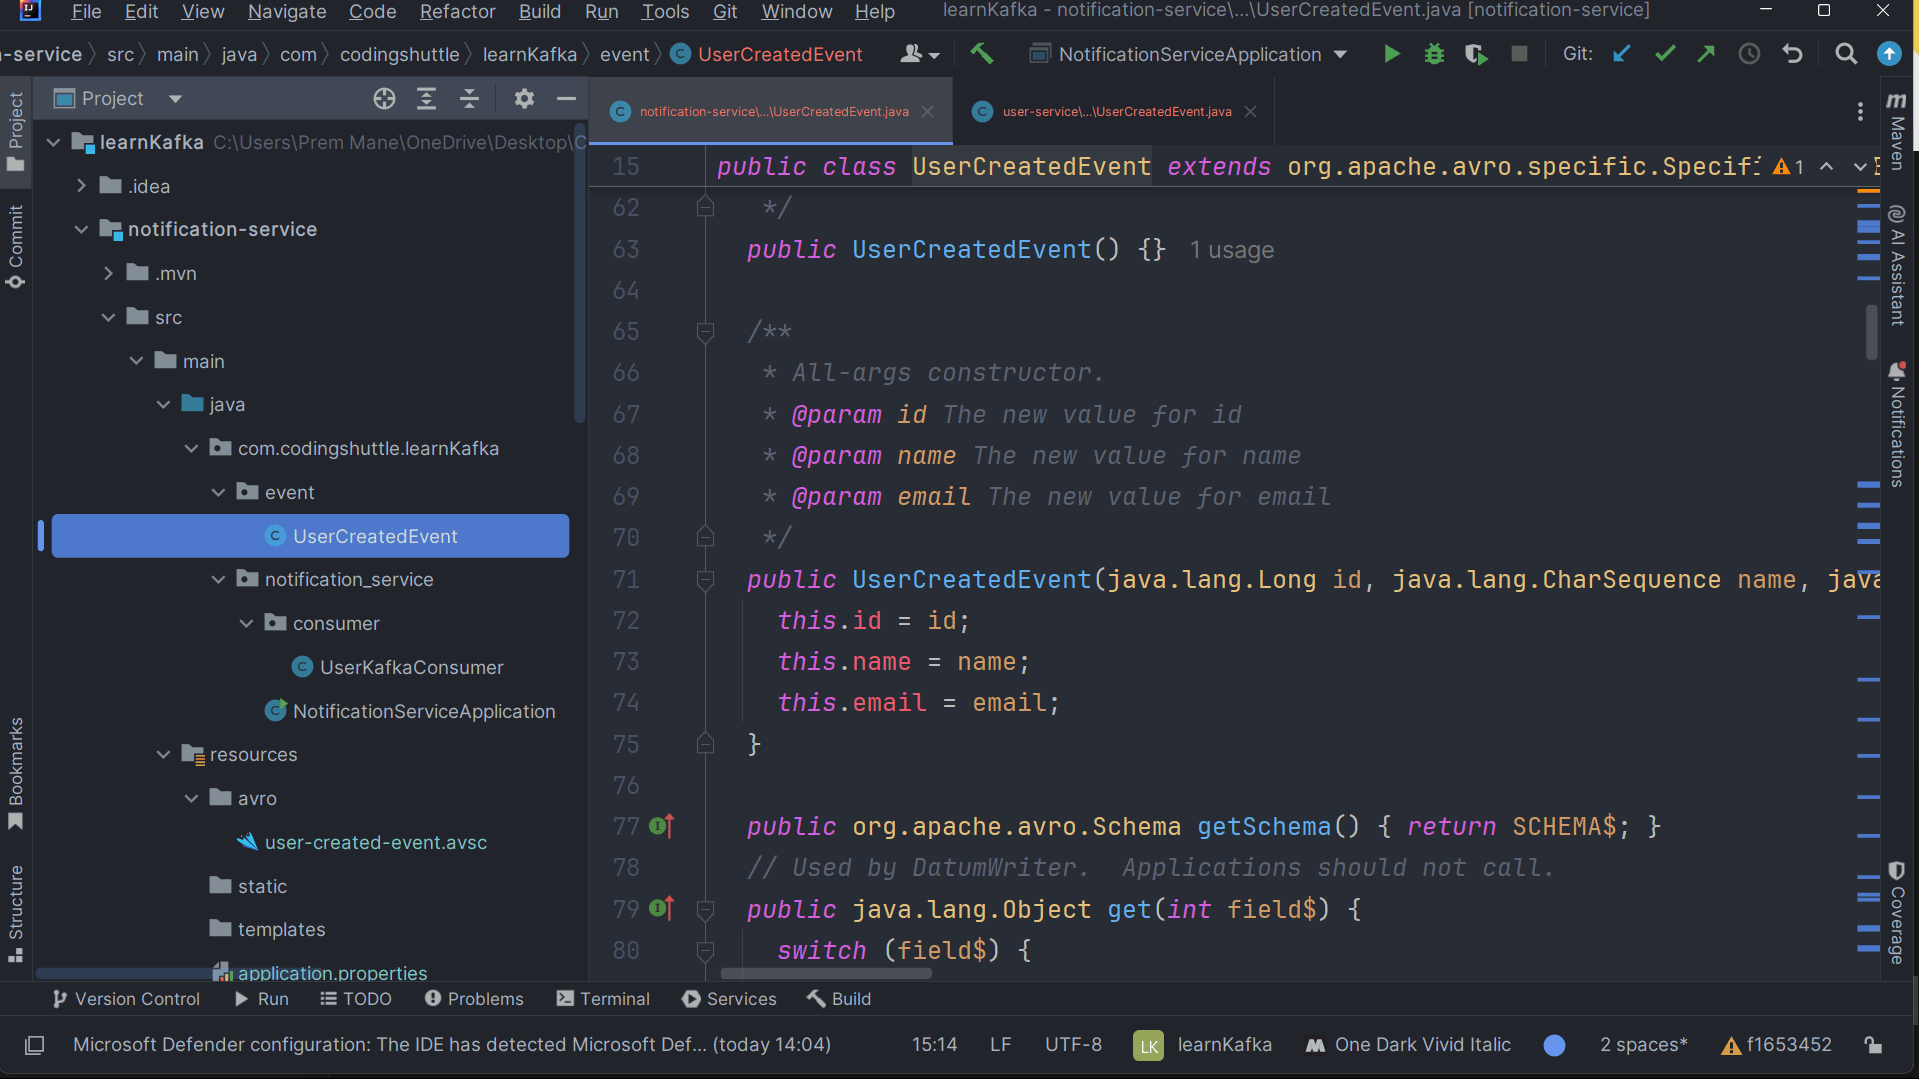
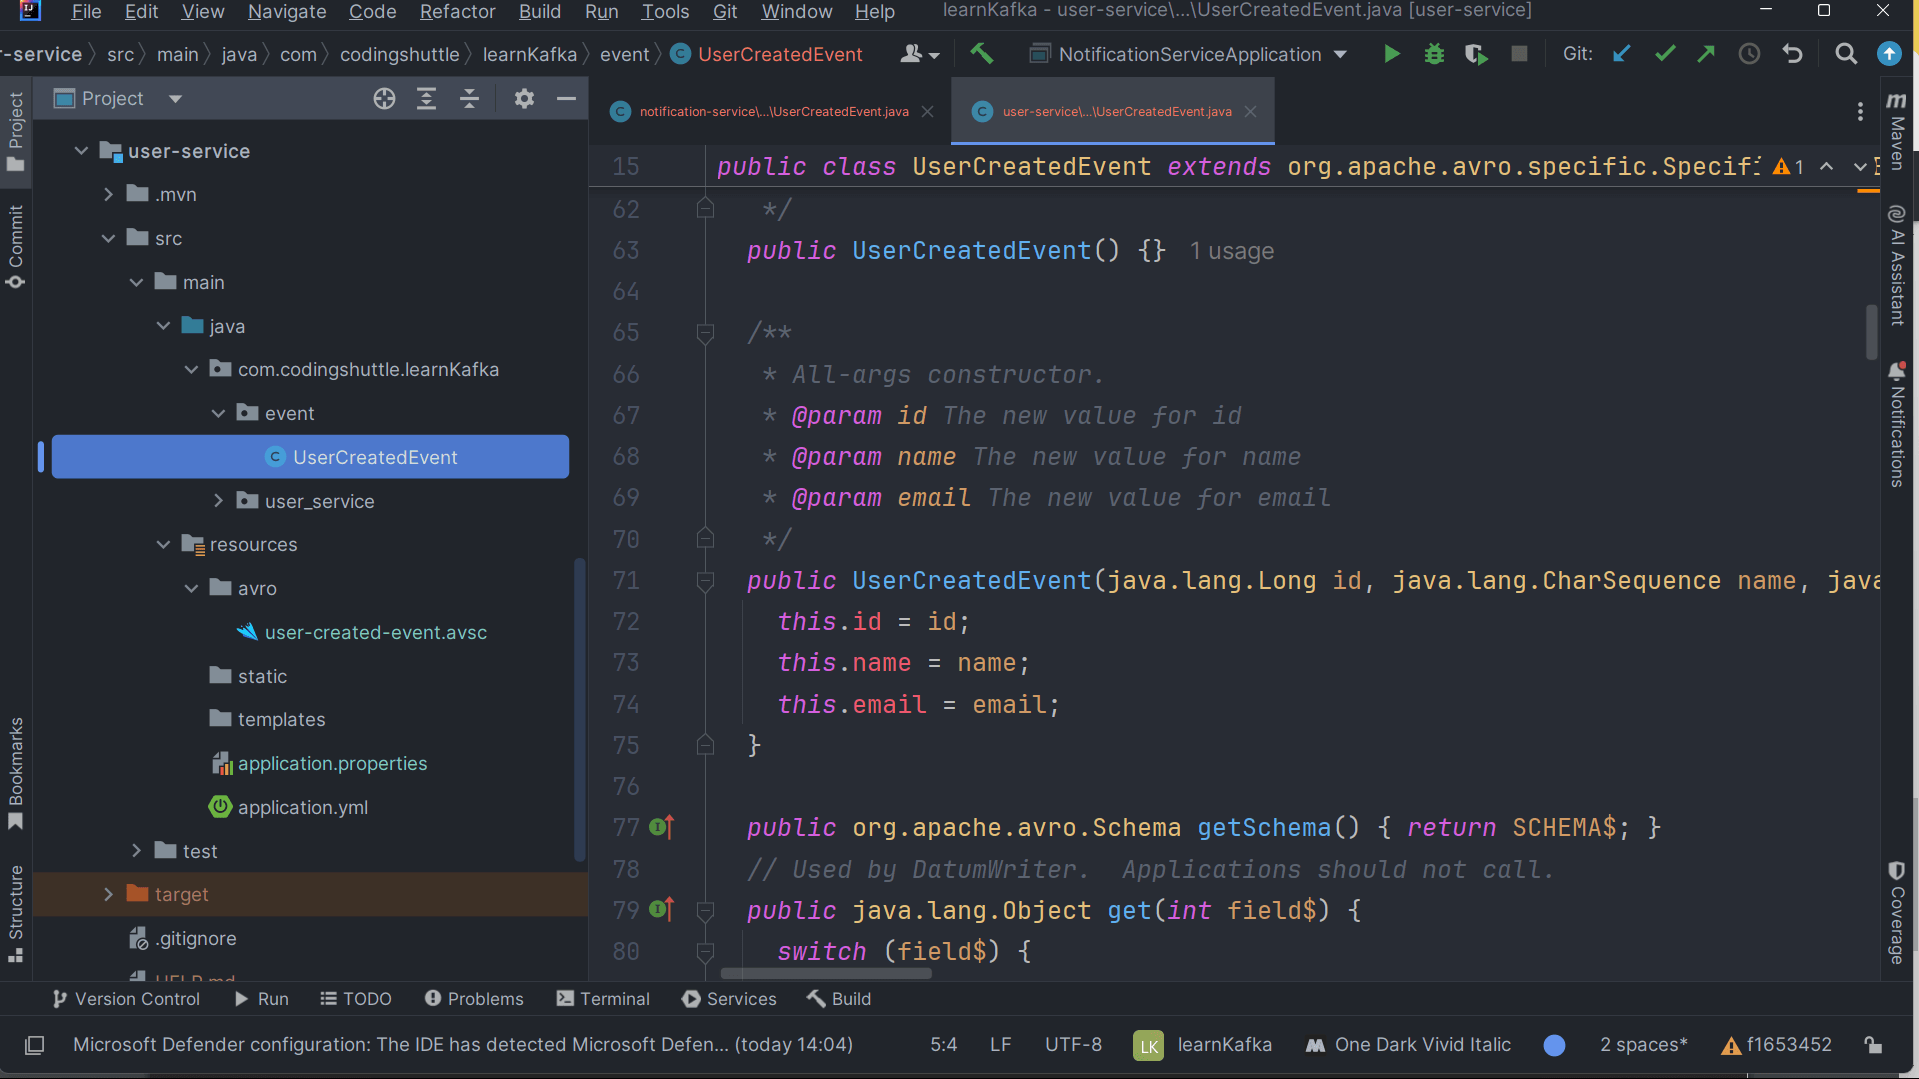
Upon successful execution, the UserCreatedEvent class file will be generated in the specified outputDirectory as configured in the Avro Maven Plugin.
Generated UserCreatedEvent Class in Notification Service:
Generated UserCreatedEvent Class in User Service:
Utilizing the Generated UserCreatedEvent Class in the User Service to produce messages.#
The following example demonstrates how to integrate the generated UserCreatedEvent class into the User Service to publish user creation events to Kafka:
The KafkaTemplate<Long, UserCreatedEvent> is used to send the event message to the Kafka topic, ensuring the UserCreatedEvent follows the schema defined in the Avro file.
Using the Generated UserCreatedEvent Class in the Notification Service to Consume Messages#
In the Notification Service, the generated UserCreatedEvent class is utilized to consume messages from the Kafka topic and log the user creation event.
The UserCreatedEvent class, generated from the Avro schema, is directly used in the listener method to ensure the received messages conform to the expected structure. This eliminates any need for manual deserialization or object mapping.
Step 5: Change the serializer and deserializer to the KafkaAvroSerializer#
In this step, we will configure the Kafka Avro serializer and deserializer in both the Notification Service (Consumer) and User Service (Producer). The Kafka Avro serializer and deserializer will replace the default JSON serializer and deserializer to handle Avro-encoded messages. Additionally, we will specify the schema registry URL in both services to ensure proper serialization and deserialization.
Notification Service (Consumer) yml file
Explanation:
value-deserializer: io.confluent.kafka.serializers.KafkaAvroDeserializer: Configures the consumer to deserialize messages from Kafka in Avro format using the Confluent Avro deserializer.schema.registry.url: Points to the URL of the Schema Registry, which stores the Avro schema used for serialization and deserialization.specific.avro.reader: Set totrueto enable the use of generated Avro classes, likeUserCreatedEvent.
User Service (Producer) yml file
Explanation:
value-serializer: io.confluent.kafka.serializers.KafkaAvroSerializer: Configures the producer to serialize messages into Avro format before sending them to Kafka.schema.registry.url: Specifies the Schema Registry URL, which allows the producer to retrieve and register the Avro schema.
Running Both User and Notification Service#
After completing the steps above, we will now run both the User and Notification microservices. Initially, you will see that the Kafka topic is created in the Control Center, but there will be no schema associated with the topic, and no messages will be present. The schema will become visible once we trigger the Create User POST request, which will send a message to the Kafka topic.
Here's the UserController with a simple endpoint to create a user that we have defined:
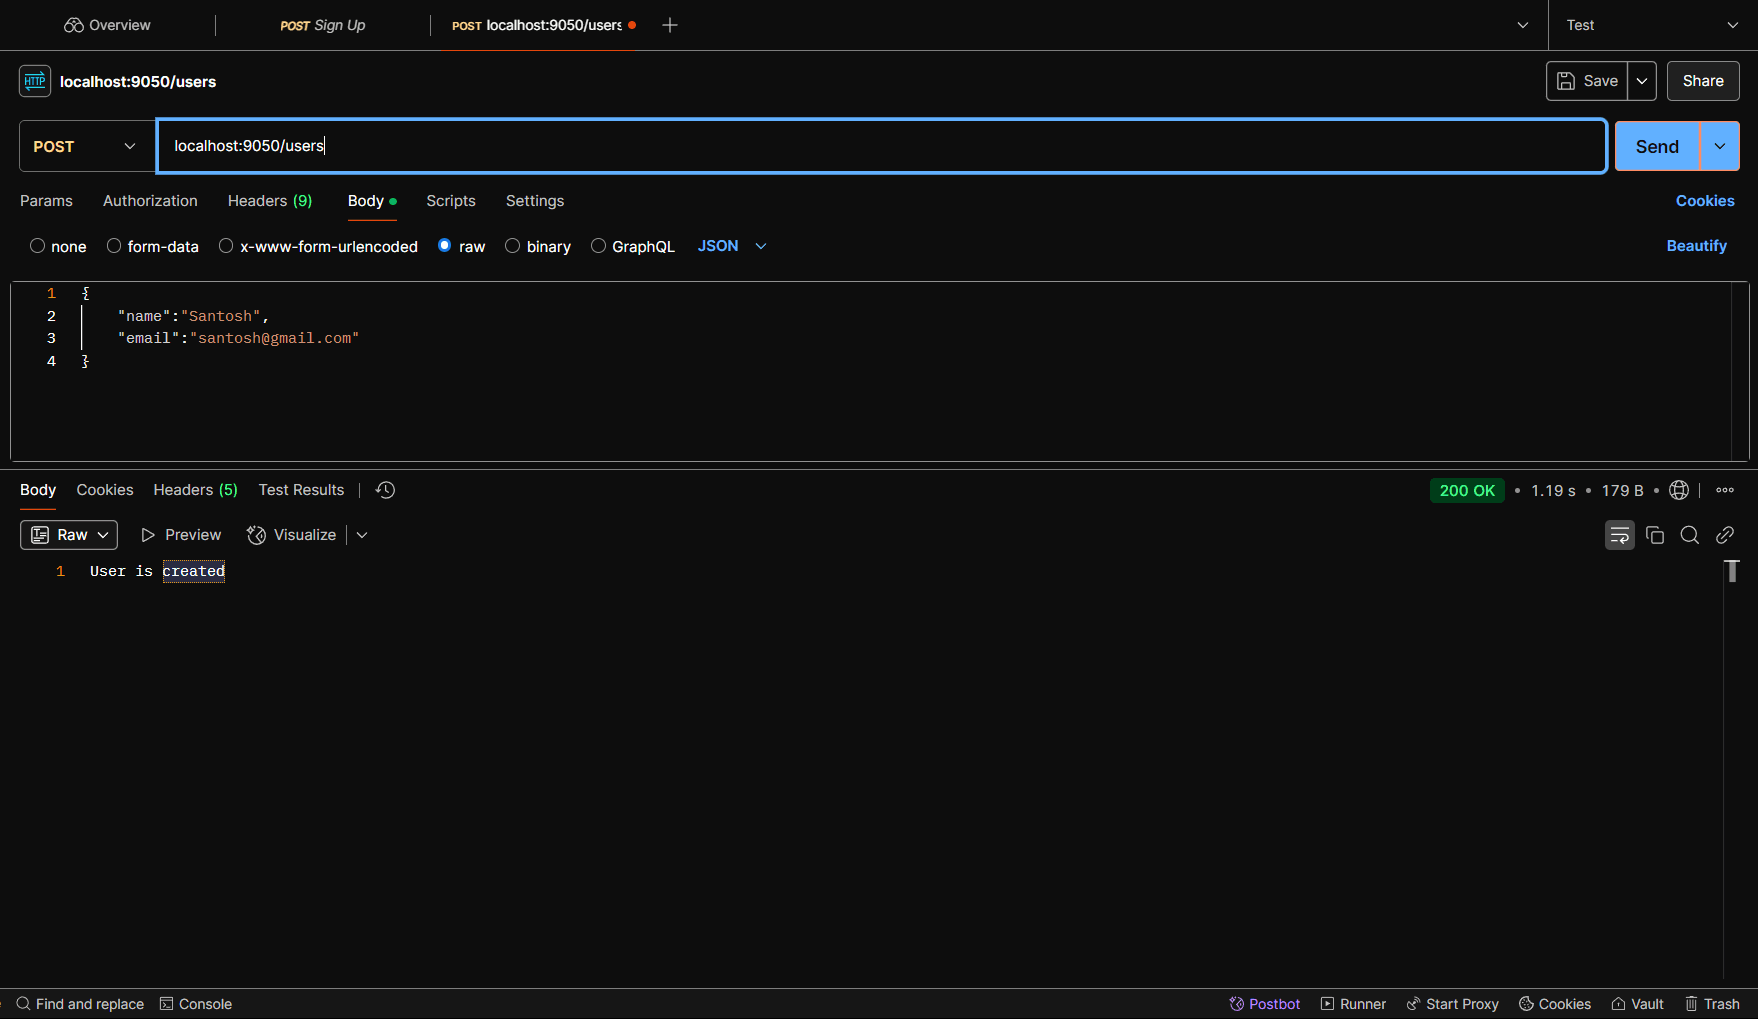
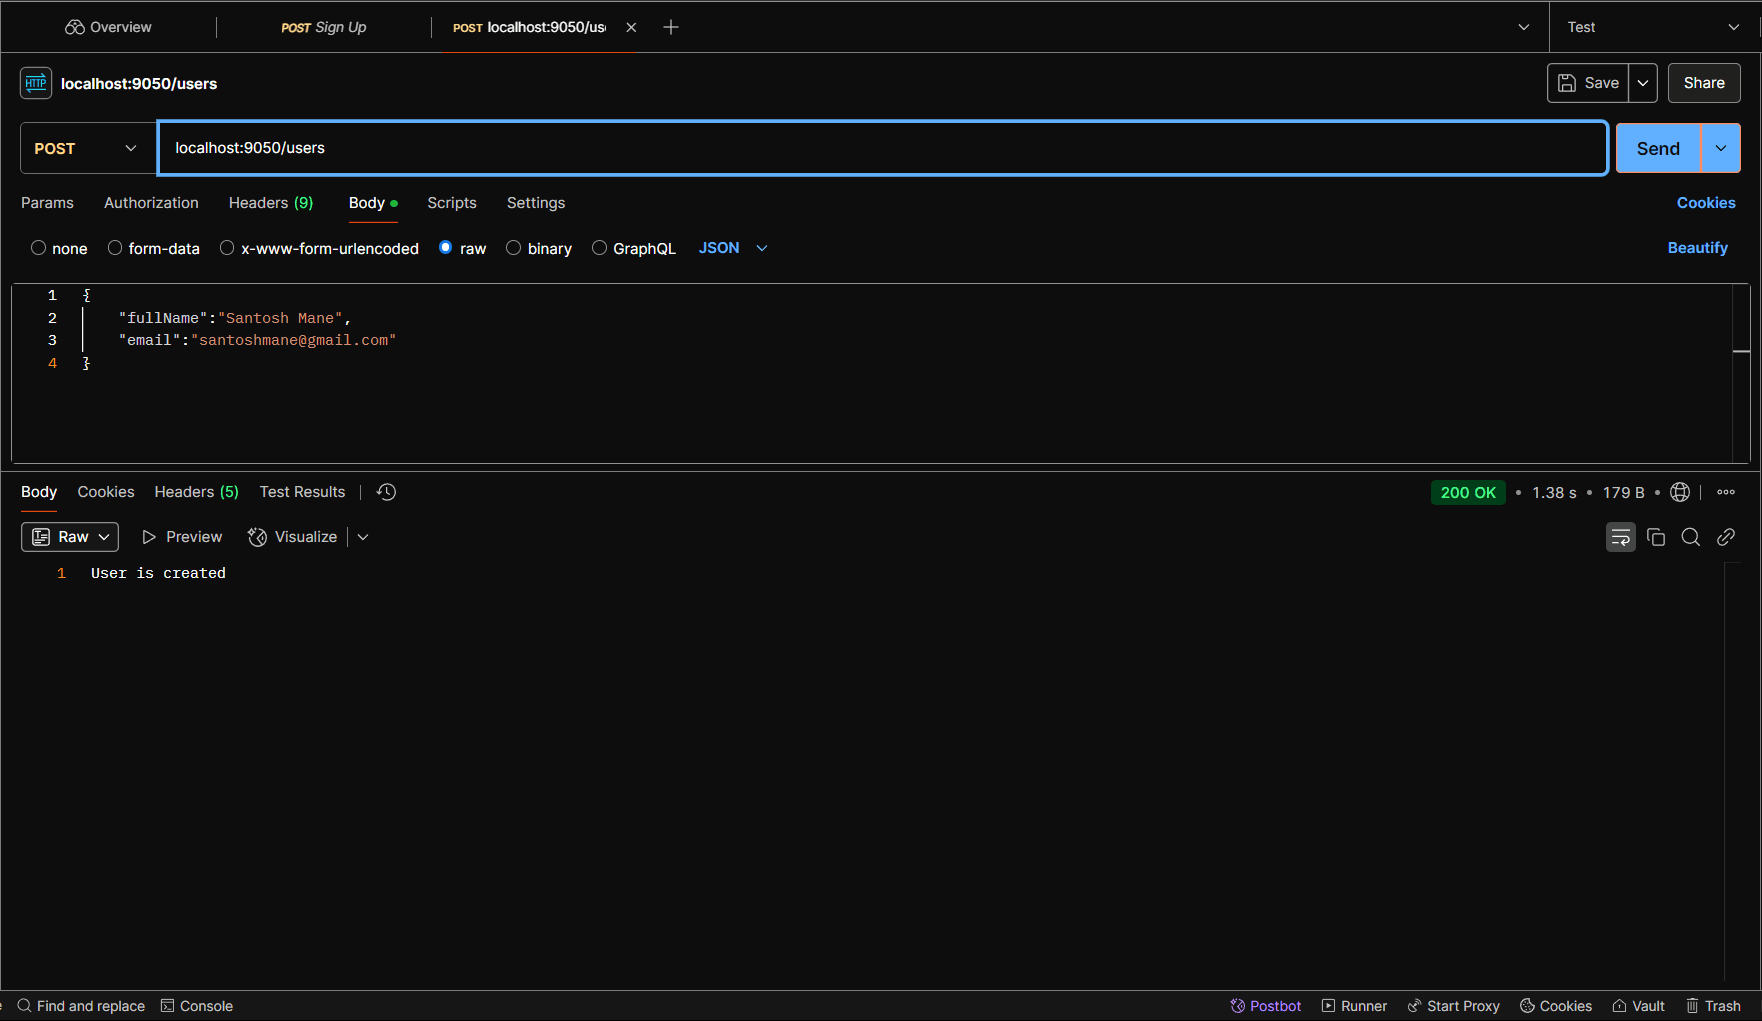
When you hit the POST request to create a user, you'll receive a 200 OK response with the message: User is created.
Once this request is made, the message will be published to the user-created-topic in the Control Center, and you will see that the schema has been registered.
The schema will have an ID associated with it:
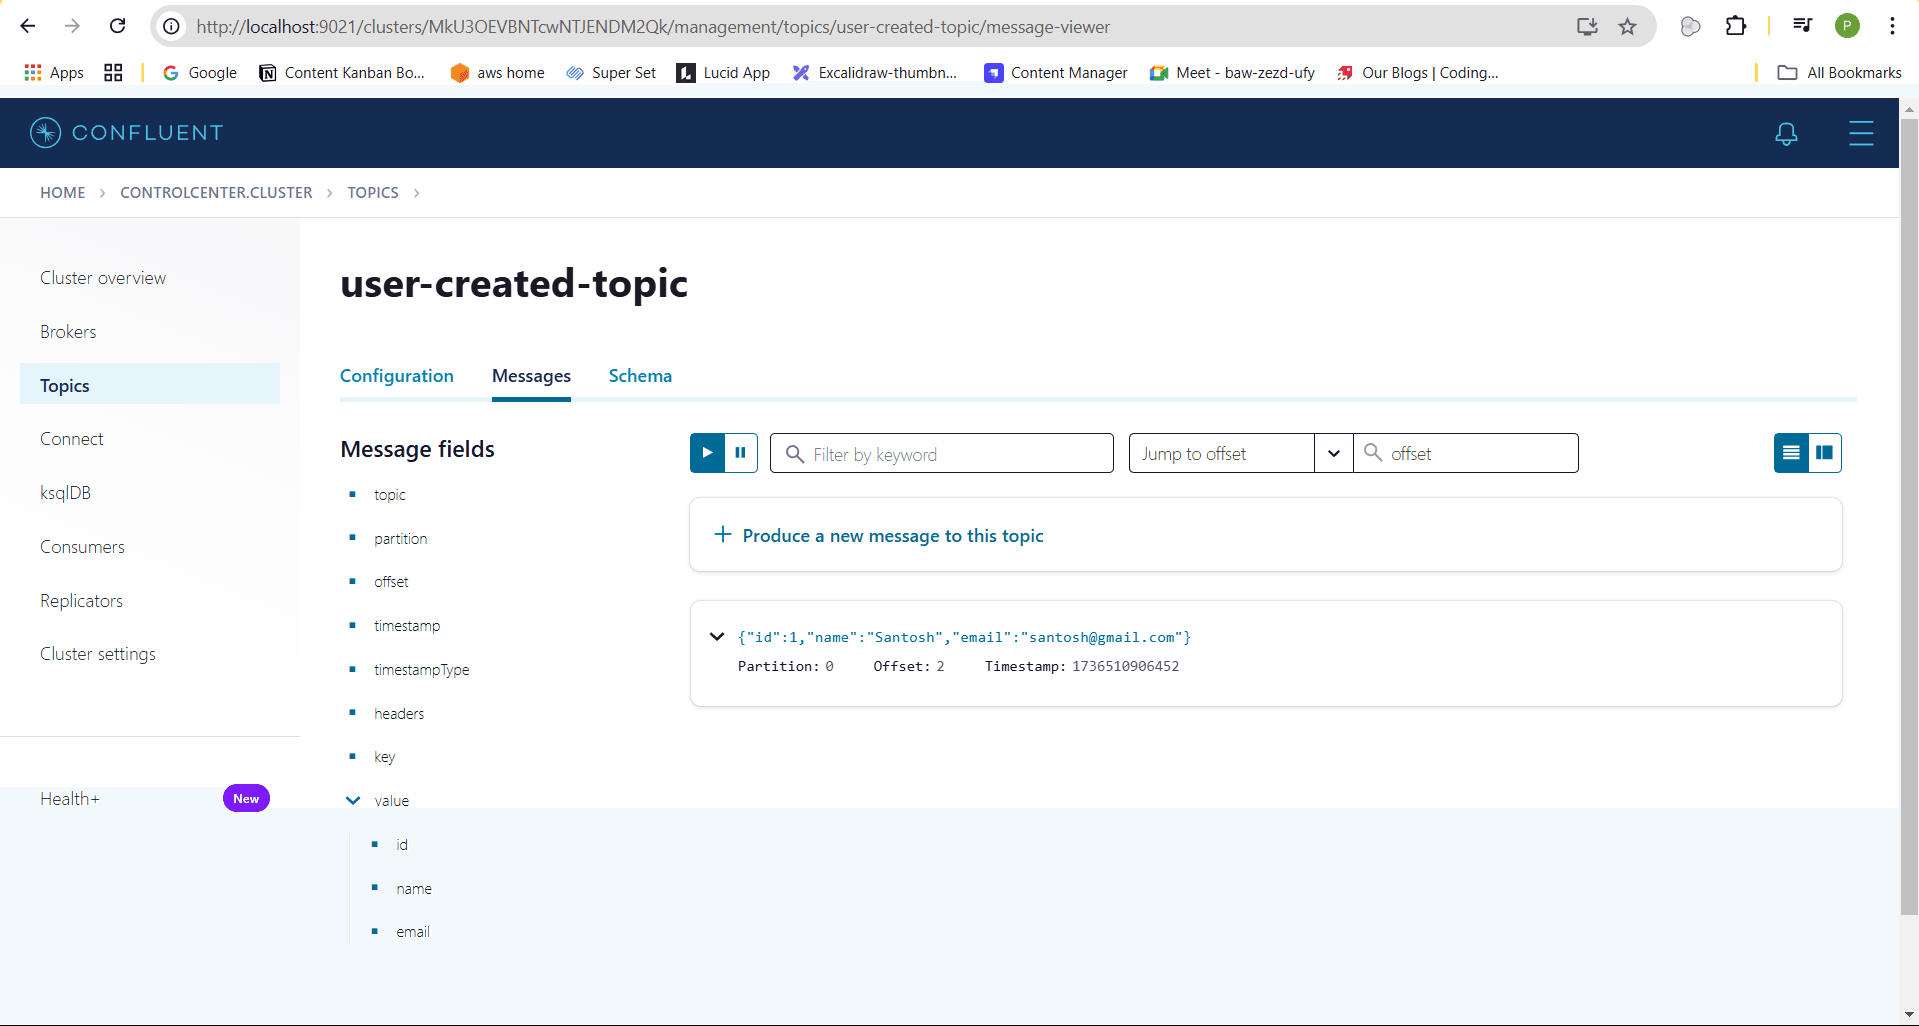
Schema with id: 1
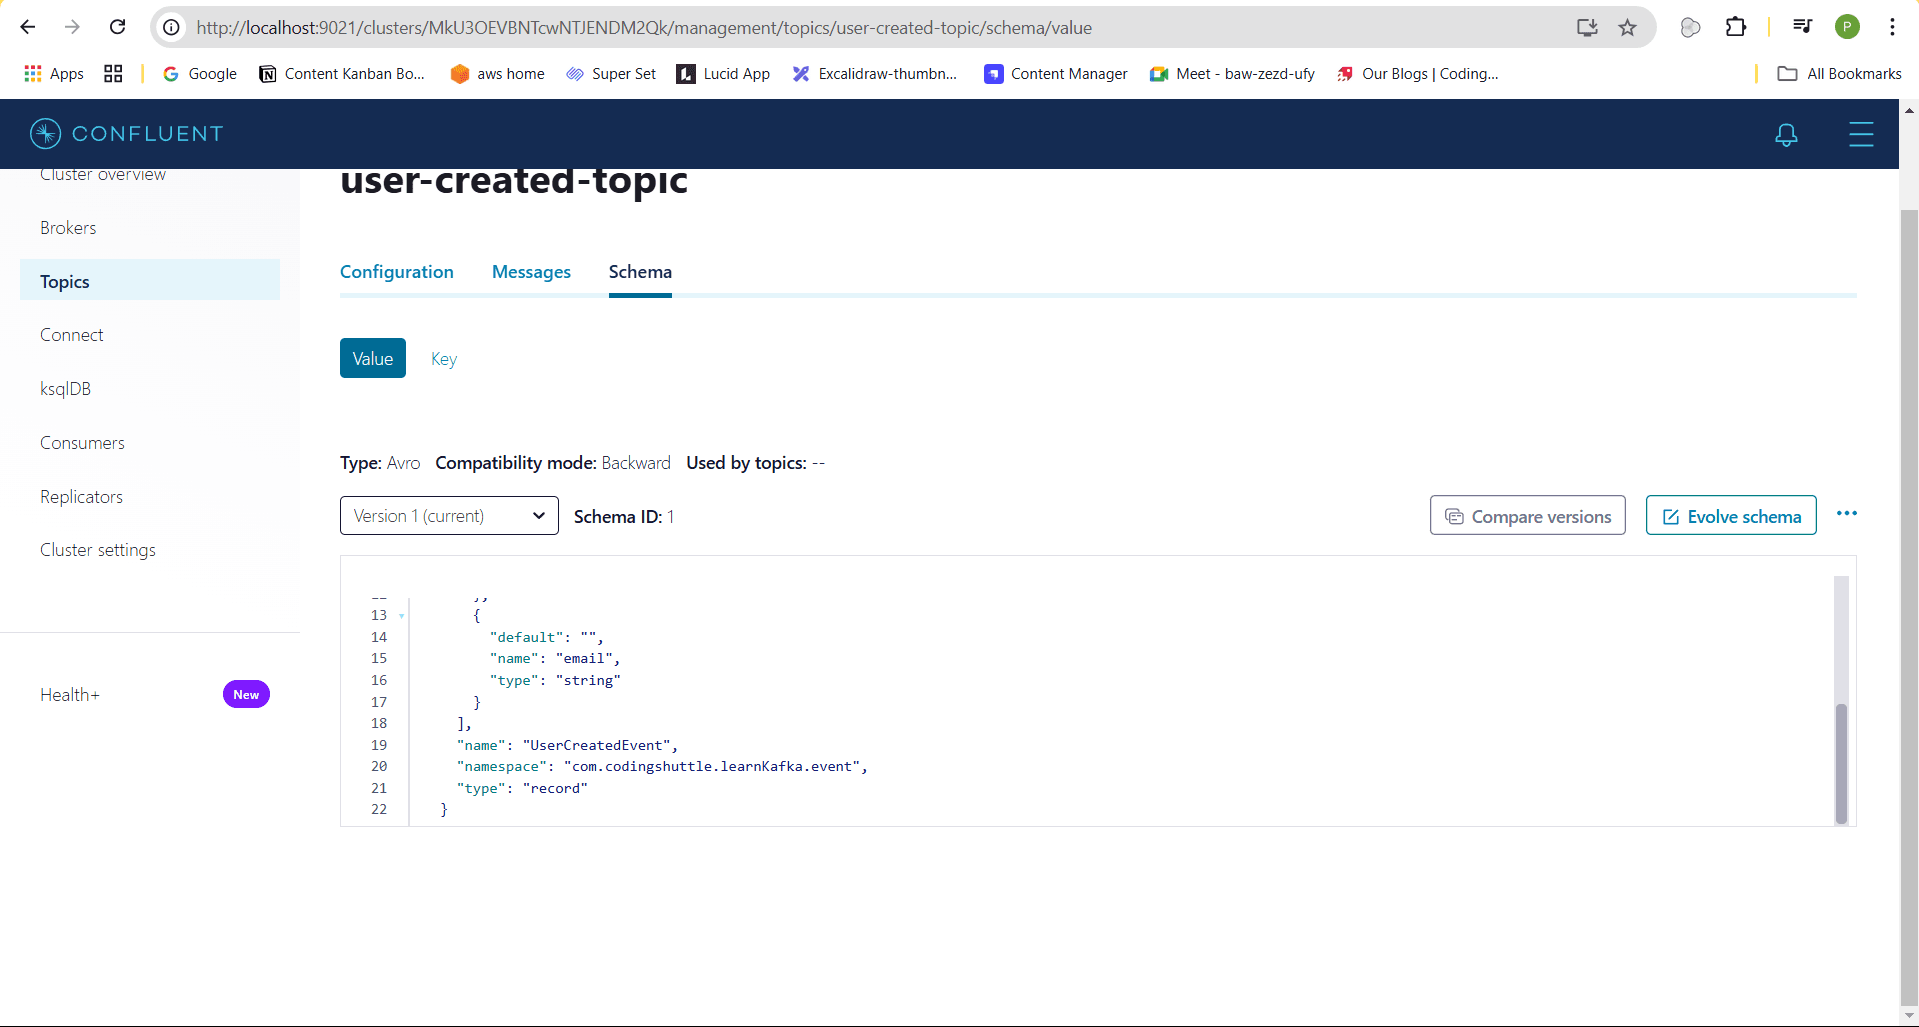
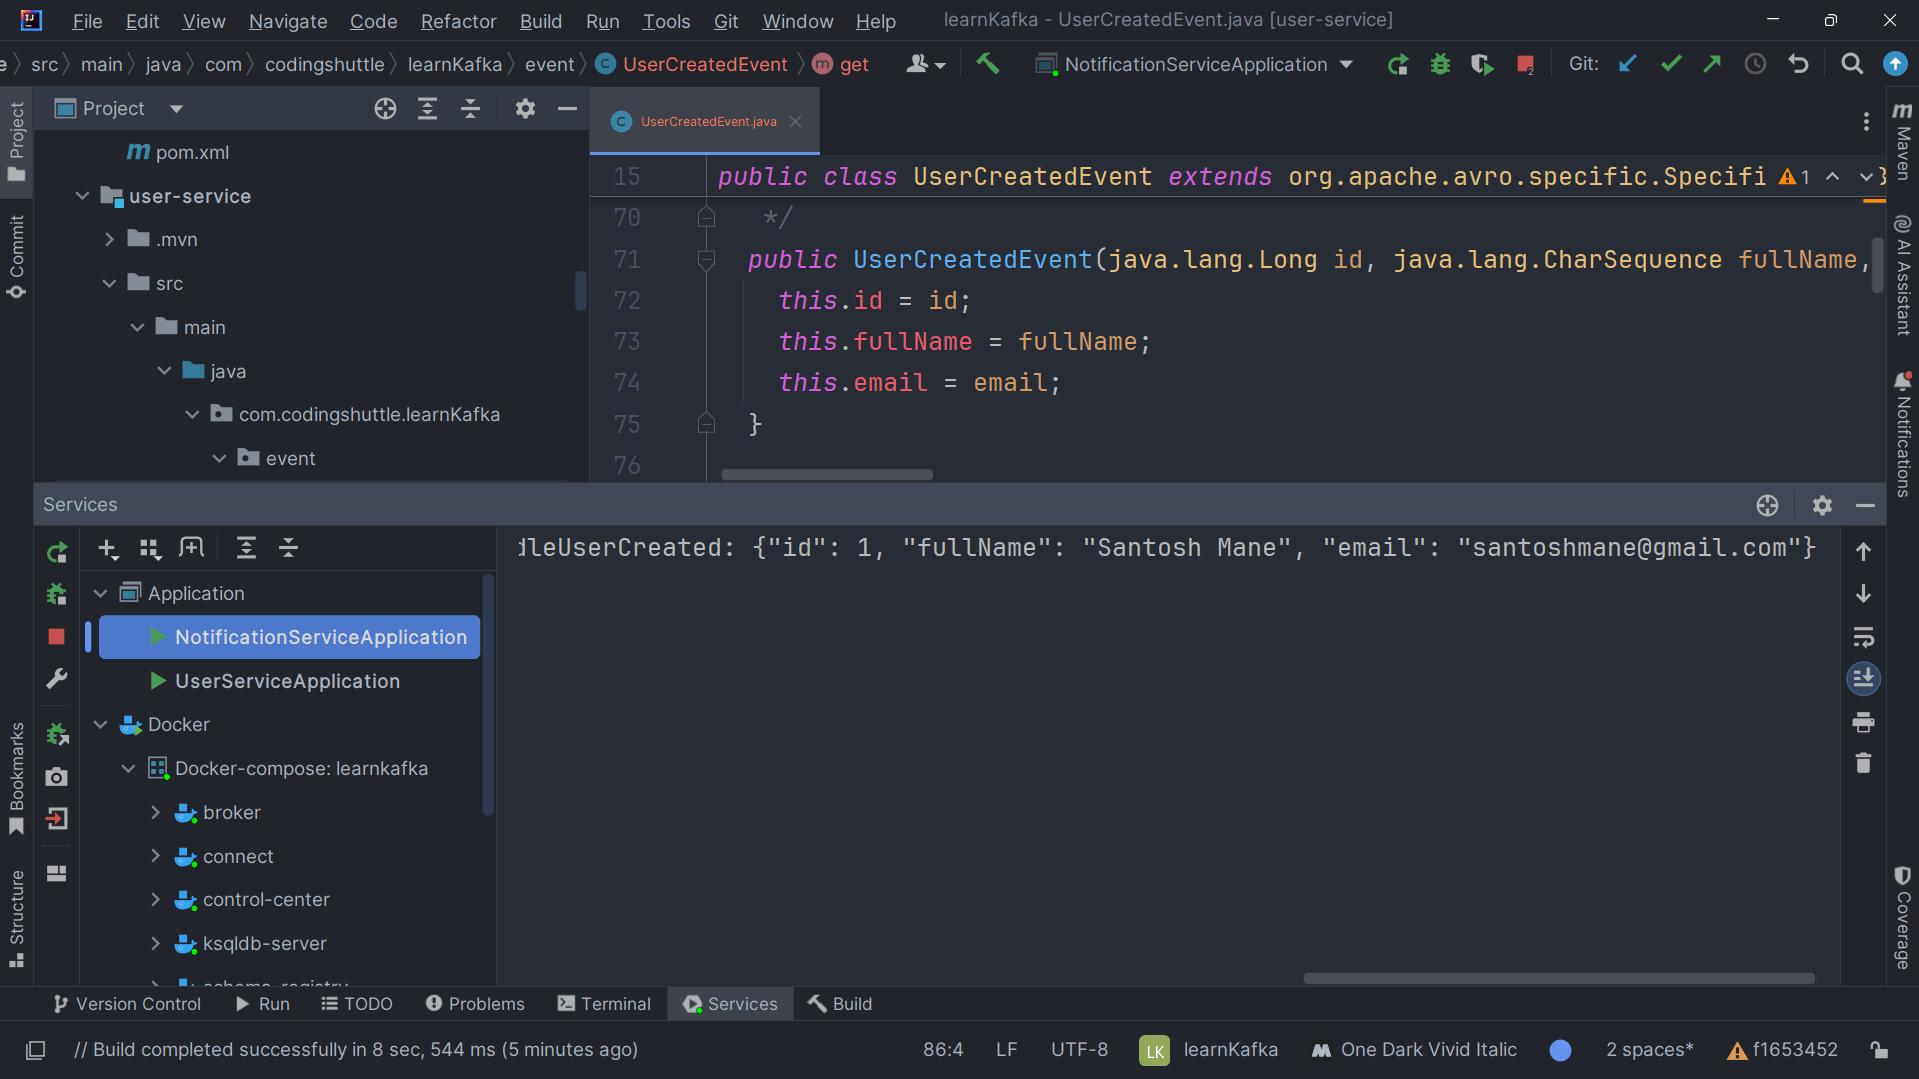
Meanwhile, the Notification Service will consume the user-created-event message and log the event on the console:
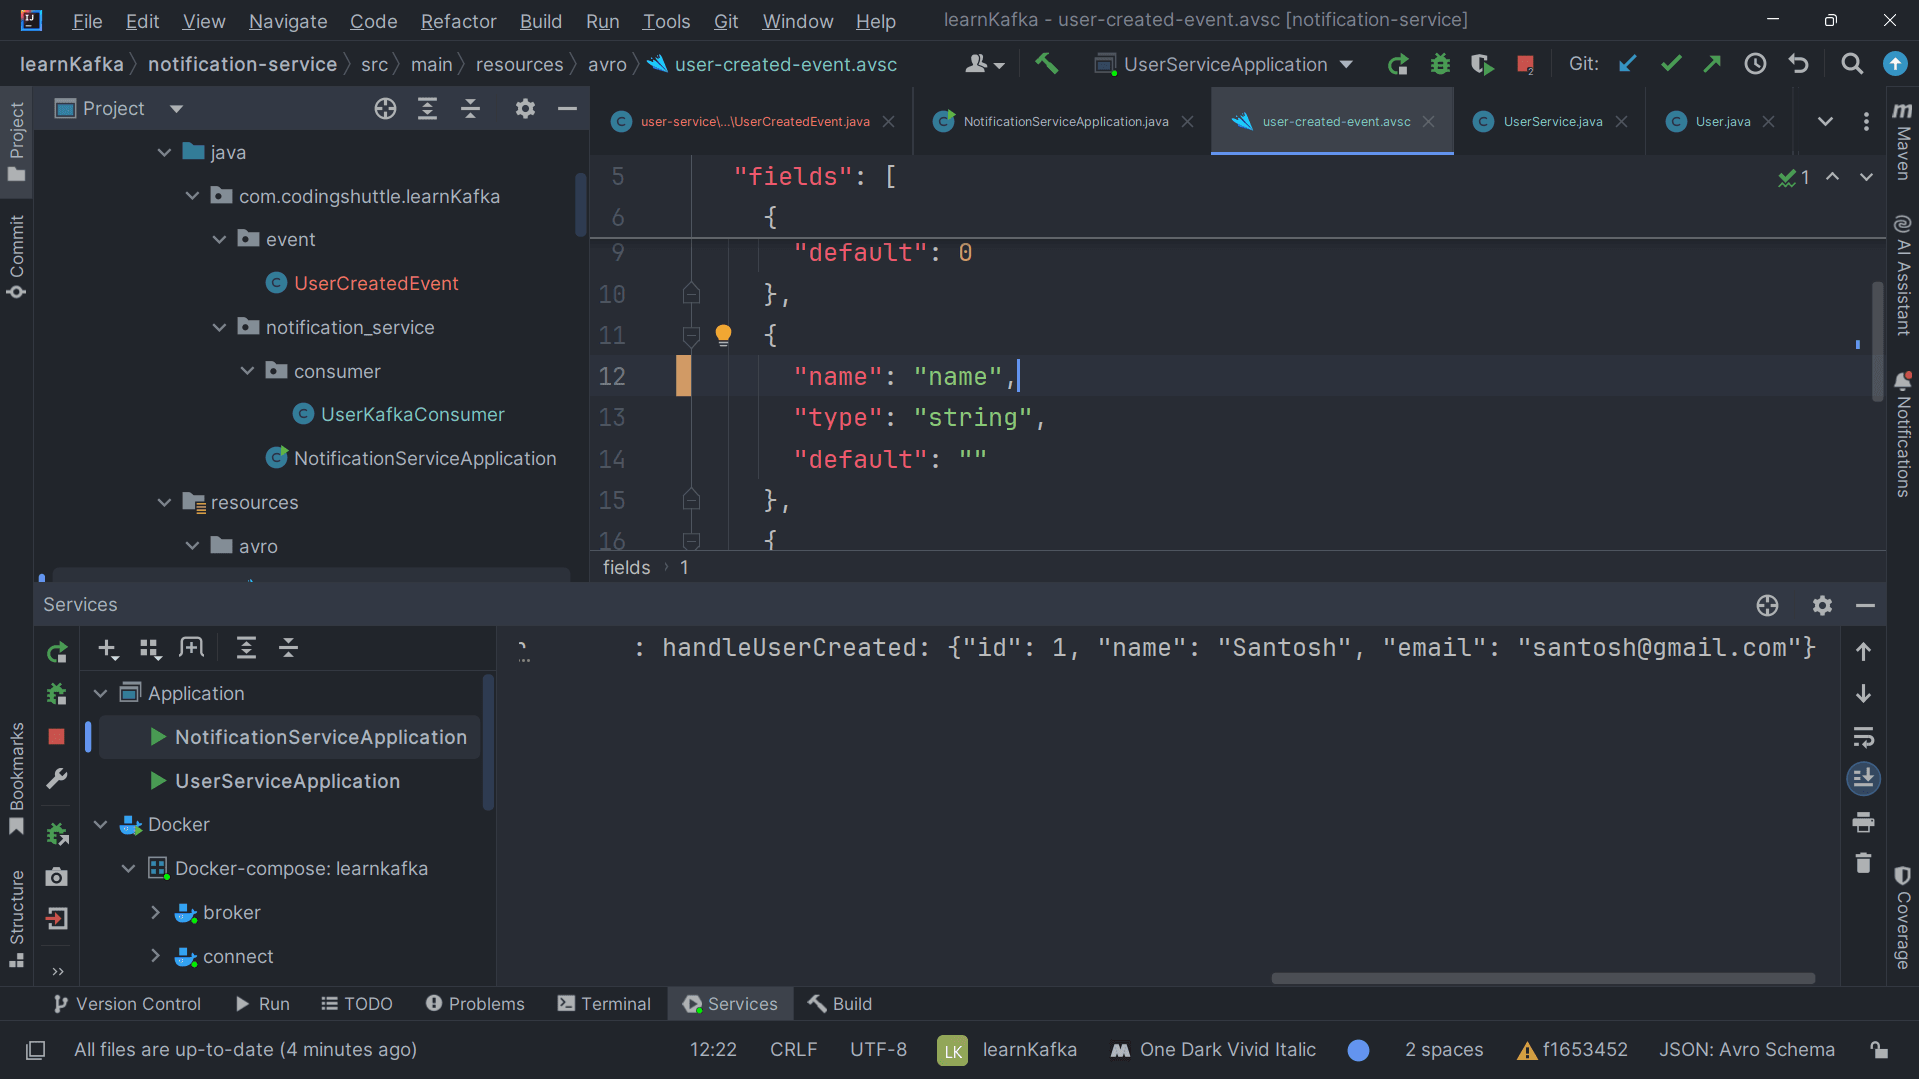
Changing the Field Name in the Avro Schema#
Next, let's change the field name in the user-created-event.avsc file from name to fullName in both the User and Notification microservices. For this example, we have the schema in both services, but you can centralize it in a single location and reference it from there.
Here's the updated Avro schema (user-created-event.avsc):
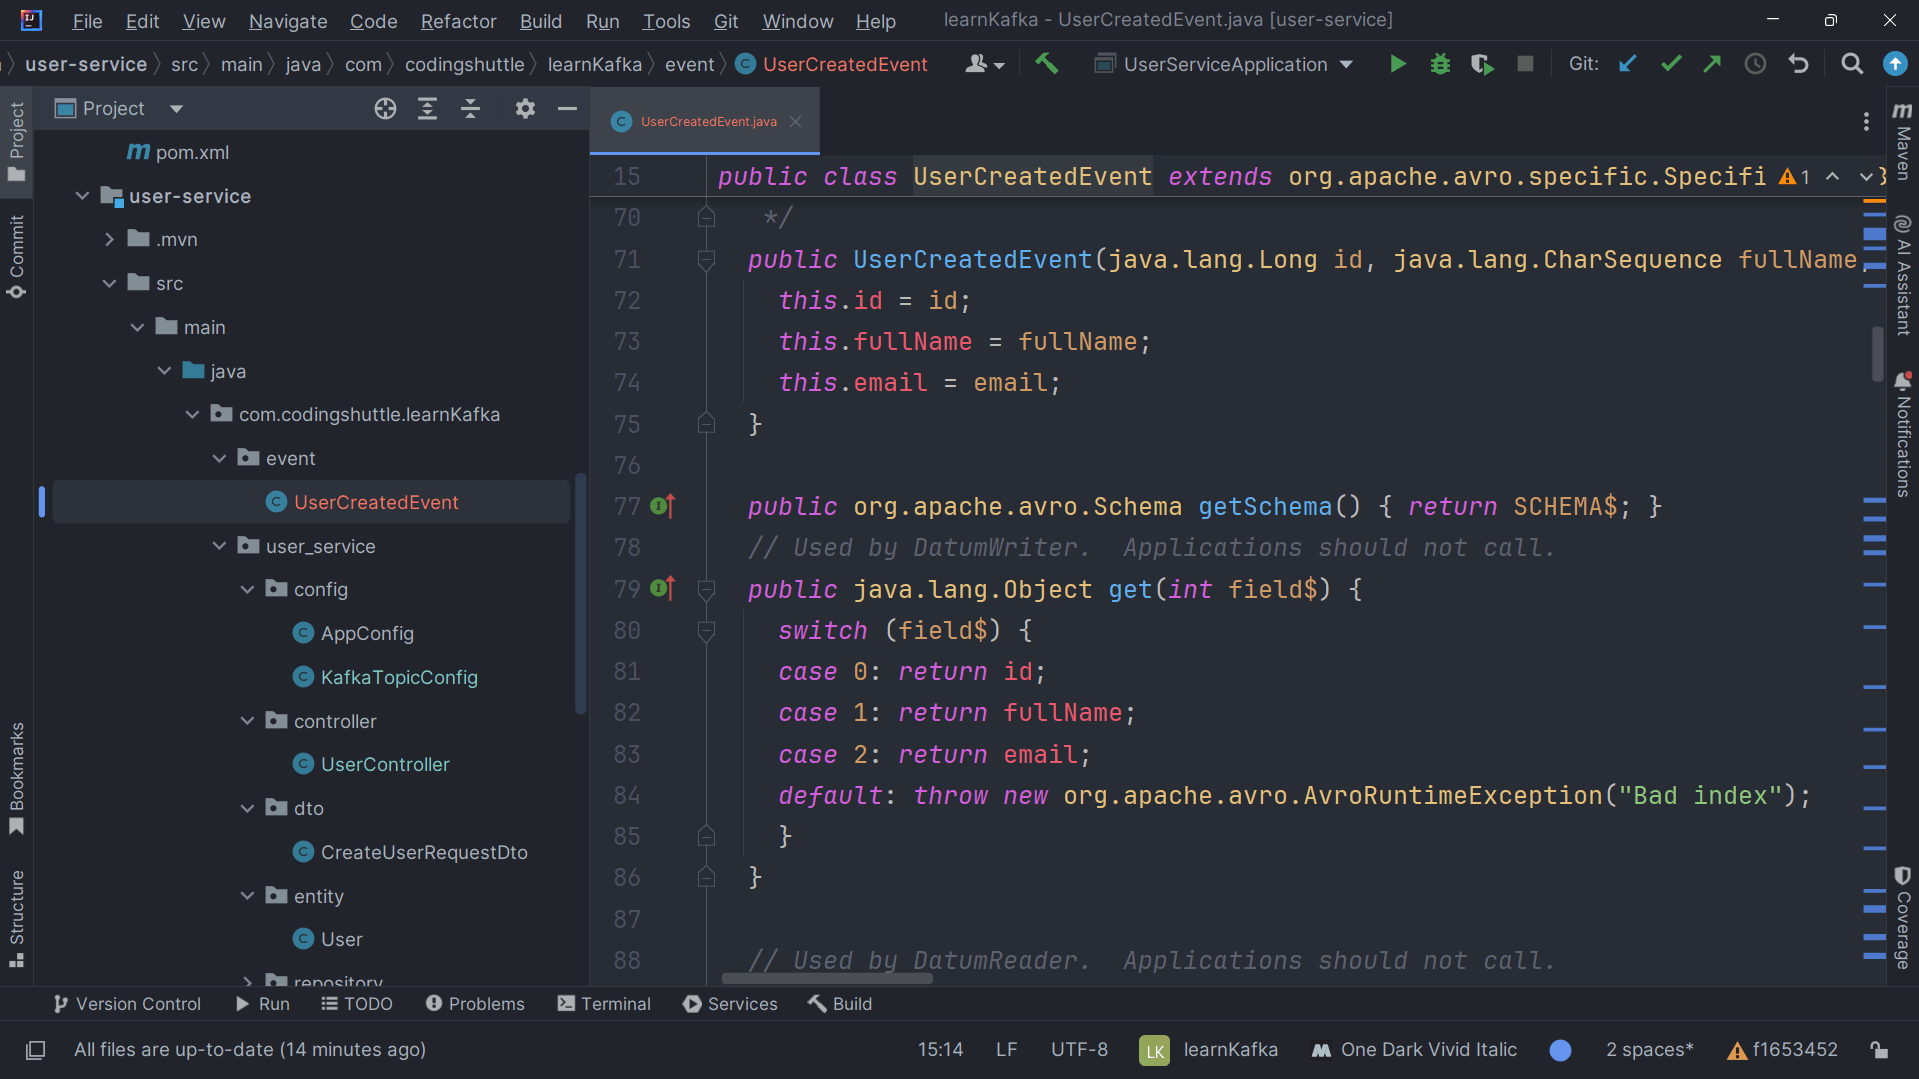
Now, update both the DTO and Entity classes to reflect the change from name to fullName.
After making these changes, run mvn install in both services to ensure that the updated UserCreatedEvent class is generated with the new fullName field.
Testing the Change#
Now, run both services and use Postman to send a POST request to create a new user. This user will now include the fullName field instead of the name field.
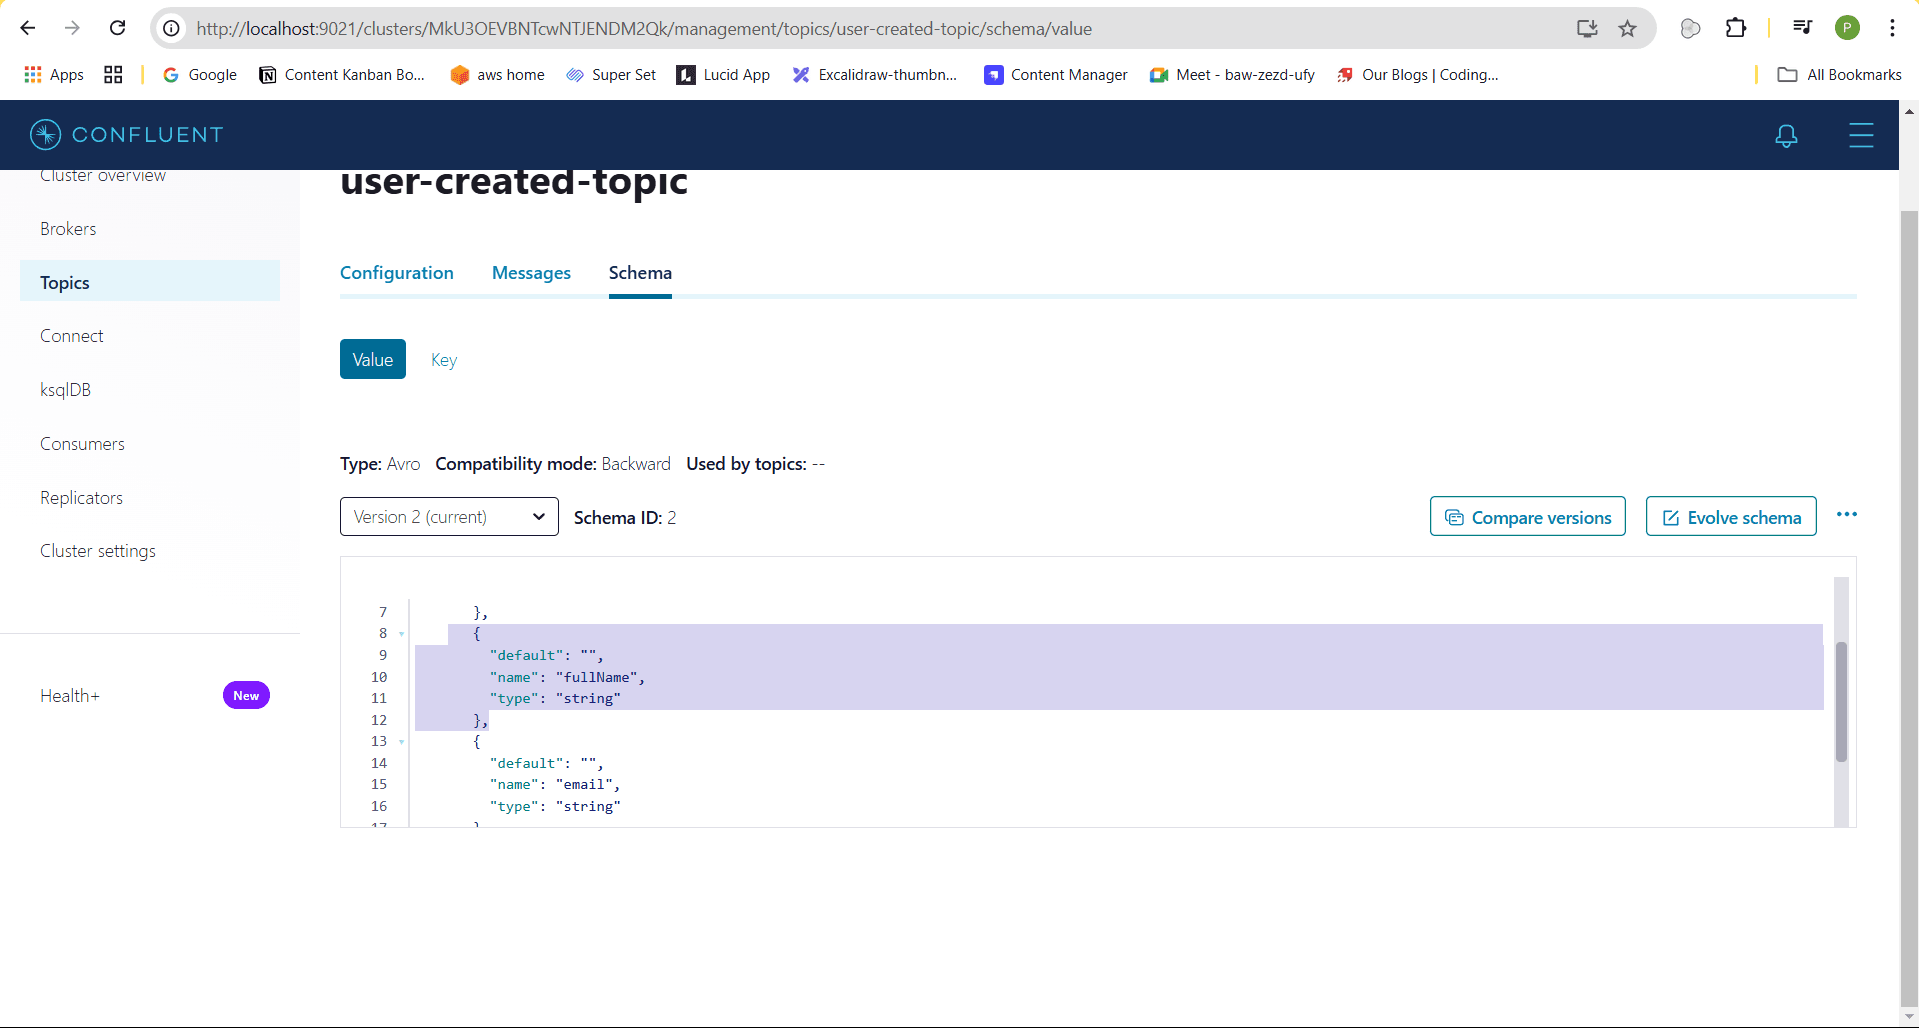
In the Control Center, you'll notice that the schema version has been updated to version 2.
The Notification Service will validate the updated schema and successfully consume the message, logging the event on the console:
Comparing the versions#
In the Control Center, you can easily compare the previous schema version with the new one. As shown, the previous schema version contains the name field, while the new version includes the updated fullName field.
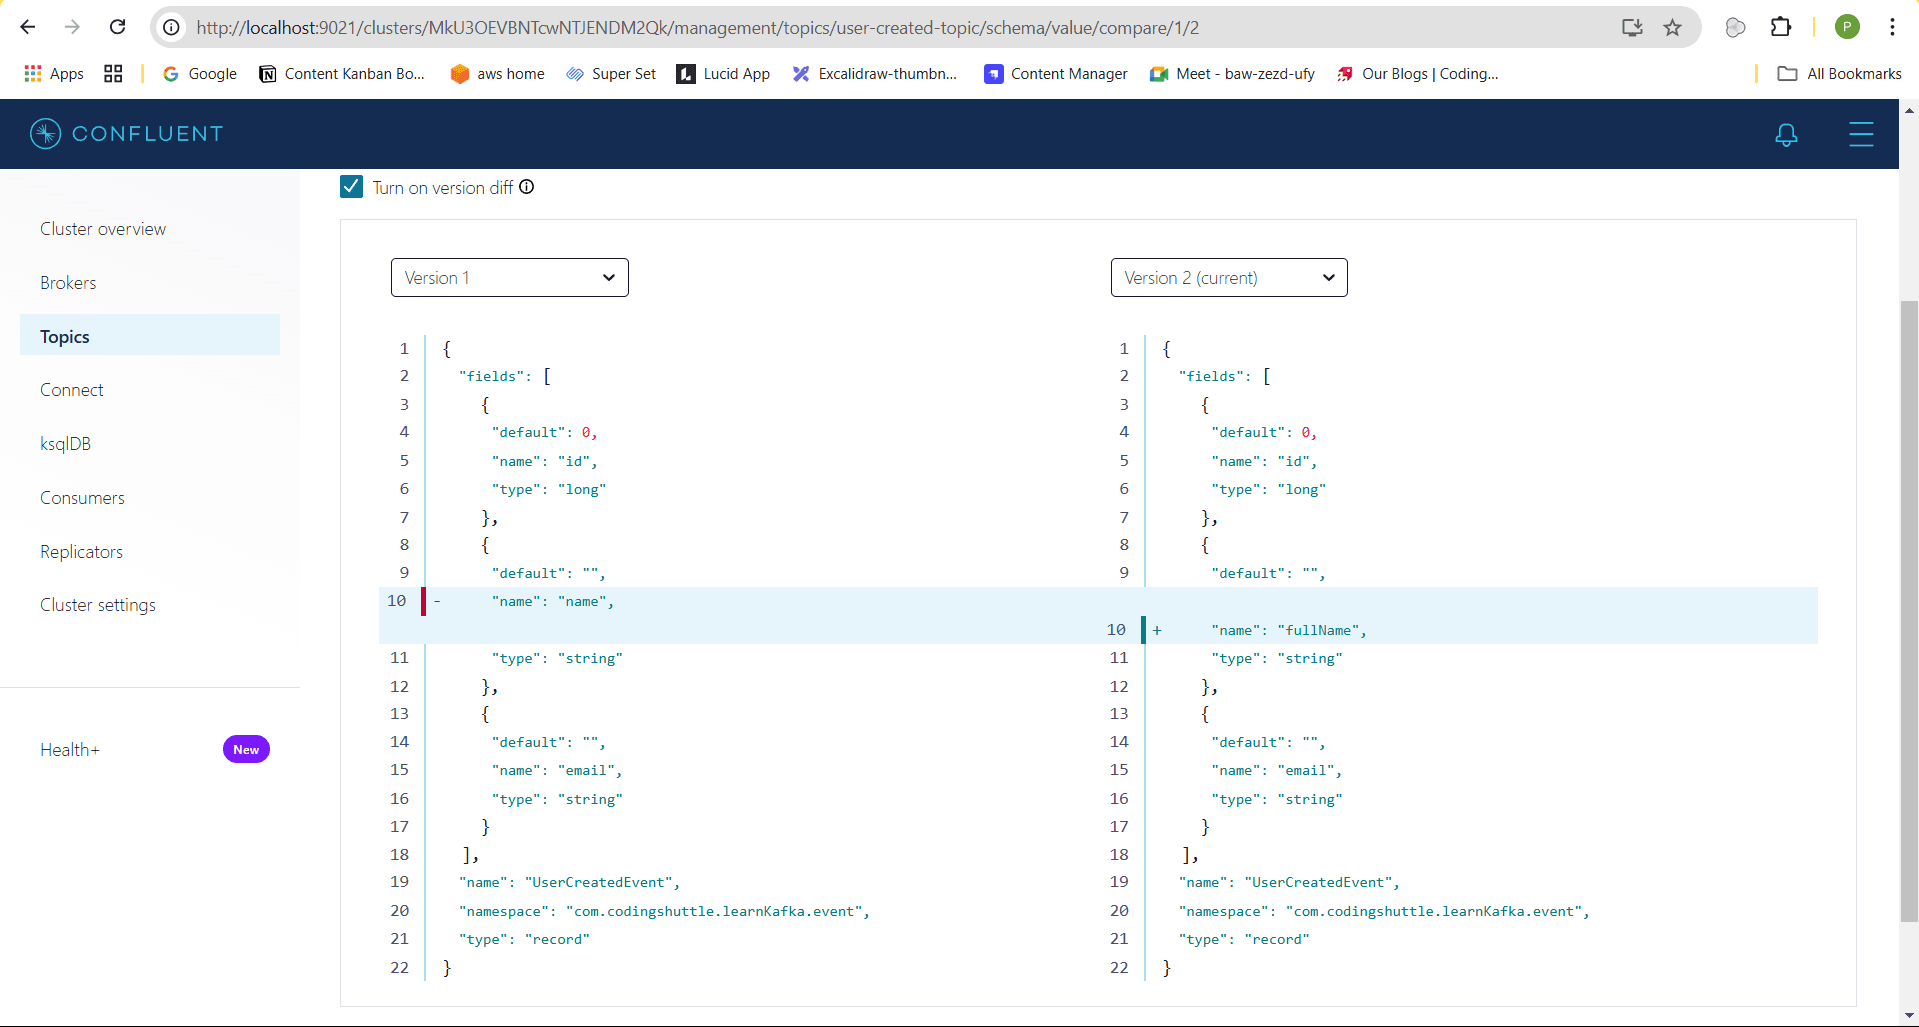
This demonstrates that you don’t need to modify the UserCreatedEvent class in both services every time the schema changes. Instead, both services rely on the Schema Registry to serialize and deserialize the event data, allowing for easier schema management and versioning.
Conclusion#
In this blog, we learned how to use the Schema Registry to avoid manually updating the UserCreatedEvent class in both services each time the schema changes. By using the schema registry, both services can serialize and deserialize event files without directly coupling to the schema, providing a more flexible and scalable solution.