Spring Boot HandBook

    Data Binding and Validation in Spring Boot: Using @ModelAttribute, @Valid, and Validation Annotations

    In modern web applications, handling user input effectively is crucial for a smooth user experience and data integrity. Spring Boot offers powerful tools for managing data binding and validation through annotations like @ModelAttribute, @Valid, and validation annotations. This article will introduce these concepts in a beginner-friendly manner, providing a solid foundation for their application in real-world scenarios.

    What is Data Binding?#

    Data binding is the process of transferring data between a user interface and the server-side application. In the context of web applications, this means mapping form data from an HTML form to a Java object on the server. Spring Boot simplifies this process through the use of @ModelAttribute.

    Understanding @ModelAttribute#

    The @ModelAttribute annotation in Spring Boot is used to bind form data to a Java object. This allows you to automatically populate a model object with data from an HTML form submission. Here’s how it works:

    Define a Model Class: Create a Java class representing the form data.#

    Add Validation Constraints: Use validation annotations from the javax.validation.constraints package in your model class.

    @Data @AllArgsConstructor @NoArgsConstructor public class User { @NotBlank(message = "Name is required") @Size(min = 2, message = "Name must be at least 2 characters") private String name; @NotBlank(message = "Email is required") @Email(message = "Invalid email format") private String email; @NotNull(message = "Age is required") @Min(value = 18, message = "You must be at least 18 years old") private Integer age; }

    Validation Annotations Explained#

    • @NotBlank: Ensures that the field is not empty or null. Useful for strings.
    • @Email: Validates that the string is a valid email format.
    • @Size: Validates the length of the field. E.g., @Size(min = 2, max = 30).
    • @Min: Validates Integer number has to be aleast specified value. and not less than it.

    Create a Controller Method: Use @ModelAttribute to bind form data to the model class.#

    @Controller public class UserController { @GetMapping("/register") public String showRegistrationForm(Model model) { model.addAttribute("user", new User()); return "registration"; // Thymeleaf will look for src/main/resources/templates/registration.html } @PostMapping("/register") public String registerUser(@Valid @ModelAttribute User user, BindingResult result, Model model) { if (result.hasErrors()) { return "registration"; // Thymeleaf will return to src/main/resources/templates/registration.html } // Process user registration model.addAttribute("user", user); // Add the user to the model to show in result return "result"; // Thymeleaf will look for src/main/resources/templates/result.html } @ModelAttribute public void addCommonAttributes(Model model) { model.addAttribute("commonTitle", "User Registration System"); } }

    Design a Form View: Create an HTML form that binds to the User object.#

    <!DOCTYPE html> <html xmlns:th="<http://www.thymeleaf.org>"> <head> <title>Registration</title> </head> <body> <h1 th:text="${commonTitle}">User Registration</h1> <form th:action="@{/register}" th:object="${user}" method="post"> <div> <label for="name">Name:</label> <input th:field="*{name}" id="name" /> <div th:if="${#fields.hasErrors('name')}" th:errors="*{name}">Name Error</div> </div> <div> <label for="email">Email:</label> <input th:field="*{email}" id="email" /> <div th:if="${#fields.hasErrors('email')}" th:errors="*{email}">Email Error</div> </div> <div> <label for="age">Age:</label> <input th:field="*{age}" id="age" /> <div th:if="${#fields.hasErrors('age')}" th:errors="*{age}">Age Error</div> </div> <button type="submit">Register</button> </form> </body> </html>

    Modify your form view to display validation errors: In this example, Thymeleaf (a popular template engine) is used to display error messages. The th:if and th:errors attributes check for and display validation errors associated with each field.

    Create result.html to show registered users details#

    <!DOCTYPE html> <html xmlns:th="<http://www.thymeleaf.org>"> <head> <title>Registration Result</title> </head> <body> <h1 th:text="${commonTitle}">User Registration</h1> <h1>Registration Successful!</h1> <p>Here are the details you submitted:</p> <ul> <li><strong>Name:</strong> <span th:text="${user.name}"></span></li> <li><strong>Email:</strong> <span th:text="${user.email}"></span></li> <li><strong>Age:</strong> <span th:text="${user.age}"></span></li> </ul> <a href="/register">Go back to registration form</a> </body> </html>

    Run the application and hit the endpoint on browser#

    Enter invalid values and in field you will see the errors.
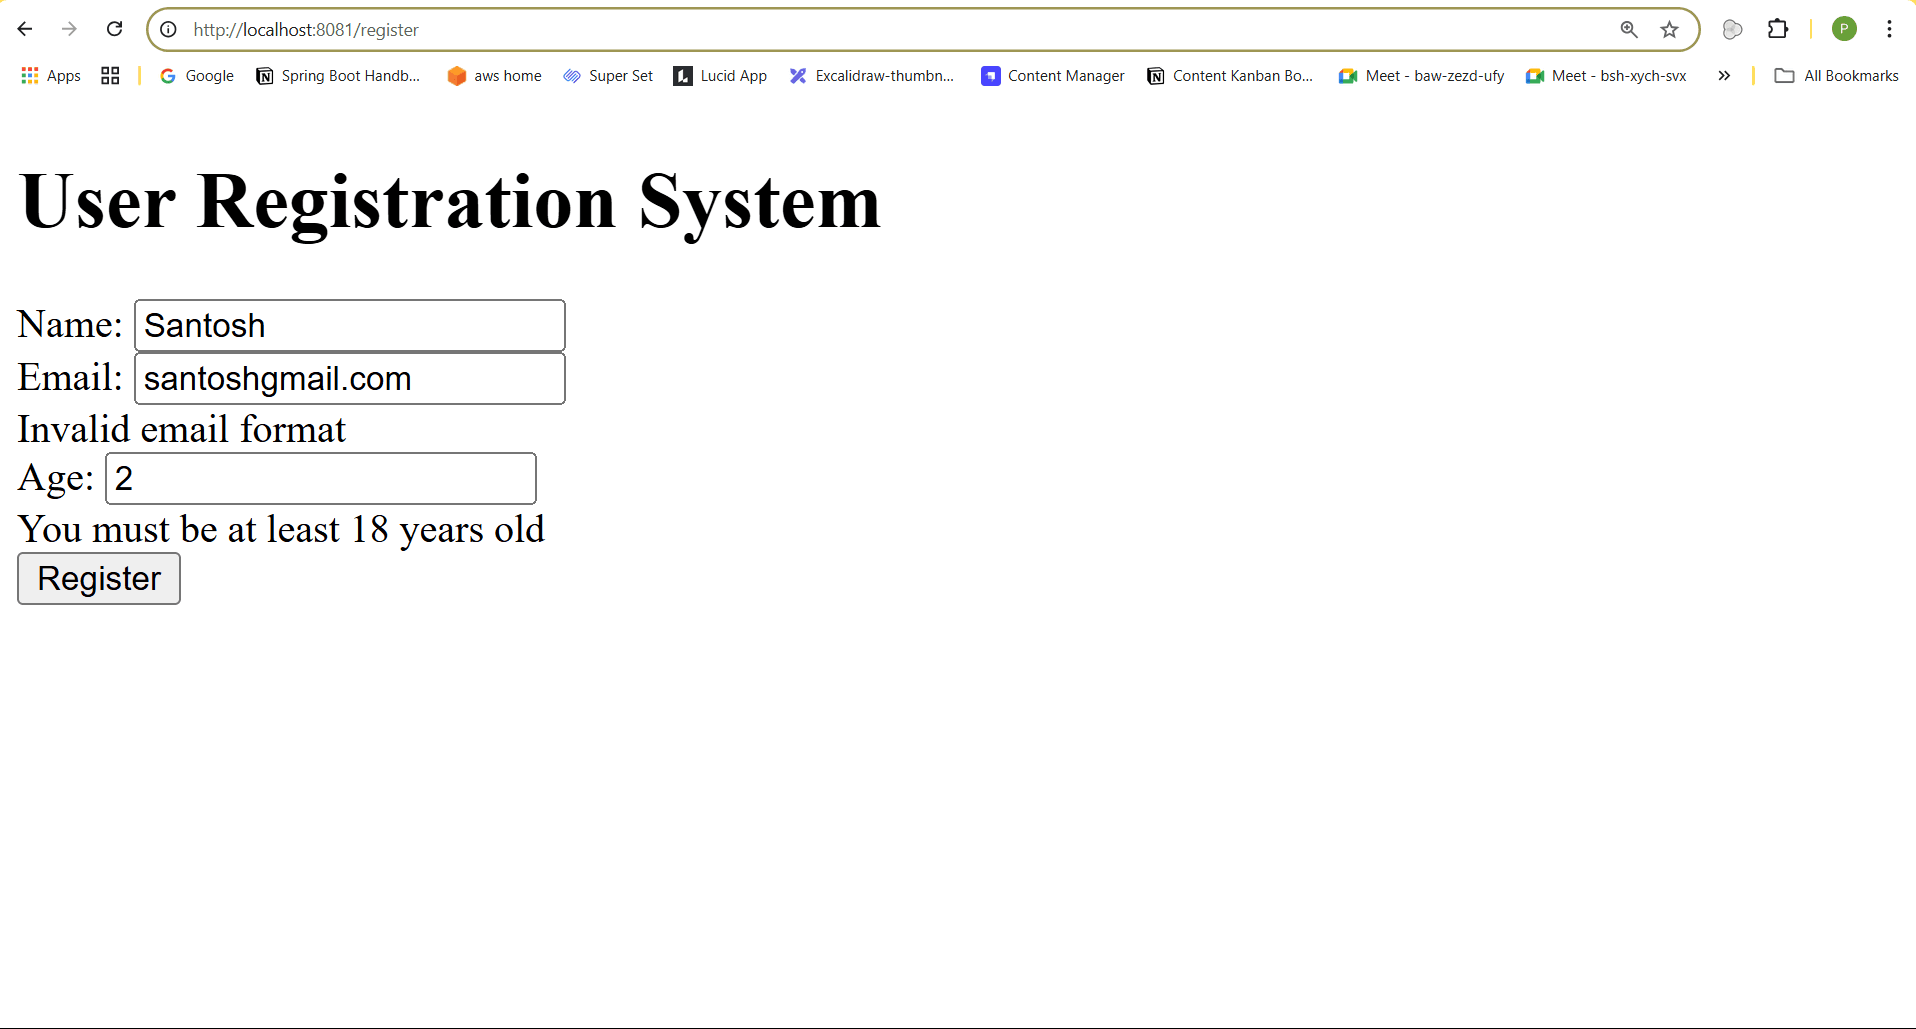
    Registration error page

    After Entering the valid values in field you will be redirected to result page .
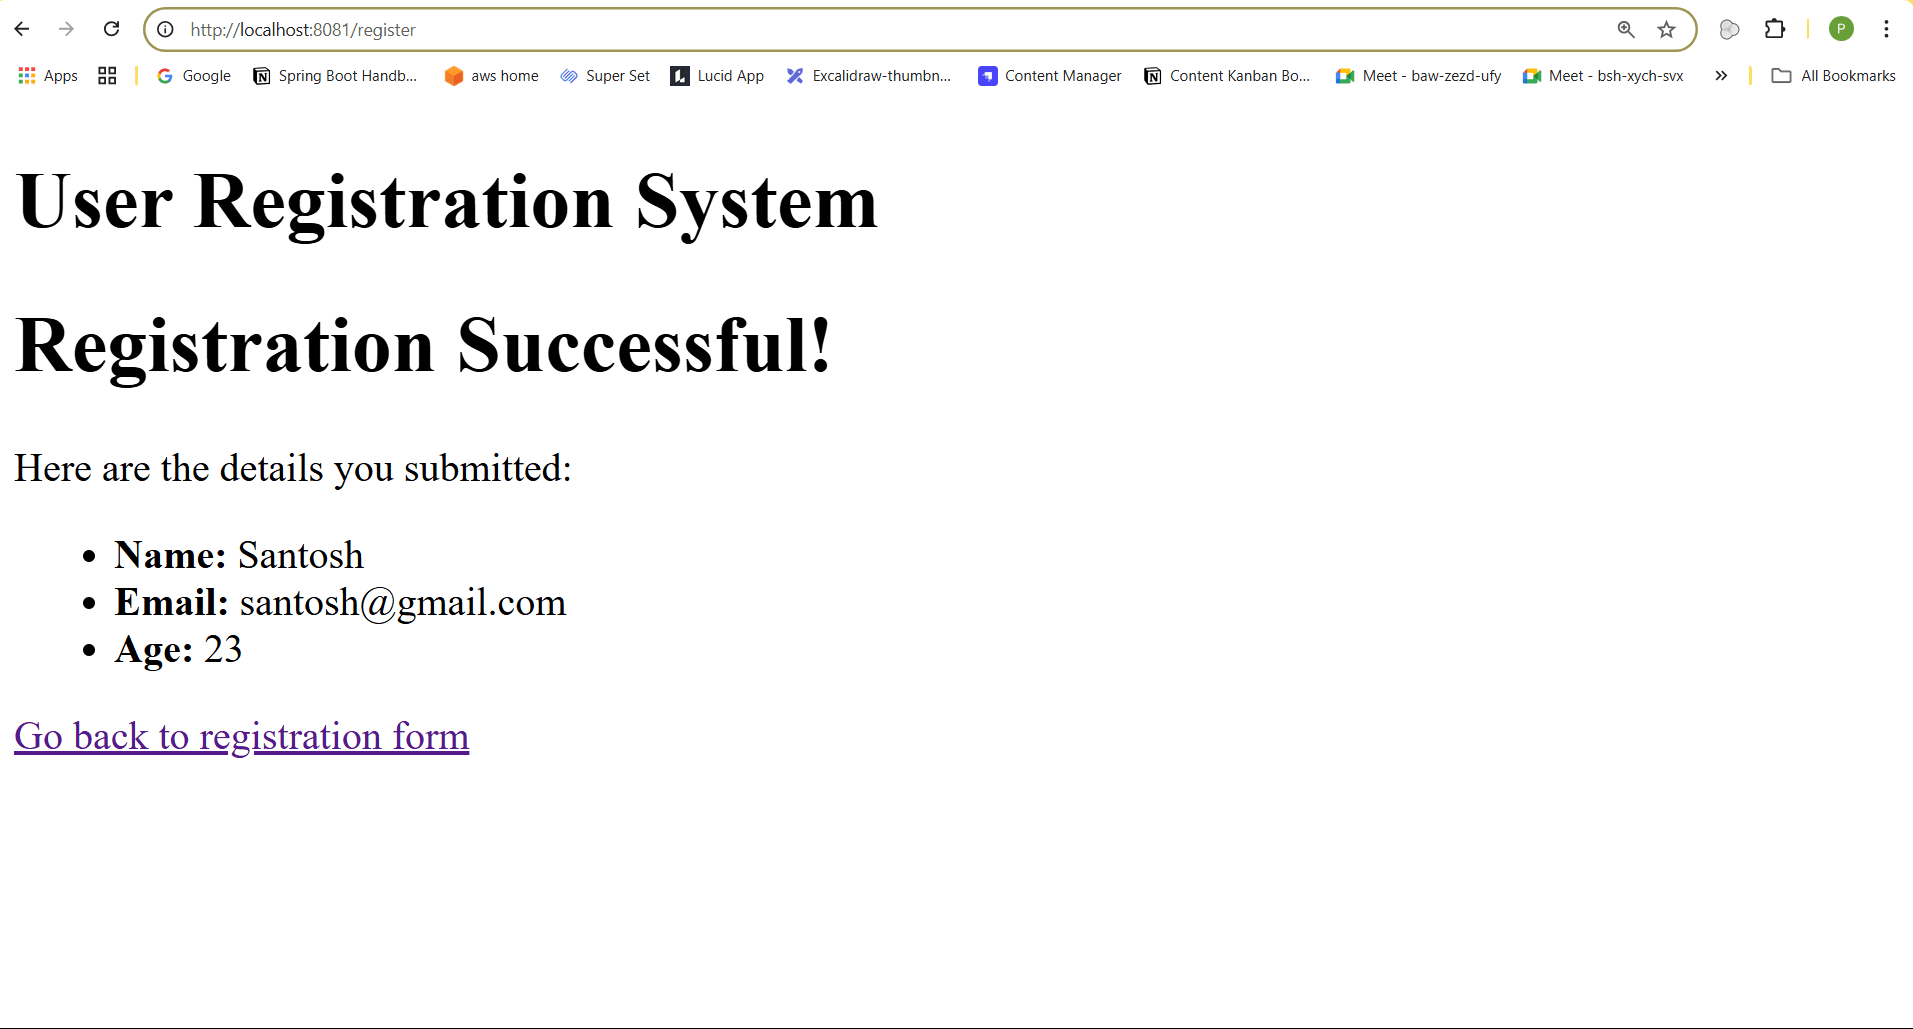
    Registration success page

    In this article, we explored the crucial concepts of data binding and validation in Spring Boot using annotations like @ModelAttribute, @Valid, and various validation annotations. We demonstrated how to bind form data to a Java object seamlessly and validate user input effectively to ensure data integrity and a smooth user experience. With practical examples and a step-by-step approach, you now have a solid foundation to implement these techniques in your own web applications.

    Last updated on Dec 28, 2024