Advance Kafka Configuration with Spring Boot
In the previous blog “Configuring Kafka with Spring Boot”, we explored how to set up Kafka with Spring Boot, demonstrating how the user-service produces messages and the notification-service consumes them. In that example, we worked with simple string messages. However, in real-world scenarios, applications often need to exchange complex data structures.
In this blog, we will dive into advanced Kafka configurations with Spring Boot. Specifically, we will learn how to send complex messages, such as JSON objects, as events to Kafka topics instead of plain string messages. This will enable more robust and scalable data handling across services.
Creating dummy microservices#
Create two dummy microservices with all the required dependency like starter web, jpa, postgres driver, lombok etc:
- User microservice
- Notification microservice
While creating this microservices from spring initializer you have to add Kafka dependency in-order integrate Kafka in our application.
Dependency name:- Spring for Apache Kafka
Using Kafka in User and Notification Microservices#
We will create a simple create-user POST endpoint in the user-service to save user details in a PostgreSQL database. When this endpoint is called with user details in the request body, Kafka will publish the user information as a message to the topic user-created-topic. In this setup, the user-service will act as a producer, generating events for the topic and sending them to the Kafka broker. The broker will assign the message to one of the topic's partitions using the user ID as the key.
On the other hand, the notification-service will serve as a consumer, listening to events from the topic user-created-topic and consuming complex messages in JSON format. For simplicity, the consumed messages will be logged to the console. This demonstrates how Kafka enables seamless communication between microservices using structured data.
Configuring User Service and Notification Service#
Add the following configuration in the application.yml file of the user-service:
This configuration sets up the producer to use LongSerializer for the key (user ID) and JsonSerializer for the value, enabling the serialization of complex JSON messages. Add the following configuration in the application.yml file of the notification-service:
This configuration sets up the consumer to use LongDeserializer for the key and JsonDeserializer for the value. The trusted.packages property ensures that only the specified package's classes are deserialized, providing security against deserialization vulnerabilities.
Setup User Service (Producer)#
Kafka Topic Configuration#
The KafkaTopicConfig class ensures the Kafka topic is initialized with 3 partitions and a replication factor of 1. If the topic already exists, this configuration is skipped.
UserCreatedEvent#
The UserCreatedEvent represents the event structure that will be sent to the Kafka topic.
User Entity and DTO#
The User entity represents the database table, and the CreateUserRequestDto is the data transfer object used in the API request.
User Entity#
CreateUserRequestDto#
User Repository#
The UserRepository provides CRUD operations for the User entity.
User Service#
The UserService handles the business logic for creating a user and publishes a UserCreatedEvent to the Kafka topic after saving the user to the database.
User Controller#
The UserController exposes an endpoint to handle user creation. The createUser method receives a CreateUserRequestDto and delegates the processing to the UserService.
With this setup, your user service is now ready. When you send a POST request with user details in the request body, it will perform the following actions:
- Create a new user in the PostgreSQL database.
- Publish a
UserCreatedEventto the Kafka topicuser-created-topic.
Next, we need to configure the notification service to consume messages from the user-created-topic and log them to the console.
Setup Notification Service (Consumer)#
User Created Event#
Create the UserCreatedEvent class, ensuring it matches the one created in the user-service.
Note: The package name must be the same as in the user-service event class for deserialization to work correctly.
Kafka Consumer Service#
Create a Kafka consumer service in the notification-service to consume messages from the user-created-topic.
Demonstration#
Ensure your Kafka server is running, and the Kafdrop UI is accessible for monitoring.
Run the User Service:
Once started:
- The
Usertable will be created in the database. - The
user-created-topicwill be initialized in Kafka. You can verify this in the Kafbat UI.
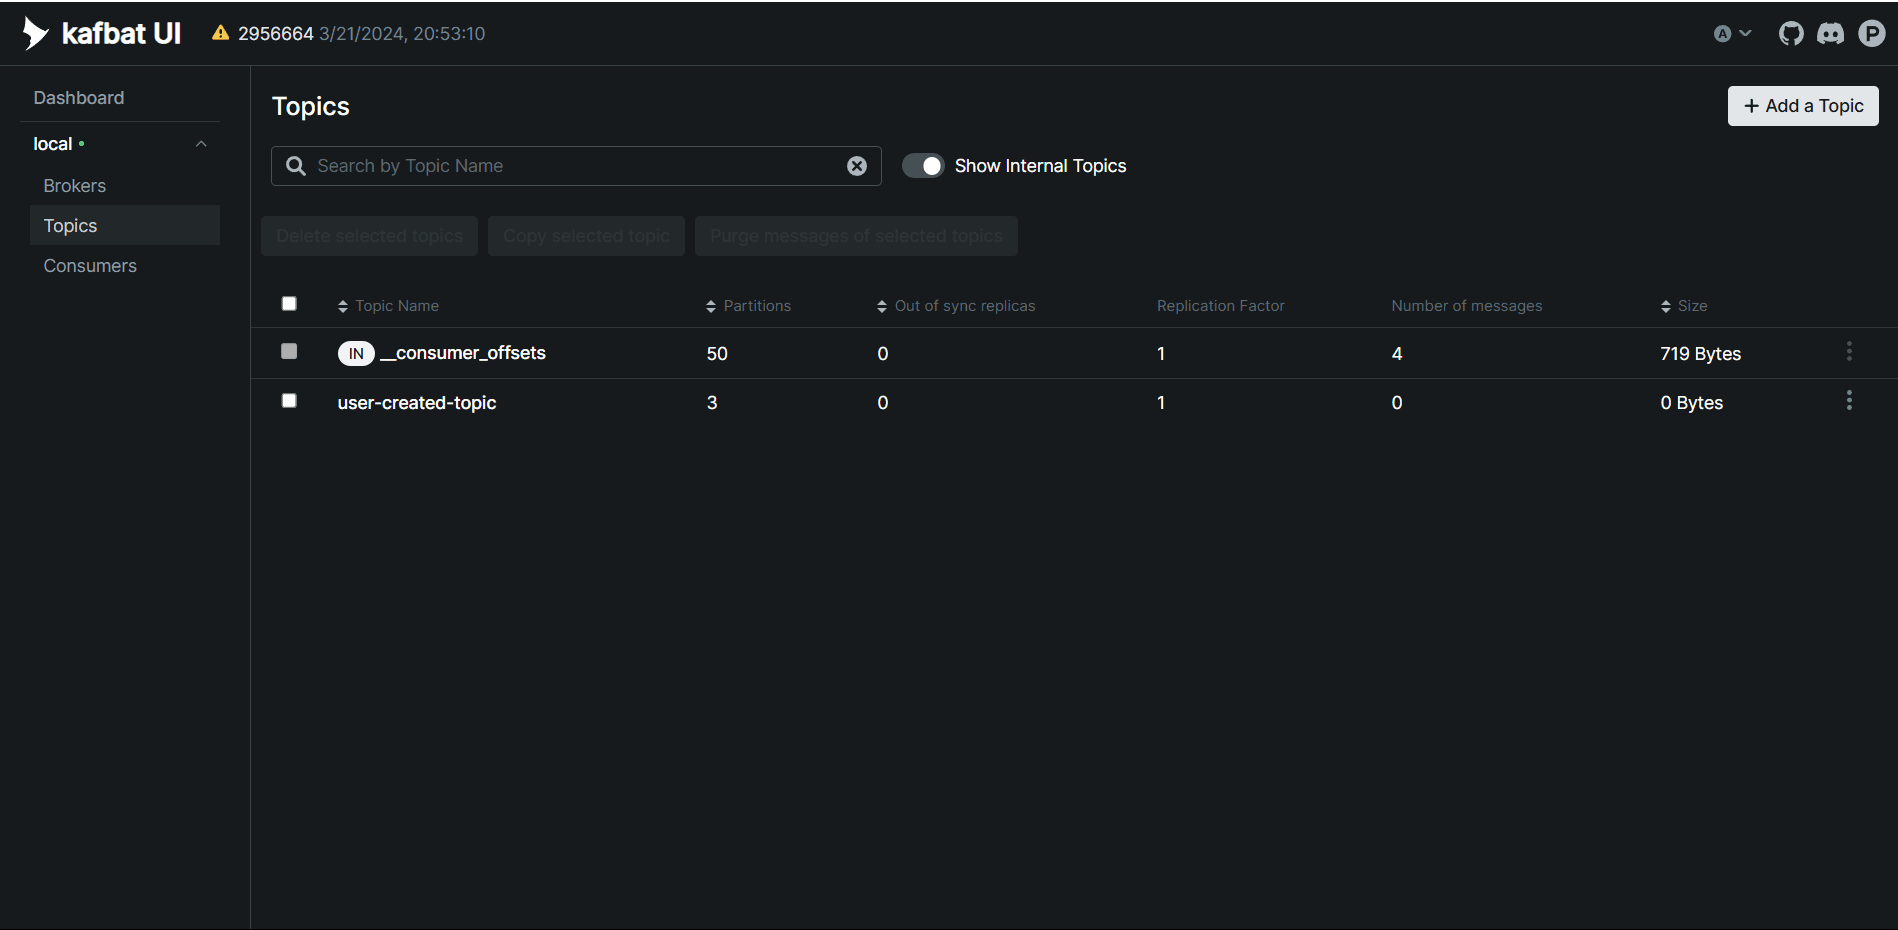
Run the Notification Service:
After starting:
- A consumer group with the
notification-servicegroup ID will appear in the Kafbat UI.
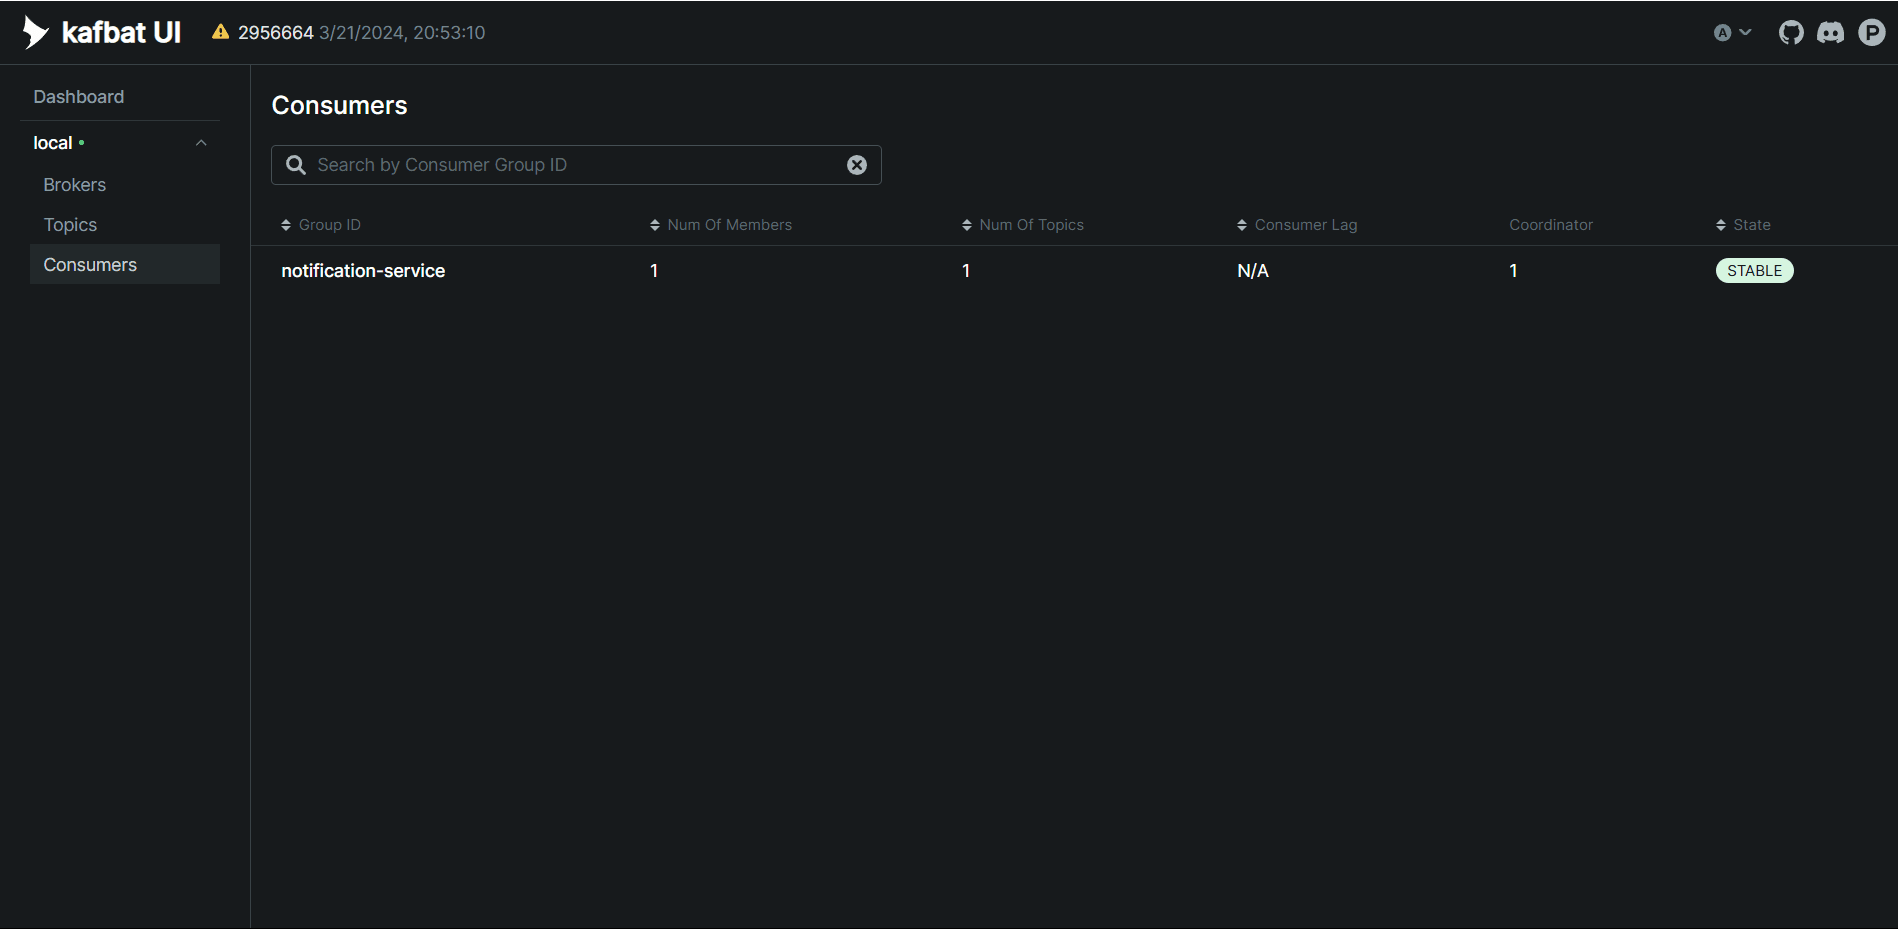
Send a Create-User POST Request:
Using Postman, send a POST request to the create-user endpoint with user details in the request body.
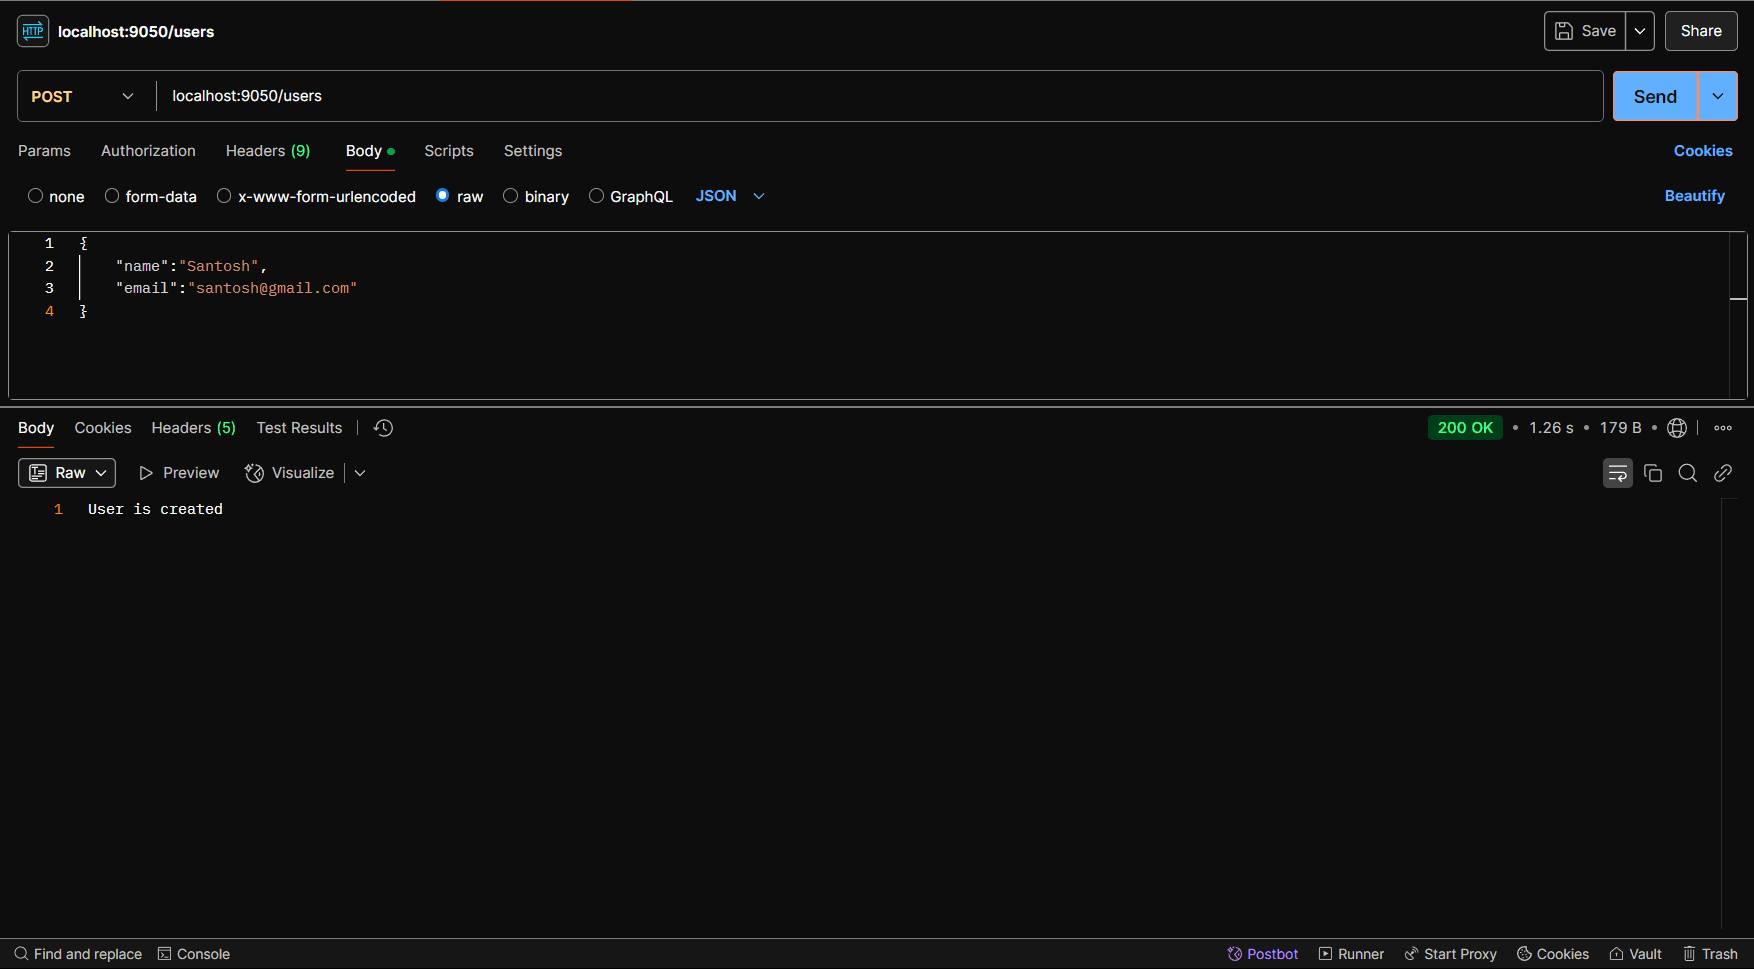
The user-service will:
- Save the user to the database.
- Publish a
UserCreatedEventto the Kafka topic.
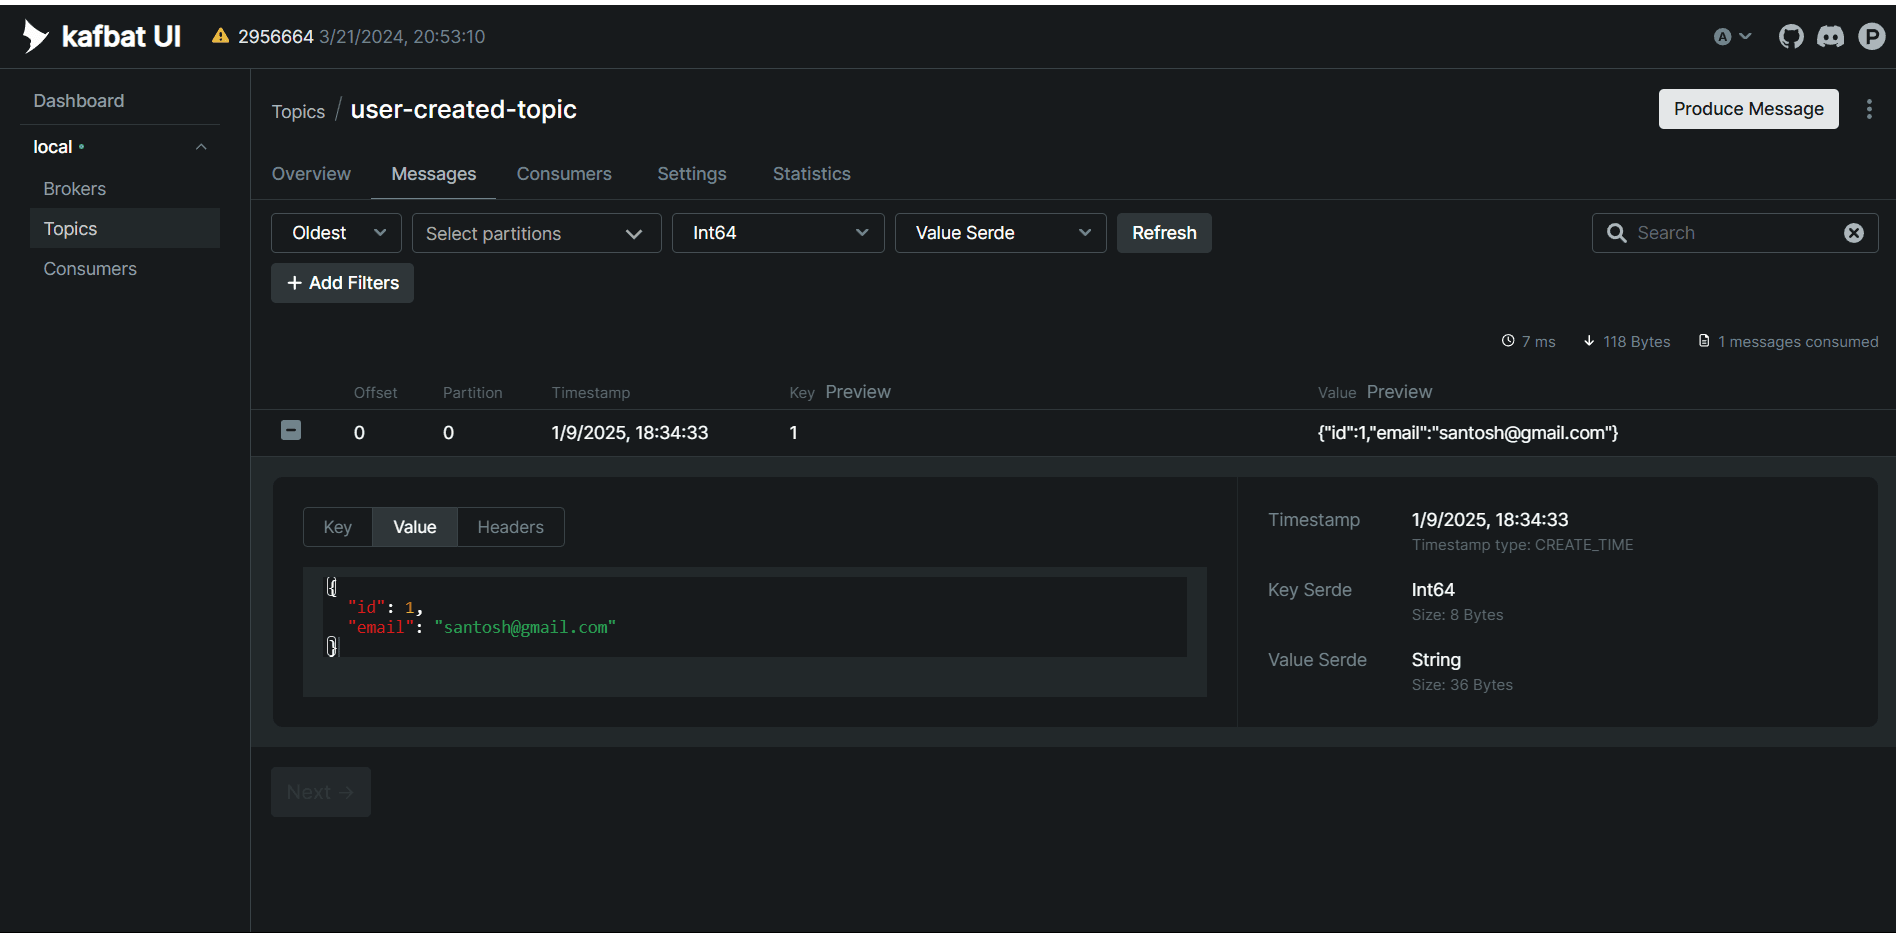
After the the notification-service will consume this message and simply log the user details on console.
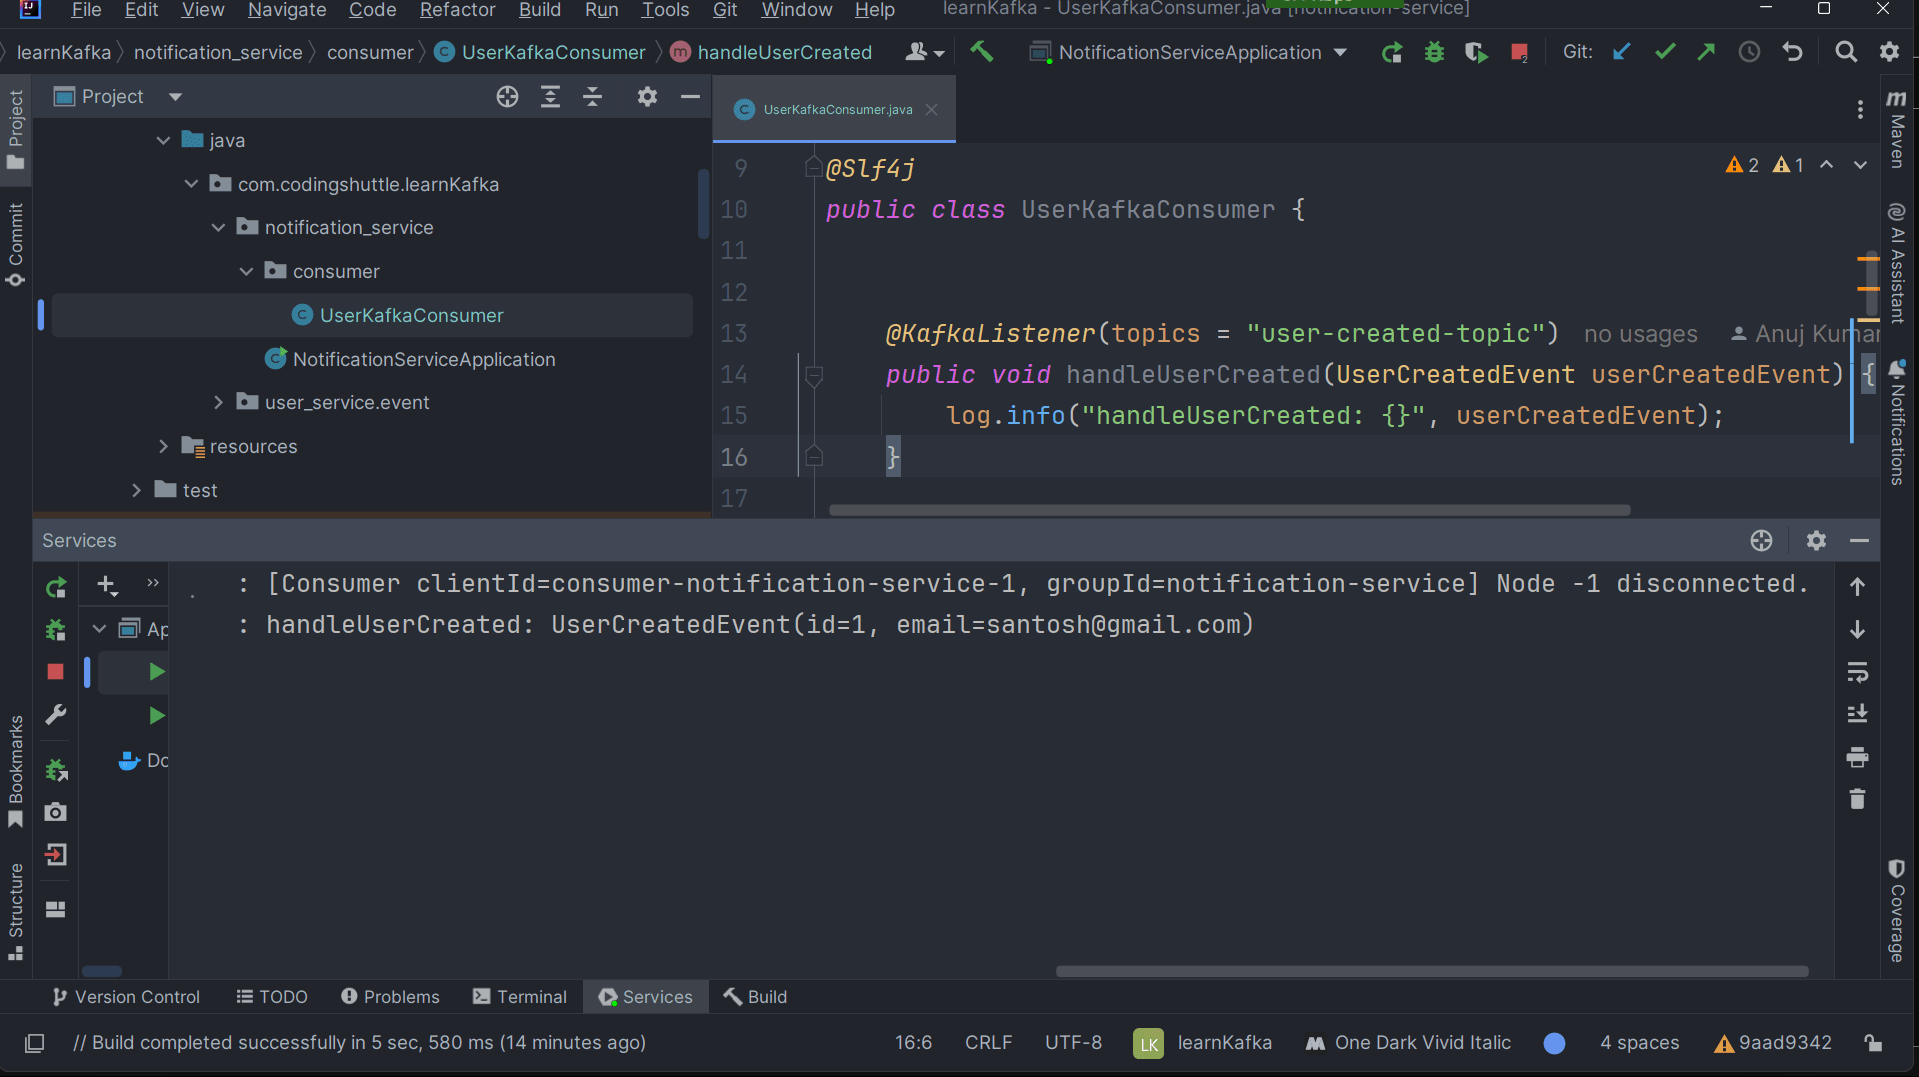
Congratulations! You have successfully implemented advanced Kafka configuration in a Spring Boot application. This setup enables the transmission of complex messages, such as JSON objects, as events to Kafka topics. You also demonstrated deserialization of these messages for seamless communication between microservices.
Conclusion#
In this blog, we explored advanced Kafka configurations with Spring Boot, focusing on transmitting complex JSON messages between microservices. By implementing a producer-consumer setup with user-service and notification-service, you learned how to handle structured data efficiently using Kafka. This approach enhances the scalability, reliability, and maintainability of microservices communication.